
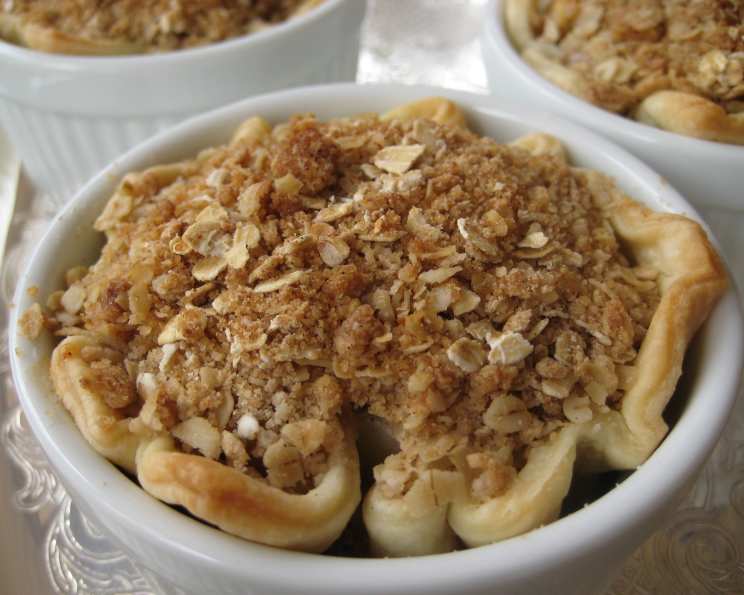
Bite-Sized Apple Pie Perfection
The scent of cinnamon and warm apples baking always transports me back to my grandmother’s kitchen. I remember standing on a stool, carefully watching her crimp the edges of a massive apple pie, her hands dusted with flour. While I couldn’t quite master her crimping technique back then, the love and warmth infused in every bite are something I’ve strived to recreate ever since. These bite-sized apple pies are my modern take on that cherished memory – all the comforting flavors of a classic, perfectly portioned for a delightful treat.
Recipe Overview
- Prep Time: 20 minutes
- Cook Time: 15 minutes
- Total Time: 35 minutes
- Servings: 12
- Yield: 12 mini pies or 6 regular pies
- Dietary Type: Vegetarian (can be made vegan)
Ingredients
Topping
- 1 cup oatmeal (not instant)
- ½ cup all-purpose flour
- ½ cup brown sugar
- ½ teaspoon cinnamon
- ¼ cup butter, chilled (may substitute margarine)
Filling
- 6-8 medium honey crisp apples (or another firm, tart, cooking apple)
- ¼ cup butter (may substitute margarine)
- ½ cup brown sugar
- ½ teaspoon cinnamon
- 1 tablespoon cornstarch
- 1 tablespoon cold water
Crust
- 1 package pie crust (Pillsbury unroll-and-fill pie crusts work great or make your own)
Equipment Needed
- Food processor (optional)
- Medium saucepan
- Muffin tin (mini or regular size)
- Rolling pin
- Circle cutter or knife
Instructions
-
First, let’s prepare the topping. In the bowl of a food processor, combine the oatmeal, all-purpose flour, brown sugar, and cinnamon. Pulse a few times until well blended. Alternatively, you can mix all ingredients thoroughly by hand in a bowl.
-
Next, add the chilled butter to the topping mixture. If using a food processor, pulse until the mixture resembles coarse crumbs. If mixing by hand, use a pastry blender or your fingertips to cut the butter into the dry ingredients until it forms a crumbly texture.
-
Now, let’s make the apple filling. Peel and dice the apples into small, even pieces.
-
Place a medium saucepan over medium heat. Add the butter to the pan and let it melt.
-
Add the diced apples to the melted butter. Sauté the apples, stirring occasionally, until they are nearly soft. This will take about 5-7 minutes. The apples should be tender but still hold their shape slightly.
-
Add the brown sugar and cinnamon to the sautéed apples. Stir to combine, ensuring the apples are evenly coated.
-
In a small bowl, whisk together the cornstarch and cold water to create a slurry. This will help thicken the apple filling.
-
Pour the cornstarch slurry into the simmering apple mixture. Cook, while stirring continuously, until the filling thickens. This should only take a minute or two.
-
Turn off the heat and allow the apple filling to cool slightly while you prepare the crust.
-
Roll out the chilled pie crust on a lightly floured surface. Use a circle cutter or a knife to cut out circles from the crust. The size of the circles will depend on whether you are using a mini or regular muffin tin. Be sure to cut one circle first and double-check that the size works for your chosen muffin tin before cutting out the rest.
-
Grease the muffin tin with cooking spray or butter to prevent the pies from sticking.
-
Place the crust circles into the greased muffin tin, gently pressing them into the bottom and up the sides of each cup. Be careful not to pierce any holes in the bottom of the crust.
-
Spoon the apple filling into the dough cups, filling them all the way to the top.
-
Place one spoonful of the topping over each pie, covering the apple filling.
-
Gently press the topping onto the pies to help the crumbs adhere. This will prevent them from falling off during baking.
-
Bake the pies at 400 degrees Fahrenheit for 12-15 minutes, or until the crust is golden brown and the topping is slightly browned.
-
Allow the pies to cool in the muffin tin for about 5 minutes before transferring them to a wire rack to cool completely.
-
Serve warm and enjoy!
Note: If you’re short on time, you can use canned pie filling as a substitute for the homemade apple filling.
Expert Tips & Tricks
- For a richer flavor, try browning the butter before adding the apples. This adds a nutty, caramelized note to the filling.
- If your topping starts to brown too quickly in the oven, loosely tent the pies with foil during the last few minutes of baking.
- To prevent a soggy crust, brush the bottom of the crust with a thin layer of melted chocolate or egg white before adding the filling.
- For a more intense apple flavor, add a splash of apple cider vinegar or apple cider to the filling.
- Make the dough yourself. It will take longer but will have a better flavour and texture.
Serving & Storage Suggestions
These bite-sized apple pies are delicious served warm, on their own, or with a scoop of vanilla ice cream or a dollop of whipped cream. A sprinkle of cinnamon or a drizzle of caramel sauce adds an extra touch of elegance.
Leftover pies can be stored in an airtight container at room temperature for up to 2 days or in the refrigerator for up to 4 days. To reheat, warm them in a preheated oven at 350 degrees Fahrenheit for 5-10 minutes, or microwave them for a few seconds until heated through.
For longer storage, you can freeze the baked pies. Allow them to cool completely before wrapping them individually in plastic wrap and placing them in a freezer-safe bag or container. They can be stored in the freezer for up to 2 months. To reheat frozen pies, bake them in a preheated oven at 350 degrees Fahrenheit for 15-20 minutes, or until heated through.
Nutritional Information
| Nutrient | Amount per Serving | % Daily Value |
|---|---|---|
| Calories | 296.6 kcal | N/A |
| Calories from Fat | 119 g | 40% |
| Total Fat | 13.2 g | 20% |
| Saturated Fat | 6.2 g | 31% |
| Cholesterol | 20.3 mg | 6% |
| Sodium | 140.8 mg | 5% |
| Total Carbohydrate | 43.5 g | 14% |
| Dietary Fiber | 3.1 g | 12% |
| Sugars | 24.9 g | 99% |
| Protein | 2.8 g | 5% |
Variations & Substitutions
- Gluten-Free: Use a gluten-free pie crust and gluten-free all-purpose flour in the topping.
- Vegan: Substitute the butter with vegan butter or coconut oil in both the topping and filling.
- Spice It Up: Add a pinch of nutmeg, allspice, or cloves to the apple filling for a warmer, spicier flavor.
- Different Fruits: Experiment with other fruits like pears, peaches, or berries in the filling.
- Nuts: Add chopped pecans or walnuts to the topping for extra crunch and flavor.
- Caramel Apple: Drizzle warm caramel sauce over the pies after baking.
FAQs (Frequently Asked Questions)
Q: Can I use store-bought apple pie filling?
A: Yes, you can substitute the homemade filling with canned apple pie filling to save time. Just be sure to drain any excess liquid before spooning it into the crusts.
Q: How do I prevent the crust from getting soggy?
A: Blind baking the crust for a few minutes before adding the filling can help prevent a soggy bottom. You can also brush the bottom of the crust with melted chocolate or egg white.
Q: Can I make these ahead of time?
A: Yes, you can assemble the pies ahead of time and store them in the refrigerator for up to 24 hours before baking. You can also bake them ahead of time and reheat them before serving.
Q: What kind of apples work best for this recipe?
A: Firm, tart apples like Honeycrisp, Granny Smith, or Braeburn work best because they hold their shape during baking and provide a nice balance of sweetness and acidity.
Q: How do I store leftover pies?
A: Store leftover pies in an airtight container at room temperature for up to 2 days or in the refrigerator for up to 4 days.
Final Thoughts
I hope this recipe inspires you to create your own batch of these delightful bite-sized apple pies. Whether you’re baking them for a holiday gathering, a special occasion, or simply a cozy treat, the warm, comforting flavors are sure to bring a smile to everyone’s face. Don’t hesitate to experiment with different variations and substitutions to make them your own. And most importantly, have fun in the kitchen! Share your creations and feedback – I’d love to see what you come up with! These mini pies pair perfectly with a hot cup of coffee or tea, or even a scoop of vanilla ice cream for an extra decadent dessert. Happy baking!