
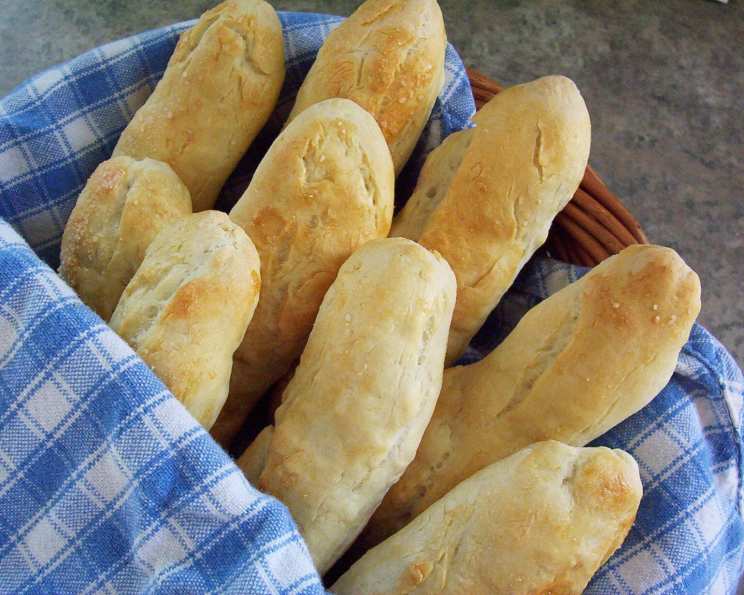
Bread Machine Breadsticks: A Culinary Journey Back Home
The scent of baking breadsticks still instantly transports me back to my grandmother’s cozy kitchen. Every Sunday, after church, she’d be in her element, her old bread machine humming a gentle tune. I remember watching, mesmerized, as she transformed simple ingredients into these golden, salty wonders. The best part? Dipping those warm, chewy breadsticks into her homemade roasted garlic butter. Now, decades later, I’ve recreated her recipe using her very own bread machine, and the taste is just as magical as I remember. It’s more than just a recipe; it’s a warm hug from the past.
Recipe Overview
- Prep Time: 20 minutes
- Cook Time: 12-15 minutes
- Total Time: 2 hours 35 minutes (includes dough cycle)
- Yields: 16 large breadsticks
- Servings: 16
- Dietary Type: Vegetarian
Ingredients
- 1 1⁄3 cups water
- 1 tablespoon butter or 1 tablespoon margarine
- 1 1⁄2 tablespoons sugar
- 1 1⁄2 teaspoons salt
- 4 cups bread flour
- 2 teaspoons yeast
For the Glaze:
- 1 egg white
- 1 tablespoon water
Optional Toppings:
- Kosher salt
- Sesame seeds
- Dried onion bits
Equipment Needed
- Bread Machine
- Measuring cups and spoons
- Countertop
- Knife or pizza cutter
- Un-greased baking sheet
- Tea towel
- Small bowl
- Pastry brush
Instructions
- Begin by adding all the ingredients to your bread machine in the exact order listed above, excluding the egg white and 1 tablespoon of water (these are for the glaze). This precise order is crucial for proper mixing and yeast activation within the machine.
- Select the dough cycle on your bread machine and start the machine. The dough cycle typically lasts around 2 hours, but this can vary depending on your bread machine model. Refer to your bread machine’s user manual for specific cycle lengths.
- Once the dough cycle is complete, carefully turn the dough out onto your lightly floured countertop. You shouldn’t need much flour; a light dusting is usually sufficient to prevent sticking.
- Using a knife or pizza cutter, divide the dough into 16 equal pieces, approximately the size of an egg.
- With your hands, roll and stretch each piece of dough into ropes about 6 to 8 inches long. Aim for a consistent thickness for even baking.
- Carefully place the formed breadsticks onto an ungreased baking sheet, leaving some space between each one for expansion during the rising and baking process.
- Cover the breadsticks with a clean tea towel and let them rise in a warm place for 20 minutes. This allows the yeast to further activate, resulting in a lighter and airier texture.
- While the breadsticks are rising, prepare the egg wash glaze. In a small bowl, whisk together the egg white and 1 tablespoon of water until well combined.
- After the 20-minute rising period, use a pastry brush to gently brush the egg wash glaze over the surface of each breadstick. This glaze will give the breadsticks a beautiful golden-brown color and a slight sheen.
- Immediately after glazing, sprinkle your desired toppings over the breadsticks. Kosher salt is a classic choice, but sesame seeds or dried onion bits also add delicious flavor and texture. You can even get creative and use a combination of toppings.
- Bake the breadsticks in a preheated oven at 400 degrees Fahrenheit (200 degrees Celsius) for 12 to 15 minutes, or until they are golden brown. Keep a close eye on them during the last few minutes of baking to prevent burning.
- Once baked, remove the breadsticks from the oven and let them cool slightly on the baking sheet before serving.
Expert Tips & Tricks
- For extra flavor, try adding a teaspoon of garlic powder or Italian seasoning to the dough before starting the bread machine.
- If you prefer a softer breadstick, reduce the baking time by a minute or two. For a crispier breadstick, bake for the full 15 minutes or even a minute longer, keeping a close eye to avoid burning.
- Don’t over-knead the dough. The bread machine does a great job of kneading it for you, so avoid adding extra flour unless absolutely necessary. Over-kneading can result in tough breadsticks.
- If you live in a dry climate, you may need to add a little more water to the dough. Start with a tablespoon at a time, and add more until the dough forms a smooth, elastic ball.
- The rising time may vary depending on the temperature of your kitchen. In warmer environments, the breadsticks may rise faster.
- If you want to prepare the dough ahead of time, you can store it in the refrigerator for up to 24 hours after the dough cycle is complete. Be sure to punch down the dough before shaping it into breadsticks.
Serving & Storage Suggestions
These breadsticks are best served warm, straight from the oven. They make a fantastic accompaniment to soups, salads, and pasta dishes. They’re also delicious on their own as a snack. For an extra special treat, serve them with a side of roasted garlic butter or your favorite dipping sauce.
To store leftover breadsticks, allow them to cool completely and then place them in an airtight container. They will stay fresh at room temperature for up to 2 days. For longer storage, you can freeze them for up to 2 months. To reheat, simply place the breadsticks in a preheated oven at 350 degrees Fahrenheit (175 degrees Celsius) for a few minutes until warmed through. You can also microwave them for a few seconds, but they may become slightly softer.
Nutritional Information
| Nutrient | Amount per Serving | % Daily Value |
|---|---|---|
| Calories | 127.4 kcal | N/A |
| Calories from Fat | 9 g | N/A |
| Total Fat | 1.1 g | 1% |
| Saturated Fat | 0.5 g | 2% |
| Cholesterol | 1.9 mg | 0% |
| Sodium | 229.3 mg | 9% |
| Total Carbohydrate | 25.2 g | 8% |
| Dietary Fiber | 1 g | 3% |
| Sugars | 1.3 g | N/A |
| Protein | 3.7 g | 7% |
Nutritional information is an estimate and can vary based on specific ingredients and portion sizes.
Variations & Substitutions
- For a dairy-free version, substitute the butter with a plant-based alternative like margarine or coconut oil.
- To make a whole-wheat version, replace half of the bread flour with whole-wheat flour. This will result in a denser, more nutritious breadstick.
- Experiment with different toppings. Try sprinkling with parmesan cheese, everything bagel seasoning, or herbs like rosemary or oregano.
- Add a touch of heat by incorporating a pinch of red pepper flakes into the dough or sprinkling them on top before baking.
- Create sweet breadsticks by reducing the amount of salt and adding a teaspoon of cinnamon and a tablespoon of brown sugar to the dough. Top with a sprinkle of cinnamon sugar after brushing with the egg wash.
FAQs (Frequently Asked Questions)
Q: Can I use all-purpose flour instead of bread flour?
A: While bread flour is recommended for its higher gluten content, which contributes to a chewier texture, you can use all-purpose flour. The breadsticks might be slightly less chewy and have a softer crumb.
Q: My dough is too sticky. What should I do?
A: Add a tablespoon of flour at a time until the dough forms a smooth ball that is slightly tacky but not overly sticky. Be careful not to add too much flour, as this can make the breadsticks tough.
Q: Can I make these breadsticks without a bread machine?
A: Yes, you can! Combine the ingredients in a bowl, knead for 8-10 minutes until smooth and elastic, and then let rise in a warm place for about an hour before shaping and baking.
Q: Why are my breadsticks not browning?
A: Ensure your oven is properly preheated and that you’ve brushed the breadsticks with the egg wash glaze. If they still aren’t browning, you can broil them for the last minute or two of baking, but watch them closely to prevent burning.
Q: Can I freeze the baked breadsticks?
A: Yes, baked breadsticks freeze well. Allow them to cool completely, then wrap them tightly in plastic wrap or place them in a freezer-safe bag. They can be reheated directly from frozen in a preheated oven.
Final Thoughts
So, there you have it – a simple yet satisfying recipe for bread machine breadsticks that’s sure to bring a touch of warmth and nostalgia to your kitchen. Don’t be afraid to experiment with different toppings and variations to make them your own. Whether you’re serving them with a comforting bowl of soup or simply enjoying them as a snack, I hope these breadsticks bring you as much joy as they’ve brought me over the years. And if you’re feeling adventurous, try pairing them with a robust Italian red wine for a truly delightful experience. Happy baking!