
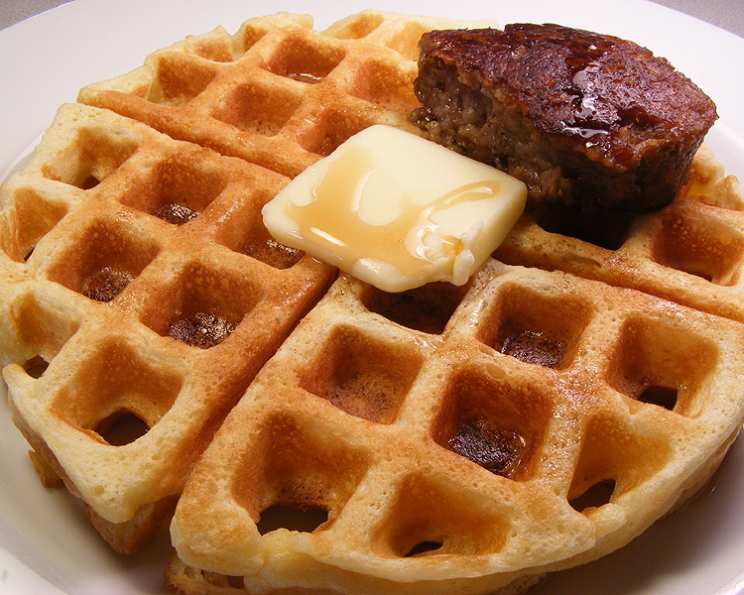
The Ultimate Buttermilk Waffle Recipe: Light, Crisp, and Irresistibly Delicious
The scent of buttermilk waffles always transports me back to weekend mornings at my grandmother’s house. The air, thick with the aroma of melting butter and maple syrup, promised a feast of golden-brown, crispy-edged waffles. I remember sitting at the kitchen table, mesmerized as she poured the batter onto her well-seasoned waffle iron, the sizzle filling the room with anticipation. It wasn’t just breakfast; it was a ritual, a symbol of warmth and family. And now, I’m excited to share a recipe that captures that same magic, delivering waffles that are both incredibly light and satisfyingly crisp.
Recipe Overview
- Prep Time: 20 minutes
- Cook Time: 14 minutes
- Total Time: 34 minutes
- Yields: 5 1/2 Cups of Batter
- Servings: About 6-8 Waffles
- Dietary Type: Not Gluten-Free
Ingredients
- 1 1⁄2 cups flour
- 1⁄2 cup cornstarch
- 1 teaspoon baking powder
- 3⁄4 teaspoon baking soda
- 1 teaspoon salt
- 3 large eggs, separated
- 3 tablespoons granulated sugar
- 1 3⁄4 cups buttermilk
- 1⁄2 teaspoon pure vanilla extract
- 1⁄2 cup unsalted butter, melted
Equipment Needed
- Large mixing bowl
- Electric mixer
- Rubber spatula
- Whisk
- Waffle maker
Instructions
-
Begin by preheating your waffle maker according to the manufacturer’s instructions. This is crucial for achieving that desirable crispy exterior.
-
In a large bowl, sift together the flour, cornstarch, baking powder, baking soda, and salt. If you don’t have a sifter, a thorough whisking will do the trick, ensuring that all the dry ingredients are evenly distributed. Set this aside.
-
In a separate mixer bowl, beat the egg whites until soft peaks form. This is the key to achieving that airy, light texture. Be careful not to overbeat the egg whites, as this can make them stiff and difficult to fold into the batter. Gently transfer the beaten egg whites to another bowl and set aside.
-
In the same mixer bowl (no need to wash it!), whisk together the egg yolks, buttermilk, and vanilla extract until well combined. The buttermilk not only adds a delightful tang but also tenderizes the gluten in the flour, resulting in a more delicate waffle.
-
Using a rubber spatula, stir the buttermilk mixture into the flour mixture, blending until the dry ingredients are just moistened. It’s perfectly fine if there are still some small lumps; in fact, it’s preferable! Overmixing will develop the gluten in the flour, leading to tough waffles.
-
Stir in the melted butter. The melted butter adds richness and flavor to the batter and helps to create a crispy crust.
-
Gently fold in the egg whites until just combined. Be careful not to deflate the egg whites, as this will reduce the volume of the batter. A few streaks of egg white are perfectly acceptable.
-
Lightly grease your preheated waffle maker. The amount of grease needed will depend on your waffle maker, but a light coating of cooking spray or melted butter is usually sufficient.
-
Pour the batter onto the hot, greased waffle maker and bake according to the manufacturer’s instructions. Typically, this will take about 2-4 minutes per waffle, or until golden brown and crisp.
-
Once the waffle is golden and crisp, carefully remove it from the waffle maker and place it on a wire rack to prevent it from becoming soggy.
Expert Tips & Tricks
- Don’t overmix the batter: As mentioned earlier, overmixing develops the gluten in the flour, resulting in tough waffles. Mix just until the dry ingredients are moistened.
- Use room-temperature ingredients: Room-temperature ingredients combine more easily and evenly, resulting in a better texture.
- Let the batter rest: Allowing the batter to rest for 5-10 minutes before baking gives the gluten time to relax, resulting in more tender waffles.
- Adjust the cooking time: The cooking time will vary depending on your waffle maker, so keep a close eye on the waffles and adjust the time as needed.
- Crisp them up in the oven: If you want your waffles to be extra crispy, place them on a baking sheet in a preheated 200°F (93°C) oven for a few minutes after they come out of the waffle maker.
Serving & Storage Suggestions
Serve your golden-brown waffles immediately with your favorite toppings. Classic options include butter, maple syrup, fresh berries, whipped cream, and powdered sugar. For a more savory twist, try topping them with fried chicken, eggs, or bacon.
Leftover waffles can be stored in an airtight container in the refrigerator for up to 3 days. To reheat, simply toast them in a toaster or toaster oven until crisp. You can also freeze waffles for longer storage. Place cooled waffles in a single layer on a baking sheet and freeze for 1-2 hours, or until solid. Then, transfer them to a freezer bag or container and store for up to 2 months. Reheat frozen waffles in a toaster or toaster oven directly from frozen.
Nutritional Information
| Nutrient | Amount per Serving | % Daily Value |
|---|---|---|
| Calories | 414.7 kcal | N/A |
| Calories from Fat | 183 g | 44% |
| Total Fat | 20.4 g | 31% |
| Saturated Fat | 11.9 g | 59% |
| Cholesterol | 148.9 mg | 49% |
| Sodium | 785.1 mg | 32% |
| Total Carbohydrate | 47.7 g | 15% |
| Dietary Fiber | 1 g | 4% |
| Sugars | 10.8 g | N/A |
| Protein | 9.7 g | 19% |
Note: Nutritional information is an estimate and may vary based on specific ingredients and portion sizes.
Variations & Substitutions
- Gluten-Free Waffles: Substitute the all-purpose flour with a gluten-free blend. Be sure to choose a blend that is designed for baking and contains xanthan gum to help bind the ingredients.
- Dairy-Free Waffles: Replace the buttermilk with a dairy-free alternative, such as almond milk or soy milk. You can add a tablespoon of lemon juice or vinegar to the dairy-free milk to mimic the acidity of buttermilk. Use a dairy-free butter substitute for the melted butter.
- Whole Wheat Waffles: Substitute half of the all-purpose flour with whole wheat flour for a more nutritious and hearty waffle.
- Chocolate Chip Waffles: Add 1/2 cup of chocolate chips to the batter for a decadent treat.
- Blueberry Waffles: Gently fold in 1 cup of fresh or frozen blueberries to the batter.
FAQs (Frequently Asked Questions)
Q: Why are my waffles soggy?
A: Soggy waffles are often the result of steaming in the waffle maker. Make sure your waffle maker is hot enough and don’t stack the waffles on top of each other after they come out of the iron. Placing them on a wire rack allows air to circulate and keeps them crisp.
Q: Can I make the batter ahead of time?
A: Yes, you can make the batter ahead of time, but it’s best to add the beaten egg whites just before baking. Store the batter in the refrigerator for up to 24 hours.
Q: What is the best way to reheat waffles?
A: The best way to reheat waffles is in a toaster or toaster oven. This will help them regain their crispness.
Q: Can I freeze the waffles?
A: Yes, waffles freeze very well. Place cooled waffles in a single layer on a baking sheet and freeze for 1-2 hours, or until solid. Then, transfer them to a freezer bag or container and store for up to 2 months.
Q: Why are my waffles sticking to the waffle maker?
A: Make sure your waffle maker is properly greased before pouring in the batter. You can use cooking spray, melted butter, or oil.
Final Thoughts
There’s something truly special about homemade buttermilk waffles. They’re simple enough for a casual weekend breakfast, yet elegant enough to serve to guests. I encourage you to try this recipe and experience the joy of creating light, crispy, and utterly delicious waffles in your own kitchen. Don’t be afraid to experiment with different toppings and variations to create your perfect waffle masterpiece. And, of course, I’d love to hear your feedback and see your creations! Serve alongside a steaming mug of coffee or a refreshing glass of orange juice for the ultimate breakfast experience.