
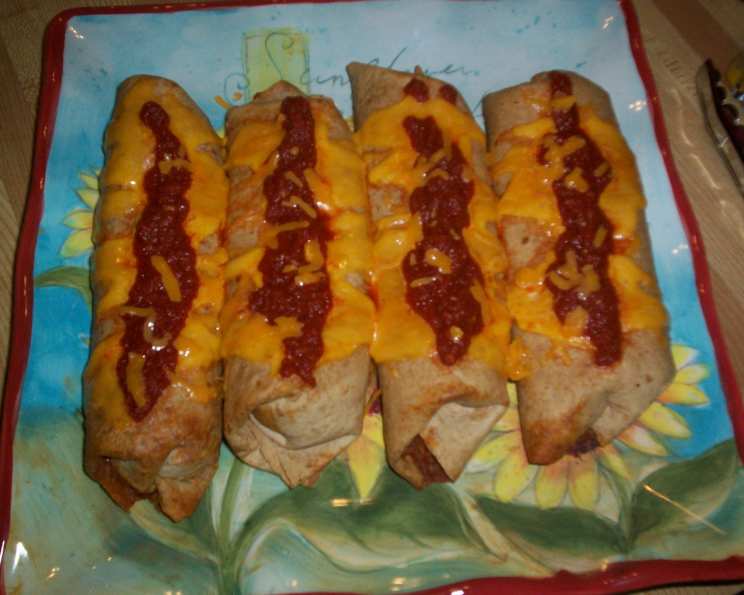
Oven-Fried Beef Chimichangas: A Healthier Fiesta Favorite
The sizzle of the skillet, the aroma of browned beef, and the anticipation of that first satisfying crunch – for me, chimichangas are pure comfort food. My grandmother, a true Tex-Mex matriarch, always made them the traditional way: deep-fried until golden and bubbly. While undeniably delicious, I often craved that same incredible flavor without the extra grease. After much experimenting, I landed on this oven-fried version, capturing all the magic of the original with a healthier twist. This recipe has become a weeknight staple in my house, a crowd-pleaser that brings back fond memories with every bite.
Recipe Overview
- Prep Time: 20 minutes
- Cook Time: 25-30 minutes
- Total Time: 45-50 minutes
- Servings: 10
- Yield: 10 Chimichangas
- Dietary Type: Adaptable (see variations)
Ingredients
- 1 lb lean ground beef
- ½ cup onion, chopped
- 2 garlic cloves, minced
- ½ teaspoon salt
- 1 (16 ounce) can fat-free refried beans
- ½ cup tomato sauce
- 2 teaspoons chili powder
- ½ teaspoon cumin
- 10 (10 inch) flour tortillas
- ¼ cup butter, melted
For the Sauce:
- 1 cup tomato sauce
- 1 cup salsa
- 2 teaspoons chili powder
Optional Toppings:
- ½ cup Mexican blend cheese
Equipment Needed
- Large skillet
- Cookie sheet
- Small saucepan
- Mixing spoon
Instructions
- Preheat your oven to 350 degrees Fahrenheit (175 degrees Celsius). This ensures even cooking and browning of your chimichangas.
- In a large skillet over medium-high heat, brown the ground beef. Break it apart with a spoon as it cooks. Once browned, drain off any excess grease. This step is crucial for preventing soggy chimichangas.
- Add the chopped onion, minced garlic, and salt to the skillet with the browned beef. Cook until the onions are softened, about 5-7 minutes, stirring occasionally. The onions should become translucent, releasing their sweetness and creating a flavorful base.
- Stir in the fat-free refried beans, tomato sauce, chili powder, and cumin. Mix well to combine all ingredients. Remove the skillet from the heat. The mixture should be thick and fragrant.
- Take one flour tortilla and place it on a clean surface. It’s important that the tortillas are at room temperature; if they are cold they are more prone to cracking when you roll them. If they are stiff, you can microwave the whole package for about 20 seconds to soften them.
- Scoop about 1/3 cup of the meat filling a little off-center on the tortilla. This prevents the filling from squeezing out the sides during rolling.
- Fold up the edge of the tortilla closest to you over the filling. Tuck it in snugly.
- Fold in each side of the tortilla towards the center, creating a sealed edge.
- Roll the tortilla all the way up, forming a tightly wrapped chimichanga.
- Place the assembled chimichanga seam-side down on a cookie sheet. Repeat steps 5-9 with the remaining tortillas and filling.
- Brush the melted butter generously over the tops of the chimichangas, making sure to get some on the bottom side as well. The butter is key to achieving that “oven-fried” crispiness. This is what simulates the texture of deep frying.
- Bake in the preheated oven at 350 degrees Fahrenheit (175 degrees Celsius) for 25 to 30 minutes, or until the chimichangas are golden brown and crispy. Keep a close eye on them to prevent burning.
- While the chimichangas are baking, prepare the sauce. In a small saucepan, combine the tomato sauce, salsa, and chili powder.
- Heat the sauce ingredients over low heat, stirring occasionally, until warmed through. Keep warm until ready to serve.
- Once the chimichangas are baked, remove them from the oven.
- Serve the chimichangas hot with the sauce drizzled over the top. If desired, sprinkle with Mexican blend cheese.
Expert Tips & Tricks
- Spice it up: For a bolder flavor, add a pinch of cayenne pepper or a dash of hot sauce to the meat filling.
- Make-Ahead Magic: Prepare the filling and assemble the chimichangas ahead of time. Store them in the refrigerator for up to 24 hours before baking. Add 5-10 minutes to the cooking time.
- Prevent Cracking: Warm the tortillas slightly before filling to make them more pliable and less prone to cracking. A damp paper towel draped over the tortillas while warming can also help.
- Crispy Bottoms: For extra crispy bottoms, place the cookie sheet on the lowest rack in the oven during the last 5-10 minutes of baking.
- Don’t overcrowd the pan: Ensure there is enough space between each chimichanga to promote even browning. If necessary, bake in batches.
Serving & Storage Suggestions
Serve these oven-fried beef chimichangas hot, straight from the oven, for the best crispy texture. They are delicious drizzled with the homemade sauce and sprinkled with shredded cheese. Other great toppings include sour cream, guacamole, chopped cilantro, or diced tomatoes.
Leftover chimichangas can be stored in an airtight container in the refrigerator for up to 3 days. Reheat them in a preheated oven at 350 degrees Fahrenheit (175 degrees Celsius) for about 10-15 minutes, or until heated through and crispy. You can also reheat them in a microwave, but the texture will be softer.
For longer storage, you can freeze unbaked chimichangas. Place them on a cookie sheet in a single layer and freeze until solid. Then, transfer them to a zip-top bag or freezer-safe container. They can be stored in the freezer for up to 2 months. To bake frozen chimichangas, thaw them in the refrigerator overnight and bake as directed in the recipe, adding about 10-15 minutes to the cooking time.
Nutritional Information
| Nutrient | Amount per Serving | % Daily Value |
|---|---|---|
| Calories | 362 kcal | N/A |
| Calories from Fat | 133 g | 37% |
| Total Fat | 14.9 g | 22% |
| Saturated Fat | 6.1 g | 30% |
| Cholesterol | 41.7 mg | 13% |
| Sodium | 998.2 mg | 41% |
| Total Carbohydrate | 41.1 g | 13% |
| Dietary Fiber | 3.7 g | 14% |
| Sugars | 4.1 g | 16% |
| Protein | 16.1 g | 32% |
Note: Nutritional information is an estimate and may vary based on specific ingredients and portion sizes.
Variations & Substitutions
- Vegetarian Option: Substitute the ground beef with seasoned black beans or lentils.
- Spicy Chicken Chimichangas: Use shredded cooked chicken and add a can of diced green chilies to the filling.
- Gluten-Free: Use gluten-free tortillas for a gluten-free version. Be sure to check the labels of all other ingredients to ensure they are gluten-free as well.
- Cheesy Goodness: Add shredded cheese directly to the meat filling for an extra cheesy chimichanga.
- Creamy Sauce: Mix sour cream or plain Greek yogurt with the sauce for a creamier topping.
FAQs (Frequently Asked Questions)
Q: Can I use a different type of meat?
A: Absolutely! Ground turkey, shredded chicken, or even seasoned pork would work well in this recipe. Adjust cooking times as needed.
Q: My tortillas keep cracking when I roll them. What am I doing wrong?
A: Tortillas are more prone to cracking when they are cold or dry. Try warming them slightly in the microwave or on a dry skillet before filling and rolling.
Q: Can I deep-fry these chimichangas instead of baking them?
A: Yes, you can! Heat oil to 350 degrees Fahrenheit (175 degrees Celsius) and deep-fry the chimichangas for 2-3 minutes per side, or until golden brown and crispy.
Q: Can I add rice to the filling?
A: Yes, you can add cooked rice to the filling for a heartier chimichanga. About 1/2 cup of cooked rice would be a good starting point.
Q: Can I freeze the sauce?
A: While you can freeze the sauce, the texture might change slightly upon thawing. It’s best to make it fresh when you’re ready to serve the chimichangas.
Final Thoughts
These Oven-Fried Beef Chimichangas are a delightful twist on a classic dish, offering a healthier and equally delicious alternative to deep-frying. The combination of savory beef filling, crispy tortillas, and flavorful sauce is simply irresistible. I encourage you to try this recipe and experience the joy of creating your own fiesta at home. Don’t hesitate to experiment with different fillings and toppings to customize it to your liking. And please, share your feedback and any variations you create – I’d love to hear how they turn out! These pair perfectly with a refreshing margarita or a cold Mexican beer. ¡Buen provecho!