
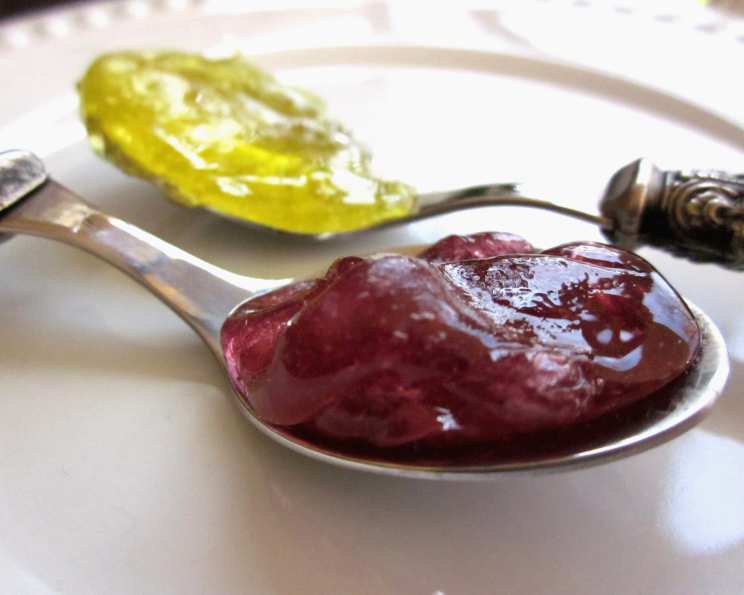
Candied Tea Spoons: A Spoonful of Sweetness
My grandmother, Nana Elsie, had a sweet tooth that rivaled any child’s. But she wasn’t just about chocolates and cakes; she loved the simple elegance of a beautifully presented cup of tea, always served with a little something special. I remember her making these candied tea spoons one Christmas, the kitchen filled with the scent of melted butterscotch and the clinking of spoons against baking sheets. They were so pretty, like tiny jewels nestled on the saucer, and they made stirring your tea feel like a true celebration. These aren’t just spoons; they’re edible memories, ready to sweeten any occasion.
Recipe Overview
- Prep Time: 10 minutes
- Cook Time: 15 minutes
- Total Time: 25 minutes
- Yields: 20 spoons
- Dietary Type: Vegetarian
Ingredients
- 34 pieces hard candies, any flavor you choose
- 2 tablespoons light corn syrup
Equipment Needed
- Heavy weight clear plastic spoons
- Cookie sheet
- Wax paper
- Saucepan
- Pam or other cooking spray
Instructions
- Begin by preparing your plastic spoons. It’s crucial that they are heavy-weight to withstand the heat of the melted candy. Thinner spoons might warp or melt.
- Line a cookie sheet with wax paper. Spray the wax paper generously with Pam or another cooking spray. This is essential to prevent the hardened candy from sticking to the paper and making the spoons difficult to remove later.
- Crush the hard candies. This can be done in a food processor or by placing the candies in a sealed plastic bag and crushing them with a rolling pin or mallet. The finer the candy is crushed, the more evenly it will melt.
- In a saucepan, combine the crushed candy and the light corn syrup. The corn syrup helps to create a smooth, glossy finish and prevents the candy from becoming too brittle.
- Place the saucepan over low heat. It is absolutely crucial to keep the heat low to prevent the candy from burning or scorching.
- Cook until the candy melts completely. Stir frequently, almost constantly, to ensure even melting and prevent sticking. This process will take approximately 10-15 minutes. Be patient and watch the candy carefully. The mixture is ready when it is completely smooth and liquid.
- Carefully spoon the melted candy into the bowls of the plastic spoons. Fill each spoon bowl generously but avoid overflowing. Work quickly, as the candy will begin to harden as it cools.
- Place the filled spoons on the prepared wax paper with the handles resting on the rim of the cookie sheet. This will help to keep the spoon bowls level and prevent the candy from running. Adjust the position of the spoons until they are as level as possible.
- Allow the candy to harden completely at room temperature. This will take at least 30 minutes to an hour, depending on the ambient temperature and humidity. You can speed up the process by placing the cookie sheet in the refrigerator for a shorter amount of time.
- Once the candy is fully hardened, carefully peel the spoons from the wax paper.
- Either wrap individually with plastic wrap for gifts or store in an airtight container at room temperature to prevent sticking.
Expert Tips & Tricks
- Candy Choice is Key: Experiment with different hard candy flavors. Peppermint for the holidays, lemon for a bright, summery tea, or even coffee-flavored candies for a mocha twist.
- Color Swirls: For a marbled effect, use two or three different colors of hard candies. Don’t fully mix them in the saucepan, allowing them to retain some definition for a visually striking spoon.
- Edible Glitter: While the candy is still slightly warm, sprinkle with edible glitter for extra sparkle and festive flair.
- Preventing Bubbles: If bubbles appear in the melted candy, gently tap the saucepan on the counter to release them.
- Salvaging Scorched Candy: If the candy accidentally scorches, unfortunately, there’s no salvaging it. Discard it immediately and start again with a fresh batch, paying closer attention to the heat.
Serving & Storage Suggestions
These candied tea spoons are best served immediately or within a few days of making them. They add a touch of whimsy and sweetness to any tea party or coffee break. Present them alongside a selection of teas or coffees, allowing guests to choose their flavor combination.
To store, wrap each spoon individually in plastic wrap to prevent sticking and to protect them from humidity. Store them in an airtight container at room temperature. Avoid storing them in the refrigerator, as the humidity can cause the candy to become sticky and lose its shine. They should last for up to two weeks if stored properly.
Nutritional Information
Note: Nutritional information is estimated and will vary depending on the specific candies used.
| Nutrient | Amount per Serving | % Daily Value |
|---|---|---|
| Calories | 46 kcal | 2% |
| Total Fat | 0g | 0% |
| Saturated Fat | 0g | 0% |
| Cholesterol | 0mg | 0% |
| Sodium | 5.2mg | 0% |
| Total Carbohydrate | 11.7g | 4% |
| Dietary Fiber | 0g | 0% |
| Sugars | 7g | 28% |
| Protein | 0g | 0% |
Variations & Substitutions
- Sugar-Free Candied Spoons: Use sugar-free hard candies for a guilt-free treat. Be aware that the texture and melting properties of sugar-free candies may differ slightly, so adjust cooking time accordingly.
- Lollipop Spoons: Use lollipop sticks instead of spoons for a fun, portable treat. Simply pour the melted candy onto a parchment-lined sheet in small circles, insert the lollipop stick, and let harden.
- Chocolate Drizzle: After the candy has hardened on the spoons, drizzle with melted chocolate for an extra layer of flavor and visual appeal.
- Spice Infusion: Add a pinch of cinnamon, nutmeg, or cardamom to the melted candy for a warm, spiced flavor.
- Nuts & Seeds: Sprinkle chopped nuts or seeds (such as almonds, pecans, or sesame seeds) onto the melted candy before it hardens for added texture and nutritional value.
FAQs (Frequently Asked Questions)
Q: Can I use metal spoons instead of plastic?
A: No, it is not recommended to use metal spoons. The candy will adhere too strongly and may be difficult to remove without damaging the spoon or the candy. Plastic spoons allow for easy release.
Q: What if my candy starts to burn while melting?
A: If the candy starts to burn, immediately remove the saucepan from the heat and discard the burnt candy. Burnt candy will have a bitter taste and is not suitable for making the spoons. Start again with a fresh batch, ensuring you use low heat and stir frequently.
Q: Can I make these ahead of time?
A: Yes, these candied tea spoons can be made several days in advance. Just be sure to wrap them individually in plastic wrap and store them in an airtight container to prevent sticking and maintain their freshness.
Q: My candy isn’t hardening. What should I do?
A: If the candy isn’t hardening, it may be due to high humidity or not cooking the candy to a high enough temperature. Place the cookie sheet in the refrigerator for 15-20 minutes to help the candy set.
Q: What kind of hard candies work best?
A: Most hard candies will work well, but avoid using candies with soft fillings or chewy centers. Clear, brightly colored candies will create the most visually appealing spoons.
Final Thoughts
These candied tea spoons are more than just a sweet treat; they’re a little bit of magic you can stir into your day. They’re perfect for adding a touch of elegance to a tea party, a unique gift for a friend, or simply a fun way to brighten up your own cup of tea. Don’t be afraid to experiment with different flavors and colors to create your own signature spoons. I hope you will find these just as fun to make as they are to eat. So, gather your supplies, get creative, and enjoy the sweetness! Share your creations with friends and family, and let me know what flavor combinations you come up with!