
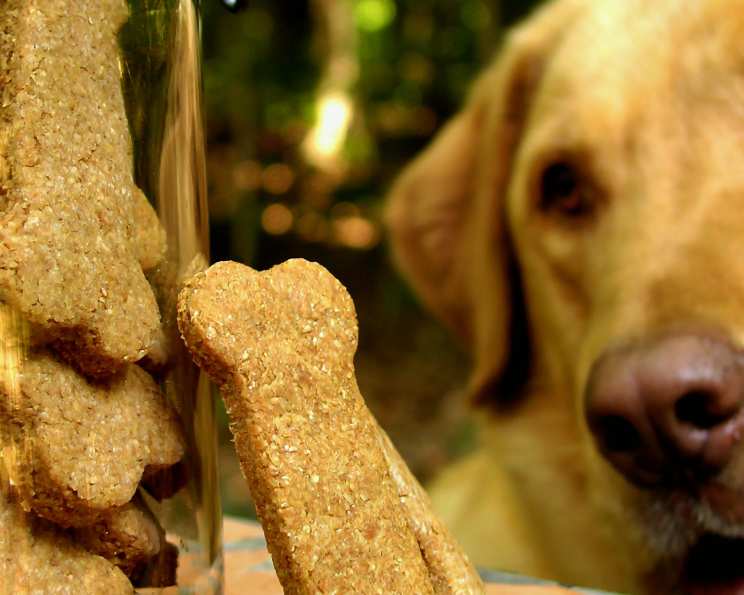
Special Occasion Dog Bones: A Tail-Wagging Treat
My memories of baking these dog biscuits are intrinsically linked to our golden retriever, Gus. Every year on his birthday, instead of a traditional dog cake, I would whip up a batch of these treats, cut into bone shapes with a well-loved cookie cutter. The smell of peanut butter and whole wheat flour baking always brought him bounding into the kitchen, tail thumping against the cabinets, eager for a taste. They weren’t just treats; they were a symbol of our love and a fun way to celebrate his special day. Even now, years after Gus has gone to the big dog park in the sky, I still make them for friends’ furry companions, a bittersweet reminder of joyful celebrations.
Recipe Overview
- Prep Time: 15 minutes
- Cook Time: 20 minutes
- Total Time: 35 minutes
- Servings: Varies based on cutter size
- Yield: Approximately 18-24 biscuits
- Dietary Type: Dog-Friendly
Ingredients
- 2 cups whole wheat flour
- 1 tablespoon baking powder
- 1 cup unsalted natural-style peanut butter
- 1 cup skim milk
- 1 tablespoon brown sugar
Equipment Needed
- Large Mixing Bowl
- Medium Mixing Bowl
- Measuring Cups and Spoons
- Cookie Sheets
- Cookie Cutters (bone-shaped or desired shapes)
- Rolling Pin
- Wire Rack
Instructions
-
Begin by preheating your oven to 375 degrees F (190 degrees C). While the oven is heating, grease your cookie sheets to prevent the biscuits from sticking. Parchment paper can also be used.
-
In a large mixing bowl, stir together the 2 cups of whole wheat flour and 1 tablespoon of baking powder. Whisking ensures even distribution of the baking powder throughout the flour, leading to a better rise. Set this dry mixture aside for later.
-
In a separate, medium-sized bowl, mix together the 1 cup of unsalted natural-style peanut butter, 1 cup of skim milk, and 1 tablespoon of brown sugar. Ensure the peanut butter is well-stirred and creamy before adding the other ingredients for optimal blending. Mix until thoroughly combined and smooth.
-
Gradually add the dry flour mixture to the wet peanut butter mixture, stirring continuously until well blended. The dough will start to form and become thicker.
-
Once the ingredients are combined, turn the dough out onto a lightly floured surface. Knead the dough gently until it becomes smooth and pliable. This usually takes just a minute or two. Be careful not to over-knead, as this can make the biscuits tough.
-
Roll out the dough to approximately 1/4 inch thickness using a rolling pin. Aim for a uniform thickness for even baking.
-
Using your chosen cookie cutters, cut out shapes from the rolled-out dough. Bone shapes are classic, but feel free to use any shape that suits the occasion or your dog’s personality.
-
Place the cut-out shapes onto the prepared cookie sheets, ensuring they are spaced about 2 inches apart to allow for even baking and prevent them from sticking together.
-
Bake in the preheated oven for 20 minutes, or until the biscuits are lightly golden brown. Baking time may vary slightly depending on your oven, so keep a close eye on them.
-
Once baked, remove the cookie sheets from the oven and transfer the biscuits to a wire rack to cool completely. Allowing them to cool completely on the rack prevents them from becoming soggy.
Expert Tips & Tricks
- Use natural peanut butter: Avoid peanut butter with added sugars, salt, or xylitol (which is toxic to dogs). The fewer the ingredients, the better.
- Don’t overbake: Overbaking can result in very hard biscuits that are difficult for some dogs to chew.
- For harder biscuits: If your dog prefers a crunchier treat, you can bake the biscuits for a few minutes longer or leave them in the oven with the heat turned off to dry out.
- Homemade is best: These homemade dog biscuits are free of preservatives and artificial additives, which are often found in commercial dog treats.
- Add flavor: You can incorporate other dog-safe ingredients like shredded carrots, unsweetened applesauce, or cooked sweet potato into the dough for added flavor and nutrients.
- If the dough is too sticky: Add a little more whole wheat flour, a tablespoon at a time, until the dough is easier to handle.
- If the dough is too dry: Add a little more skim milk, a tablespoon at a time, until the dough comes together.
- For easy cleanup: Line your work surface with parchment paper before rolling out the dough.
- Make a big batch: Double or triple the recipe and freeze the baked biscuits for later use.
Serving & Storage Suggestions
Serve these homemade dog biscuits as a special treat or reward for your furry friend. They are best enjoyed within a few days of baking. To store, place the completely cooled biscuits in an airtight container. They will keep at room temperature for up to a week, in the refrigerator for up to two weeks, or in the freezer for up to three months. Thaw frozen biscuits at room temperature before serving. Always supervise your dog while they are enjoying treats.
Nutritional Information
Please note that this is an estimated nutritional information, and actual values may vary based on specific ingredient brands and portion sizes.
| Nutrient | Amount per Serving (approx. 1 biscuit) | % Daily Value (for dogs – Varies widely by dog size and needs) |
|---|---|---|
| Calories | 60 kcal | Varies |
| Total Fat | 3g | Varies |
| Saturated Fat | 0.5g | Varies |
| Cholesterol | 0.5mg | Varies |
| Sodium | 10mg | Varies |
| Total Carbohydrate | 7g | Varies |
| Dietary Fiber | 1g | Varies |
| Sugars | 0.5g | Varies |
| Protein | 2g | Varies |
Variations & Substitutions
- Gluten-Free: Substitute the whole wheat flour with a gluten-free blend designed for baking. Be aware that this might alter the texture slightly.
- Grain-Free: Use chickpea flour or coconut flour as a grain-free alternative, but you may need to adjust the liquid content to achieve the right dough consistency.
- Different Nut Butters: While peanut butter is a favorite, you can experiment with other dog-safe nut butters like almond butter or cashew butter. Always check the ingredients to ensure they don’t contain xylitol.
- Sweeteners: If you want to avoid brown sugar, you can use a small amount of honey or molasses instead, but use sparingly.
- Liquid: Instead of skim milk, you can use water or bone broth for added flavor and nutrients.
- Herbs: Consider adding dog-safe herbs like parsley or rosemary to the dough for extra flavor and health benefits.
FAQs (Frequently Asked Questions)
Q: Are these dog biscuits safe for all dogs?
A: These biscuits are made with dog-safe ingredients; however, it’s essential to consider any allergies or sensitivities your dog may have. If you’re unsure, consult with your veterinarian.
Q: Can I use a different type of flour?
A: Yes, you can experiment with other flours like oat flour or brown rice flour. However, the texture and baking time might need adjustments accordingly.
Q: How do I know if the biscuits are done?
A: The biscuits are done when they are lightly golden brown around the edges and feel firm to the touch.
Q: My dog has a peanut allergy. What can I use instead?
A: Substitute the peanut butter with sunflower seed butter (sunbutter) or another dog-safe nut butter that your dog isn’t allergic to.
Q: Can I add eggs to this recipe?
A: While eggs aren’t necessary, adding one egg can make the biscuits slightly richer and chewier. If you add an egg, you may need to reduce the amount of skim milk slightly to maintain the desired dough consistency.
Final Thoughts
These special occasion dog bones are a simple yet heartfelt way to show your furry friend some love. They are easy to make, customizable to your dog’s preferences, and free from the harmful additives found in many commercial treats. So, roll up your sleeves, preheat your oven, and get ready to bake a batch of tail-wagging happiness. I encourage you to try this recipe and share your creations. Your canine companion will undoubtedly thank you for it!