
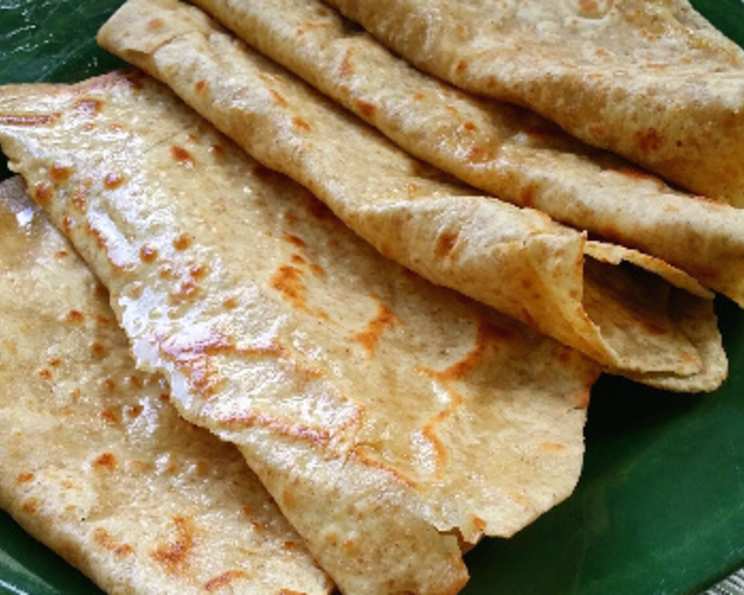
Mastering Chapati: A Culinary Journey to Indian Flatbread Perfection
The scent of freshly cooked chapati always transports me back to my travels in India. I remember sitting in a small village home, the aroma of wood smoke and spices filling the air, watching a grandmother effortlessly roll out perfect circles of dough. She cooked them over an open fire, the chapati puffing up like little balloons. The taste, warm and slightly nutty, was unlike anything I had ever experienced. This simple bread, shared with such generosity, became a symbol of connection and the heart of Indian hospitality for me. Now, I strive to recreate that experience in my own kitchen, sharing this culinary treasure with others.
Recipe Overview
- Prep Time: 1 hour 15 minutes (includes dough resting time)
- Cook Time: 30 minutes
- Total Time: 1 hour 45 minutes
- Yields: 24 Chapati
- Dietary Type: Vegan
Ingredients
- 2 cups whole wheat flour
- 1 cup all-purpose flour
- ½ teaspoon salt
- 1 cup warm water (110°F to 115°F)
- All-purpose flour, for kneading and shaping
- Usli ghee or shortening, for your griddle and to brush the chapati
Equipment Needed
- Large mixing bowl
- Measuring cups and spoons
- Damp towel
- Rolling pin
- Griddle or heavy skillet
- Tongs
- Napkin-lined breadbasket
Instructions
- In a large mixing bowl, thoroughly combine the whole wheat flour, all-purpose flour, and salt. This ensures the salt is evenly distributed, which is crucial for flavor.
- Gradually add ¾ cup of the warm water while mixing constantly with your hands until the dough is moist. The water should be warm, not hot, to activate the gluten properly.
- Add the remaining water, 1 tablespoon at a time, mixing constantly with your hands. Be patient and add the water gradually to avoid a sticky dough.
- Continue working the dough until it forms a ball and holds its shape. The dough will be stiff at this stage, which is normal.
- Dampen your hands with a little water. Keep the dough in the mixing bowl to knead.
- Knead in an additional 2 tablespoons of all-purpose flour, if necessary, to make a moderately stiff dough. This step might be needed depending on the humidity and the flour’s absorption rate.
- Knead the dough until it is smooth and elastic (approximately 8 to 10 minutes). Continue dampening your hands as needed during kneading to prevent the dough from drying out. The gluten development is key to the chapati’s texture.
- The dough is ready for shaping when you can lightly and quickly press two fingertips ¼ inch into the dough, and it springs back. This indicates that the gluten has developed sufficiently.
- Shape the dough into a ball. Cover the bowl with a damp towel to prevent the dough from drying out.
- Let the dough stand in a warm place for 30 to 60 minutes. This resting period allows the gluten to relax, making the dough easier to roll.
- Turn the dough out onto a lightly floured surface. Knead the dough for 1 to 2 minutes more. This helps to redistribute the gluten and creates a more uniform texture.
- Divide the dough in half. Form each half into a 12-inch-long roll.
- Cut each roll into 12 one-inch pieces. You should now have 24 evenly sized portions.
- Flatten each piece of dough with the palm of your hand. This makes it easier to roll out later.
- Sprinkle some flour over the flattened balls. Cover with plastic wrap. Let rest for 30 minutes. This second resting period further relaxes the gluten and prevents the dough from snapping back when rolled.
- On a well-floured surface, roll the flattened ball into a circle 7 to 8 inches in diameter, turning the dough over once and firmly pressing and stretching the dough with the rolling pin. Make sure the surface is well-floured to prevent sticking. Aim for a uniform thickness.
- Roll the chapati around the rolling pin and transfer it to a hot, greased griddle or heavy skillet. The griddle should be preheated over medium heat.
- Cook over medium heat for about ½ to 1 minute or until tiny brown spots appear on the underside. Watch closely and adjust the heat as needed to prevent burning.
- Using tongs, turn and cook for 30 seconds more on the other side.
- Remove from heat; brush with Usli ghee or melted shortening. This adds flavor and a soft texture.
- Repeat with the remaining balls.
- Stack the hot Chapati in a napkin-lined breadbasket to keep warm. Serve immediately.
Expert Tips & Tricks
- Dough Consistency: The key to perfect chapati is the dough consistency. It should be moderately stiff but not dry. If the dough is too dry, add water a teaspoon at a time. If it’s too sticky, add a little more flour.
- Resting Time: Don’t skip the resting time! It’s crucial for the dough to relax, making it easier to roll and giving the chapati a soft texture.
- Rolling Technique: Use even pressure while rolling to achieve a uniform thickness. Rotate the dough frequently to prevent it from sticking to the surface.
- Cooking Temperature: Maintaining the right temperature on the griddle is essential. Too hot, and the chapati will burn. Too low, and it will become hard. Medium heat is generally ideal.
- Puffing Up: For truly authentic chapati, try cooking them directly over an open flame after the initial griddle cooking. This will cause them to puff up dramatically. Use tongs and be careful not to burn yourself.
Serving & Storage Suggestions
Serve chapati immediately while they are warm and soft. They pair perfectly with curries, stews, lentils, and vegetables. They can also be enjoyed with yogurt and pickles. To store leftover chapati, wrap them tightly in foil or plastic wrap and keep them at room temperature for up to 2 days or in the refrigerator for up to 5 days. To reheat, sprinkle lightly with water and warm in a skillet or microwave. For longer storage, freeze them in a single layer and reheat in the oven or skillet.
Nutritional Information
| Nutrient | Amount per Serving | % Daily Value |
|---|---|---|
| Calories | 53 kcal | N/A |
| Calories from Fat | 2 g | 5% |
| Total Fat | 0.3 g | 0% |
| Saturated Fat | 0.1 g | 0% |
| Cholesterol | 0 mg | 0% |
| Sodium | 49 mg | 2% |
| Total Carbohydrate | 11.2 g | 3% |
| Dietary Fiber | 1.2 g | 4% |
| Sugars | 0.1 g | 0% |
| Protein | 1.9 g | 3% |
Note: Nutritional information is an estimate and can vary based on specific ingredients and portion sizes.
Variations & Substitutions
- Gluten-Free Chapati: Substitute the wheat flour with a blend of gluten-free flours like rice flour, tapioca starch, and sorghum flour. You may need to adjust the amount of water.
- Flavored Chapati: Add spices like cumin, coriander, or turmeric to the dough for a flavorful twist. You can also incorporate finely chopped herbs like cilantro or mint.
- Ghee Alternatives: If you don’t have usli ghee, you can use regular ghee, melted butter, or any vegetable oil. For a vegan option, use coconut oil or another plant-based oil.
- Ajwain Chapati: Add a teaspoon of ajwain seeds (carom seeds) to the dough for a unique and aromatic flavor.
FAQs (Frequently Asked Questions)
Q: Why is my chapati hard and not soft?
A: This could be due to several reasons: too much flour in the dough, not enough resting time, overcooking on the griddle, or using old flour. Ensure proper kneading and resting, and adjust cooking time as needed.
Q: How do I get my chapati to puff up like a balloon?
A: Roll the chapati evenly, cook it on a hot griddle until brown spots appear, then transfer it directly over an open flame. The steam trapped inside will cause it to puff up.
Q: Can I make the dough ahead of time?
A: Yes, you can make the dough ahead of time and store it in the refrigerator for up to 24 hours. Bring it to room temperature before rolling.
Q: What is Usli Ghee, and can I skip brushing with it?
A: Usli Ghee is clarified butter commonly used in Indian cooking. Brushing with ghee (or a substitute) adds flavor and keeps the chapati soft, but it can be skipped if desired.
Q: How do I prevent the chapati from sticking to the rolling surface?
A: Use plenty of flour on the rolling surface and the rolling pin. Rotate the dough frequently while rolling to prevent sticking.
Final Thoughts
Chapati is more than just bread; it’s an essential part of Indian cuisine and a symbol of sharing and connection. Don’t be intimidated by the process. With a little practice, you’ll be making perfect, soft, and delicious chapati in no time. I encourage you to try this recipe, experiment with variations, and share your creations with family and friends. Pair it with a flavorful curry or dal for a truly authentic Indian meal. I’d love to hear about your experience and any tips or tricks you discover along the way. Happy cooking!