
The Ultimate Cheesy Elbow Mac & Cheese: A Comfort Food Classic
The memory is etched in my mind: a snow day, the kind where school was canceled before sunrise, and the world outside was a silent, sparkling wonderland. My grandmother, a woman who could coax magic out of the simplest ingredients, would always make her famous macaroni and cheese. The aroma alone, a blend of warm milk, melted butter, and sharp cheddar, was enough to thaw any winter chill. It wasn’t just a meal; it was a hug in a bowl, a reminder that even on the coldest days, warmth and comfort were always within reach.
Recipe Overview
- Prep Time: 10 minutes
- Cook Time: 40 minutes
- Total Time: 50 minutes
- Servings: 3
- Yield: Approximately 5 cups
- Dietary Type: Vegetarian
Ingredients
- 1 1⁄2 cups elbow macaroni
- 2 tablespoons butter
- 2 tablespoons all-purpose flour
- 3⁄4 teaspoon salt
- 1 dash pepper
- 2 cups milk
- 1 1⁄2 cups sharp cheddar cheese, shredded
Equipment Needed
- Large pot
- Saucepan
- Colander
- Buttered casserole dish
- Measuring cups and spoons
Instructions
- Begin by cooking the elbow macaroni according to package directions. Usually, this involves bringing a large pot of salted water to a boil, adding the macaroni, and cooking until al dente – tender but still slightly firm to the bite. This usually takes about 8-10 minutes.
- Once the macaroni is cooked, drain it thoroughly in a colander and set it aside. Don’t rinse the pasta; the starch helps the sauce adhere better.
- Now, prepare the cheese sauce. In a saucepan over medium heat, melt the butter. Ensure the butter doesn’t brown or burn.
- Once the butter is melted, whisk in the all-purpose flour. Continue whisking constantly for about 1-2 minutes to create a smooth roux. This step is crucial for thickening the sauce and preventing lumps. The roux should be pale golden in color.
- Stir in the salt and pepper into the roux.
- Gradually add the milk to the roux, whisking continuously to prevent lumps from forming. Start with a small amount of milk and whisk until smooth, then add the remaining milk.
- Cook the sauce over medium heat, stirring constantly, until it thickens and becomes bubbly. This usually takes about 5-7 minutes. The sauce should be thick enough to coat the back of a spoon.
- Reduce the heat to low and stir in 1 cup of the shredded sharp cheddar cheese until it is completely melted and the sauce is smooth and creamy.
- Combine the cooked and drained macaroni with the cheese sauce in a buttered casserole dish. Mix well to ensure all the macaroni is evenly coated in the sauce.
- Sprinkle the remaining 1⁄2 cup of shredded sharp cheddar cheese evenly over the top of the macaroni and cheese.
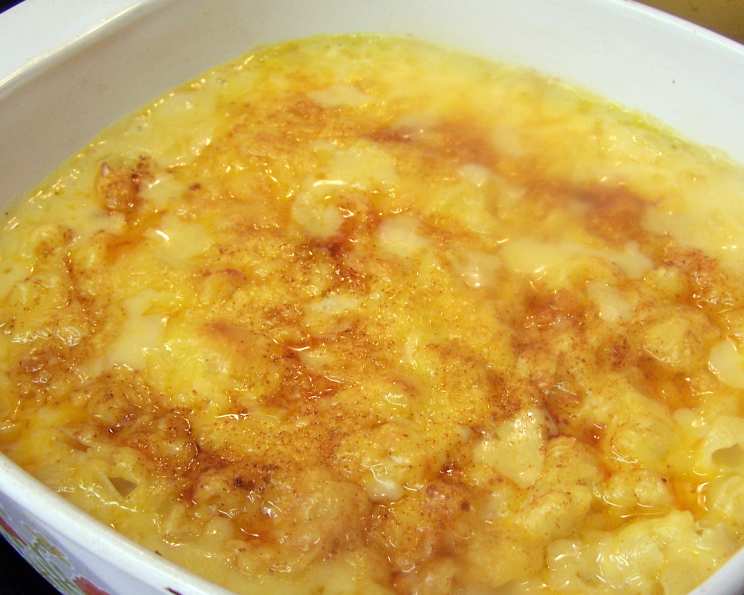
- Bake in a preheated oven at 350°F (175°C) for 30 minutes, or until the cheese is melted and bubbly and the top is lightly golden brown.
- You can sprinkle with a little paprika to aid in browning some, if desired.
Expert Tips & Tricks
- Cheese Choice: While sharp cheddar is classic, feel free to experiment with other cheeses like Gruyere, Monterey Jack, or a blend of your favorites. A small amount of Parmesan adds a delightful nutty flavor.
- Preventing Lumps: The key to a smooth cheese sauce is to add the milk gradually and whisk constantly while the roux cooks. If lumps do form, you can try using an immersion blender to smooth them out.
- Seasoning is Key: Don’t be afraid to adjust the salt and pepper to your taste. A pinch of nutmeg or a dash of hot sauce can also add a unique flavor dimension.
- Breadcrumb Topping: For an extra crispy topping, mix breadcrumbs with melted butter and sprinkle over the macaroni and cheese before baking. Panko breadcrumbs work particularly well.
- Make-Ahead Tip: Assemble the macaroni and cheese in the casserole dish and refrigerate it, covered, for up to 24 hours before baking. Add a few extra minutes to the baking time to ensure it’s heated through.
Serving & Storage Suggestions
Serve the Cheesy Elbow Mac & Cheese hot, straight from the oven. It makes a wonderful side dish for grilled chicken, roasted vegetables, or a hearty salad. For a complete meal, add a side of steamed broccoli or green beans.
Leftovers can be stored in an airtight container in the refrigerator for up to 3-4 days. To reheat, bake in a preheated oven at 350°F (175°C) until heated through, or microwave in short intervals, stirring occasionally. You may need to add a splash of milk to keep it from drying out. While freezing is possible, the texture of the cheese sauce may change slightly upon thawing.
Nutritional Information
| Nutrient | Amount per Serving | % Daily Value (approx.) |
|---|---|---|
| Calories | 612.7 kcal | N/A |
| Calories from Fat | 298 g | 49% |
| Total Fat | 33.2 g | 51% |
| Saturated Fat | 20.6 g | 103% |
| Cholesterol | 102.5 mg | 34% |
| Sodium | 1082.8 mg | 45% |
| Total Carbohydrate | 51.3 g | 17% |
| Dietary Fiber | 1.8 g | 7% |
| Sugars | 1.7 g | 6% |
| Protein | 26.9 g | 53% |
Note: Nutritional information is an estimate and may vary based on specific ingredients and preparation methods.
Variations & Substitutions
- Gluten-Free Mac & Cheese: Use gluten-free elbow macaroni and a gluten-free all-purpose flour blend for the roux.
- Spicy Mac & Cheese: Add a pinch of cayenne pepper or a dash of your favorite hot sauce to the cheese sauce. You can also use pepper jack cheese for an extra kick.
- Vegetable Mac & Cheese: Stir in steamed broccoli florets, peas, or diced carrots into the macaroni and cheese before baking.
- Smoked Mac & Cheese: Use smoked cheddar cheese or add a few drops of liquid smoke to the cheese sauce for a smoky flavor.
- Creamy Mac & Cheese: Substitute heavy cream for some of the milk for an even richer and creamier sauce.
- Different Pasta Shapes: While elbow macaroni is traditional, you can use other pasta shapes like shells, penne, or rotini.
FAQs (Frequently Asked Questions)
Q: Can I use pre-shredded cheese?
A: While convenient, pre-shredded cheese often contains cellulose, which can prevent it from melting as smoothly. For the best results, shred your own cheese from a block.
Q: How can I prevent the macaroni and cheese from drying out in the oven?
A: Make sure the cheese sauce is thick enough before adding the macaroni. Also, avoid overbaking, as this can cause the sauce to dry out.
Q: Can I add a topping other than cheese?
A: Absolutely! Breadcrumbs, crumbled bacon, or even crushed potato chips can add a delicious textural element.
Q: What if my cheese sauce is too thick?
A: Gradually add a little more milk, stirring constantly, until you reach your desired consistency.
Q: How do I reheat macaroni and cheese without it getting grainy?
A: Reheat gently over low heat, stirring frequently, and add a splash of milk or cream to help restore its creamy texture.
Final Thoughts
This Cheesy Elbow Mac & Cheese isn’t just a recipe; it’s a celebration of simple pleasures and heartwarming memories. Whether you’re making it for a cozy night in, a potluck with friends, or a special occasion, this dish is guaranteed to bring smiles to the faces of everyone who tries it. So, gather your ingredients, preheat your oven, and get ready to experience the ultimate comfort food classic. Don’t be afraid to experiment with different cheeses and seasonings to create your own signature version. And most importantly, enjoy every cheesy, delicious bite! I encourage you to share your creations and any variations you try. Bon appétit!