
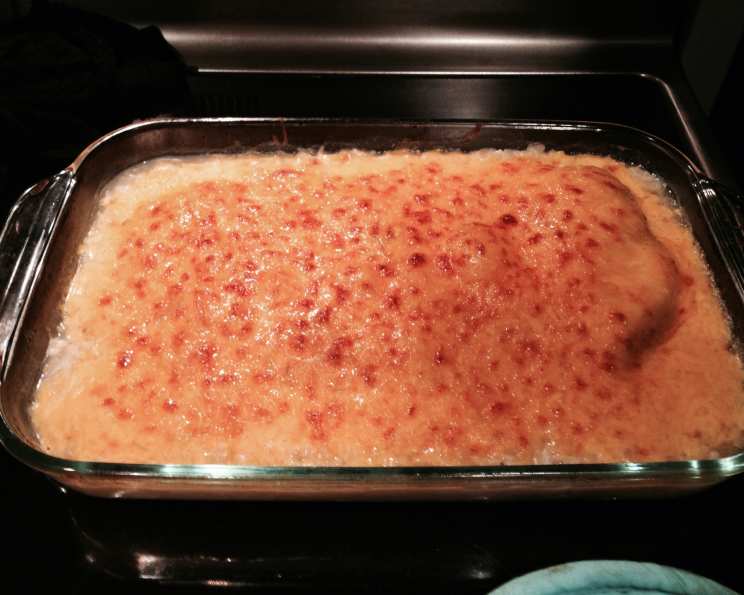
Cheesy Rice Pilaf Chicken Bake: A Weeknight Winner
The scent of savory rice pilaf always transports me back to my grandmother’s kitchen. She had a knack for transforming simple pantry staples into comforting feasts, and her rice pilaf chicken casserole was a frequent star of our family dinners. The aroma of the rice mingling with the chicken and a hint of garlic would fill the house, signaling a warm and satisfying meal to come. While this recipe isn’t exactly hers, it captures the same spirit of ease and deliciousness – perfect for busy weeknights when you crave a taste of home.
Recipe Overview
- Prep Time: 15 minutes
- Cook Time: 30-40 minutes
- Broil Time: 2-3 minutes
- Total Time: 47-58 minutes
- Servings: 4
- Dietary Type: Gluten-Free
Ingredients
- 4 chicken breasts, boneless, skinless (medium-sized)
- 1 (5 1/3 ounce) package rice pilaf mix (Knorr Rice Sides Rice Pilaf recommended)
- 1 tablespoon olive oil
- 1⁄2 teaspoon dried garlic, minced (Tastefully Simple Garlic Garlic Seasoning recommended)
- 1⁄2 teaspoon dried onion, minced (Tastefully Simple Onion Onion Seasoning recommended)
- 2 cups chicken broth (or water)
- 1⁄2 cup sharp cheddar cheese, shredded
Equipment Needed
- 9 x 13 inch baking pan
- Medium bowl
- Aluminum foil
Instructions
- Begin by preheating your oven to 350°F (175°C). Ensure your oven rack is positioned in the center.
- Arrange the chicken breasts side-by-side in a 9 x 13 inch baking pan. There should be minimal overlap, as this will ensure even cooking.
- In a medium bowl, combine the rice pilaf mix, olive oil, dried garlic, dried onion, and chicken broth. Stir well to ensure the rice pilaf mix is fully incorporated and no clumps remain.
- Pour the rice pilaf mixture evenly over the chicken breasts, ensuring they are adequately coated. The rice mixture should surround the chicken.
- Cover the baking pan tightly with aluminum foil, securing all sides to create a sealed environment. This will trap the steam and help cook the chicken evenly and keep it moist.
- Bake the covered pan for 30-40 minutes, depending on the size and thickness of your chicken breasts. Larger, thicker breasts will require a longer cooking time. The internal temperature of the chicken should reach 165°F (74°C).
- Once the chicken breasts are cooked through, carefully remove the pan from the oven. At this point, preheat your broiler to medium heat. Keep a close watch on the broiler as it can quickly burn the cheese.
- Evenly distribute the shredded cheddar cheese over the top of each chicken breast, creating a cheesy layer.
- Position the pan 4-6 inches from the heat source in your broiler (uncovered) and broil for 2-3 minutes, or until the cheese has melted and begun to brown slightly. Watch carefully to prevent burning.
- Remove the pan from the oven and let it rest for 5 minutes before serving. This allows the juices to redistribute within the chicken, resulting in a more tender and flavorful dish.
Expert Tips & Tricks
- For enhanced flavor, try browning the chicken breasts in a skillet with a little olive oil before placing them in the baking dish. This adds a deeper, richer taste to the final dish.
- If you don’t have dried minced garlic and onion, you can use fresh! About 1 teaspoon of each, finely minced, will work great.
- To ensure the chicken breasts cook evenly, consider pounding them to an even thickness before baking. This will help them cook at the same rate.
- If you’re short on time, you can use pre-cooked rotisserie chicken. Simply shred the chicken and add it to the rice pilaf mixture before baking. This will significantly reduce the cooking time.
- For a creamier rice pilaf, add a dollop of sour cream or Greek yogurt to the rice mixture before baking.
Serving & Storage Suggestions
Serve the Cheesy Rice Pilaf Chicken Bake hot, directly from the oven. A simple side salad or steamed vegetables complements the richness of the dish perfectly. Leftovers can be stored in an airtight container in the refrigerator for up to 3 days. Reheat gently in the microwave or oven until warmed through. To reheat in the oven, cover the dish with foil to prevent it from drying out. The chicken can also be frozen for up to 2 months. Thaw completely in the refrigerator before reheating. Note that the texture of the rice might change slightly after freezing and thawing.
Nutritional Information
| Nutrient | Amount per Serving | % Daily Value |
|---|---|---|
| Calories | 356.6 kcal | N/A |
| Calories from Fat | 199 g | 56% |
| Total Fat | 22.2 g | 34% |
| Saturated Fat | 7.5 g | 37% |
| Cholesterol | 107.6 mg | 35% |
| Sodium | 560.8 mg | 23% |
| Total Carbohydrate | 0.9 g | 0% |
| Dietary Fiber | 0 g | 0% |
| Sugars | 0.5 g | 2% |
| Protein | 36.2 g | 72% |
Variations & Substitutions
- Spice it up: Add a pinch of red pepper flakes to the rice pilaf mixture for a subtle kick.
- Vegetable boost: Stir in some chopped vegetables, such as bell peppers, onions, or mushrooms, to the rice pilaf mixture for added nutrients and flavor.
- Cheese variations: Experiment with different types of cheese, such as Monterey Jack, mozzarella, or provolone.
- Herbaceous twist: Add fresh herbs, such as parsley, thyme, or rosemary, to the rice pilaf mixture for a more aromatic dish.
- Cream of mushroom soup: Instead of chicken broth and dried onion, use 1 can of cream of mushroom soup mixed with 1 cup of water to add another layer of richness and depth.
FAQs (Frequently Asked Questions)
Q: Can I use bone-in chicken for this recipe?
A: While boneless, skinless chicken breasts are recommended for their quicker cooking time, you can use bone-in chicken thighs or drumsticks. Just be sure to adjust the cooking time accordingly, ensuring the chicken is cooked through to an internal temperature of 165°F (74°C).
Q: What if my rice pilaf mix calls for a different amount of liquid?
A: If your rice pilaf mix directions indicate a different liquid ratio, adjust the amount of chicken broth (or water) accordingly. Follow the package instructions for the best results.
Q: Can I prepare this dish ahead of time?
A: Yes, you can assemble the dish ahead of time up to the point of baking. Cover the baking pan tightly with foil and store it in the refrigerator for up to 24 hours. Add a few minutes to the baking time to ensure the chicken is cooked through.
Q: My cheese is browning too quickly under the broiler. What should I do?
A: If the cheese is browning too quickly, lower the broiler temperature or move the pan further away from the heat source. You can also tent the pan with foil to prevent the cheese from burning.
Q: Can I make this recipe without the cheese?
A: Absolutely! If you prefer, you can omit the cheese altogether. The dish will still be flavorful and satisfying. You could also try a dairy-free cheese alternative.
Final Thoughts
This Cheesy Rice Pilaf Chicken Bake is a testament to the fact that delicious meals don’t have to be complicated. With just a handful of ingredients and minimal effort, you can create a comforting and satisfying dish that the whole family will love. So go ahead, gather your ingredients, and experience the joy of this effortless chicken bake! I’m confident it will become a new weeknight staple in your home. Don’t hesitate to share your own creative twists and feedback – I’m always excited to see how you make this recipe your own! Pair it with a crisp green salad and a glass of your favorite white wine for the perfect weeknight dinner.