
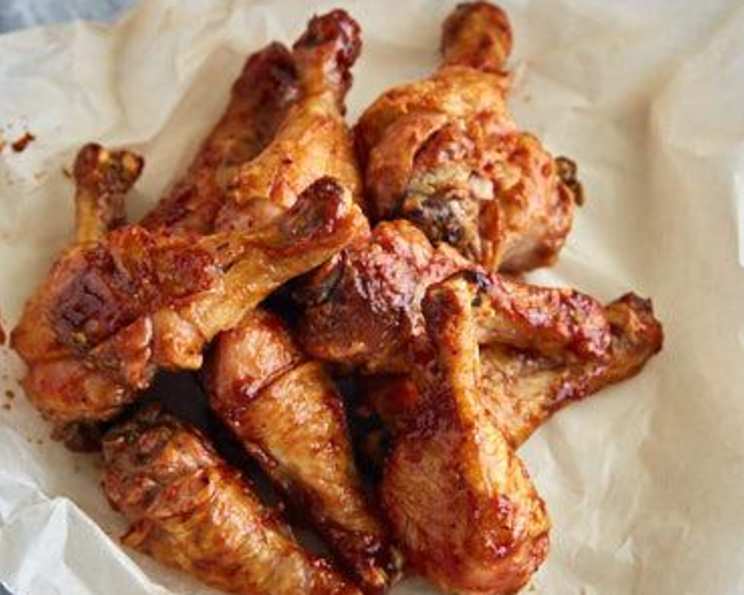
Chicken Legs for Dummies: A Foolproof Guide to Crispy, Juicy Perfection
My grandmother, bless her heart, wasn’t exactly known for her culinary prowess. But every so often, she’d nail a dish so perfectly that it would etch itself into my memory. Her baked chicken legs were one of those dishes. They weren’t fancy, just simple, seasoned, and baked until the skin was shatteringly crisp and the meat practically fell off the bone. The aroma alone was enough to transport me back to her sun-drenched kitchen, filled with the comforting sounds of her humming and the clatter of pans. It was this memory that pushed me to perfect my own version of the humble baked chicken leg.
Recipe Overview
- Prep Time: 10 minutes
- Cook Time: 1 hour
- Total Time: 1 hour 10 minutes
- Servings: 6
- Yield: 6 chicken legs
- Dietary Type: Gluten-Free, Dairy-Free
Ingredients
- 6 chicken legs
- 2 tablespoons olive oil
- 1 teaspoon sea salt or 1 teaspoon seasoning salt
- ½ teaspoon pepper
- 1 teaspoon garlic powder
- 1 teaspoon onion powder
- 2 teaspoons smoked paprika
- 2 teaspoons rosemary or 2 teaspoons poultry seasoning
- 1 teaspoon lemon juice (optional, add to the olive oil for brushing)
- 1 teaspoon chili powder (optional, if you want some spice)
- 2 tablespoons barbecue sauce (optional)
Equipment Needed
- Oven
- Baking sheet
- Wire rack (optional, but highly recommended)
- Small bowl
- Pastry brush or spoon
Instructions
-
Begin by preheating your oven to 375 degrees Fahrenheit (190 degrees Celsius). This ensures even cooking from the start.
-
Wash the chicken legs thoroughly under cold running water. Pat them completely dry with paper towels. This is a crucial step for achieving crispy skin. Excess moisture is the enemy!
-
In a small bowl, combine the olive oil (and lemon juice, if using), sea salt (or seasoning salt), pepper, garlic powder, onion powder, smoked paprika, and rosemary (or poultry seasoning). If you are feeling adventurous, include the chili powder. Mix well to create a flavorful marinade.
-
Place the dried chicken legs on a baking sheet. For optimal crispiness, place a wire rack on the baking sheet and arrange the chicken legs on the rack. This allows air to circulate around the chicken, promoting even browning.
-
Brush the chicken legs generously with the olive oil and spice mixture, ensuring they are evenly coated. Use your hands to rub the seasoning into the chicken for maximum flavor penetration.
-
Bake the chicken legs for 20 minutes. Then, carefully turn the legs over and bake for another 20 minutes.
-
Check the chicken for doneness. At this stage, you can brush on the barbecue sauce if desired. For a varied flavor profile, consider only saucing half the legs.
-
Continue baking for a final 20 minutes, rotating the chicken legs as needed to ensure even browning and prevent burning. The total cooking time should be approximately 1 hour.
-
To ensure the chicken is fully cooked, insert a meat thermometer into the thickest part of the leg, avoiding the bone. The internal temperature should reach 165 degrees Fahrenheit (74 degrees Celsius). If the chicken hasn’t reached this temperature, continue baking for a few more minutes, checking frequently.
-
Once cooked through, remove the chicken legs from the oven and let them rest for 5 minutes before serving. This allows the juices to redistribute, resulting in more tender and flavorful chicken.
Expert Tips & Tricks
- Crispy Skin Secrets: Patting the chicken completely dry before seasoning is essential for achieving crispy skin. Using a wire rack elevates the chicken and allows for better air circulation, further promoting crispness.
- Flavor Boost: For a richer, more complex flavor, consider marinating the chicken legs in the spice mixture for at least 30 minutes (or even overnight) in the refrigerator before baking.
- Preventing Burning: If the chicken legs start to brown too quickly, loosely tent a piece of aluminum foil over them during the last 10-15 minutes of baking.
- Spice it Up: Feel free to adjust the spices to your liking. A pinch of cayenne pepper or a dash of hot sauce can add some extra heat.
- Even Cooking: Always ensure your oven is properly preheated. Uneven oven temperatures can lead to unevenly cooked chicken. Use an oven thermometer to verify the temperature.
Serving & Storage Suggestions
Serve these juicy baked chicken legs hot from the oven with your favorite sides. Classic pairings include mashed potatoes, roasted vegetables, coleslaw, or a simple green salad. For a complete meal, consider serving them with cornbread or biscuits.
Leftover chicken legs can be stored in an airtight container in the refrigerator for up to 3-4 days. To reheat, you can use the oven (at 350°F or 175°C) for about 15-20 minutes, or until heated through. Alternatively, you can reheat them in the microwave, but be careful not to overcook them, as this can make them dry. For longer storage, cooked chicken legs can be frozen for up to 2-3 months. Thaw them in the refrigerator overnight before reheating.
Nutritional Information
| Nutrient | Amount per Serving | % Daily Value |
|---|---|---|
| Calories | 300 kcal | 15% |
| Total Fat | 20g | 31% |
| Saturated Fat | 5g | 25% |
| Cholesterol | 150mg | 50% |
| Sodium | 500mg | 22% |
| Total Carbohydrate | 5g | 2% |
| Dietary Fiber | 1g | 4% |
| Sugars | 2g | – |
| Protein | 25g | 50% |
| Note: Nutritional information is an estimate and may vary based on specific ingredients and portion sizes. |
Variations & Substitutions
- Herbs de Provence: Substitute the rosemary and paprika with 2 teaspoons of Herbs de Provence for a French-inspired flavor.
- Lemon Herb: Increase the lemon juice to 1 tablespoon and add 1 teaspoon of dried thyme for a bright and refreshing twist.
- Spicy Mango: Combine 1/4 cup of mango chutney with the olive oil and spices (omitting the chili powder) for a sweet and spicy glaze.
- Honey Garlic: Mix 2 tablespoons of honey with 2 cloves of minced garlic and the olive oil for a sweet and savory glaze.
- Skinless Option: If you prefer, you can remove the skin from the chicken legs before seasoning and baking. The cooking time may be slightly reduced.
- Different Chicken Cuts: This recipe works equally well with other cuts of chicken, such as chicken thighs or bone-in, skin-on chicken breasts. Adjust the cooking time accordingly.
FAQs (Frequently Asked Questions)
Q: How do I know when the chicken legs are fully cooked?
A: The best way to ensure the chicken is cooked through is to use a meat thermometer. Insert it into the thickest part of the leg (avoiding the bone) and make sure it reaches 165 degrees Fahrenheit (74 degrees Celsius).
Q: Can I use skinless chicken legs for this recipe?
A: Yes, you can. Just be aware that the skinless chicken legs may not get as crispy. You might want to reduce the cooking time slightly to prevent them from drying out.
Q: Can I prepare the chicken legs ahead of time?
A: Absolutely! You can season the chicken legs and store them in the refrigerator for up to 24 hours before baking. This allows the flavors to meld together even more.
Q: What if I don’t have a wire rack?
A: While a wire rack is highly recommended for crispy skin, you can still bake the chicken legs directly on the baking sheet. Just be sure to flip them frequently to ensure even cooking and browning.
Q: Can I use different seasonings?
A: Of course! Feel free to experiment with your favorite herbs and spices. This recipe is very versatile and can be easily adapted to your personal taste.
Final Thoughts
So there you have it: a ridiculously simple, yet incredibly satisfying recipe for baked chicken legs. It’s the kind of dish that’s perfect for a weeknight dinner, a casual weekend gathering, or any time you’re craving comfort food. Don’t be afraid to get creative with the seasonings and make it your own. I encourage you to try this recipe and share your feedback! Pair it with a crisp green salad and a glass of your favorite wine for a truly memorable meal. Now, go forth and bake some chicken!