
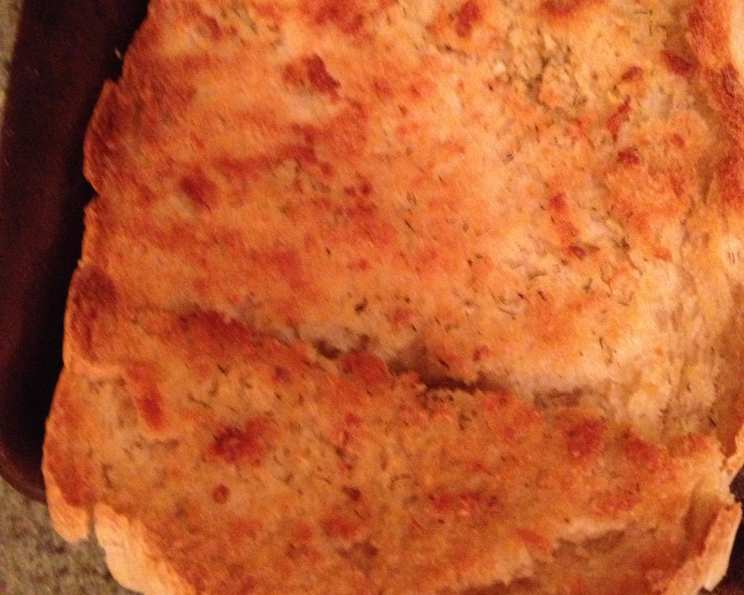
Perfect Garlic Bread from Scratch
Garlic bread. Even the name evokes warmth, comfort, and the anticipation of something utterly delicious. I remember as a child, the sheer delight of tearing into a still-warm loaf, the garlicky aroma filling the kitchen, and the satisfyingly soft interior yielding to a perfectly crisp crust. My grandmother would always make a loaf to accompany her famous spaghetti, and honestly, sometimes I liked the garlic bread even more! It’s a simple pleasure, elevated by homemade goodness. Let’s embark on a journey to create the most perfect garlic bread you’ve ever tasted, starting with the bread itself.
Recipe Overview
- Prep Time: 45 minutes (plus rising time)
- Cook Time: 30-35 minutes
- Total Time: 2 hours
- Yields: 1 loaf
- Serves: 6
- Dietary Type: Vegetarian
Ingredients
For the Bread:
- 2 – 2 ½ cups flour
- 1 teaspoon salt
- 1 cup warm water
- ½ tablespoon instant yeast
- ½ tablespoon sugar
- 1 tablespoon oil
For the Garlic Butter:
- ¼ – ⅓ cup butter, room temperature (homemade is preferable)
- ½ teaspoon dill
- 6 cloves garlic, minced
- ½ teaspoon salt
- ½ teaspoon fresh black pepper
Equipment Needed
- Measuring cups and spoons
- Medium-sized mixing bowl
- Measuring cup
- Cookie sheet
- Sharp knife
- Garlic press or grinder
- Aluminum foil
Instructions
-
In a measuring cup, mix together the yeast and sugar. This helps prevent the yeast from clumping and activates it. Add the warm water and stir until dissolved. Let sit for 5 minutes, allowing the yeast to bloom and become foamy. This step is crucial to ensure your bread rises properly.
-
In a medium-sized bowl, combine 2 cups of the flour and the salt. Pour in the yeast mixture and stir until a soft dough begins to form.
-
Turn the dough out onto a lightly floured surface and knead until it becomes smooth and elastic. This typically takes 5-7 minutes. Add more flour, a tablespoon at a time, if the dough is too sticky, but be careful not to add so much that it becomes dry. The dough should remain slightly sticky to the touch.
-
Rinse out the mixing bowl and swirl the oil around to coat the entire surface. Place the dough back into the bowl and turn it over so it is coated with oil. This prevents the dough from drying out as it rises.
-
Cover the bowl with a clean kitchen towel or plastic wrap (I like to use a tea towel wrapped over and under the bowl). Place the bowl in a warm (but not hot!) oven to rise. A helpful trick is to turn your oven on to its lowest setting for about 5 minutes, then turn it off. This creates a consistently warm environment.
-
Allow the dough to rise until it has doubled in size, which typically takes about an hour.
-
Once the dough has doubled, punch it down gently to release the air. Shape the dough into a long, thin loaf.
-
Place the loaf on a cookie sheet that has been lightly oiled and sprinkled with cornmeal. The cornmeal adds a subtle texture and prevents the loaf from sticking. Using a sharp knife, slash the top of the loaf diagonally 3 or 4 times.
-
Return the loaf to your warm oven and allow it to double again.
-
Preheat your oven to 375°F (190°C). My oven tends to run a little cool, so I often bump the temperature up closer to 380°F or 390°F. In this case, a slightly warmer oven is preferable to one that’s too cool.
-
Bake the loaf for 20 minutes, or until it is nicely golden brown on top.
-
Remove the loaf from the oven and let it cool until it is no more than warm to the touch.
-
While the bread is baking, prepare the garlic butter. In a small bowl, combine the softened butter, dill, minced garlic, salt, and pepper. Mix well until all ingredients are evenly distributed.
-
Once the bread is cool enough to handle, slice it vertically into ¾ to 1-inch slices, being careful to leave the bottom crust intact. This creates individual portions while keeping the loaf connected.
-
Carefully pull the slices apart slightly so you can spread the garlic butter on both sides of each slice without breaking them apart completely. Be generous with the butter, ensuring each slice is thoroughly coated.
-
Wrap the loaf loosely but completely in aluminum foil.
-
Bake at 400°F (200°C) for 10-15 minutes, or until the butter is melted and the bread is heated through.
-
Serve immediately and enjoy!
Expert Tips & Tricks
- Homemade butter truly elevates the flavor. If you have the time, try making your own. Simply whip room-temperature whipping cream until the fat separates from the milk. Rinse the butter under cold water to remove excess milk and mix in a little salt.
- Don’t over-knead the dough. Over-kneading can result in a tough loaf. Knead just until the dough is smooth and elastic.
- Adjust baking time according to your oven. Every oven is different, so keep an eye on the bread while it’s baking. If it starts to brown too quickly, tent it with foil.
- Fresh garlic is key. Avoid using garlic powder, as it lacks the robust flavor of fresh garlic.
- For an extra cheesy touch, sprinkle some shredded Parmesan or mozzarella cheese over the garlic butter before baking.
Serving & Storage Suggestions
Serve this garlic bread immediately while it’s still warm and the butter is melted and fragrant. It’s the perfect accompaniment to pasta dishes, soups, salads, or even enjoyed on its own as a snack.
If you have any leftovers (though that’s unlikely!), store them wrapped tightly in foil or in an airtight container at room temperature for up to 2 days. To reheat, wrap the bread in foil and bake at 350°F (175°C) for 5-10 minutes, or until warmed through. You can also reheat individual slices in a toaster oven.
Freezing the fully assembled garlic bread is not recommended, as the butter can separate upon thawing. However, you can freeze the bread dough and garlic butter separately. Thaw the dough in the refrigerator overnight, then proceed with the recipe as directed. The garlic butter can be thawed in the refrigerator for a few hours or at room temperature for a shorter period.
Nutritional Information
| Nutrient | Amount per Serving | % Daily Value |
|---|---|---|
| Calories | 251.8 kcal | N/A |
| Calories from Fat | 93 g | 37% |
| Total Fat | 10.4 g | 16% |
| Saturated Fat | 5.2 g | 26% |
| Cholesterol | 20.3 mg | 6% |
| Sodium | 652 mg | 27% |
| Total Carbohydrate | 34.4 g | 11% |
| Dietary Fiber | 1.5 g | 6% |
| Sugars | 1.2 g | 4% |
| Protein | 5 g | 10% |
Variations & Substitutions
- Gluten-Free Garlic Bread: Use a gluten-free flour blend to make the bread dough. Be sure to choose a blend that is designed for bread making.
- Herbaceous Garlic Bread: Add other fresh herbs like parsley, oregano, or thyme to the garlic butter for a more complex flavor profile.
- Spicy Garlic Bread: Add a pinch of red pepper flakes to the garlic butter for a touch of heat.
- Vegan Garlic Bread: Substitute the butter with a vegan butter alternative. Ensure that your chosen butter alternative has a high fat content for the best results. You can also use olive oil instead of butter for a different flavor.
- Cheese Lovers: Add a generous layer of your favorite shredded cheese, such as mozzarella, provolone, or parmesan, on top of the garlic butter before baking.
FAQs (Frequently Asked Questions)
Q: Can I use pre-made bread dough?
A: While you certainly can, using homemade dough makes a world of difference in terms of flavor and texture. Pre-made doughs often lack the depth of flavor that comes from a long, slow rise.
Q: How do I prevent the garlic from burning?
A: Mincing the garlic finely and mixing it with the butter helps to protect it from direct heat and prevent burning. Also, wrapping the loaf in foil during the second bake helps to regulate the temperature.
Q: Can I freeze the garlic bread after it’s baked?
A: Freezing the fully assembled garlic bread isn’t ideal, as the butter can separate upon thawing. However, you can freeze the bread dough before baking or the baked loaf without the garlic butter.
Q: What’s the best way to mince garlic?
A: A garlic press is a convenient tool, but mincing garlic by hand with a sharp knife allows you to control the texture. Aim for a fine mince to ensure the garlic flavor is evenly distributed throughout the butter.
Q: Can I use salted butter instead of unsalted?
A: Yes, but you may want to reduce the amount of added salt in the garlic butter to prevent it from being too salty. Taste the butter after mixing and adjust the seasoning as needed.
Final Thoughts
There you have it: a recipe for perfect garlic bread, made completely from scratch. While it requires a bit more effort than simply slathering store-bought bread with garlic butter, the results are well worth it. The aroma of freshly baked bread combined with the savory scent of garlic is simply irresistible. So, gather your ingredients, roll up your sleeves, and prepare to create a loaf that will impress your family and friends. I encourage you to experiment with variations and make this recipe your own. And don’t forget to share your creations and feedback – I’d love to hear how it turns out! Consider serving this alongside a hearty bowl of tomato soup or a comforting plate of spaghetti. Happy baking!