
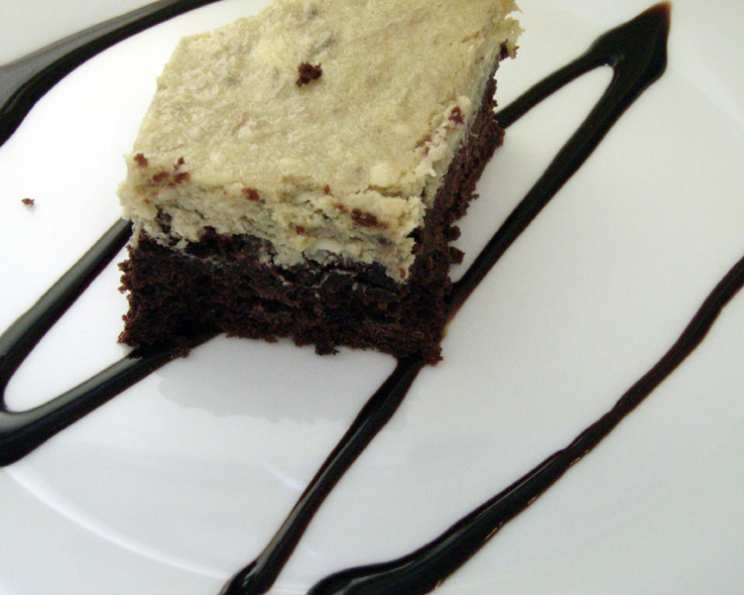
Chocolate Bottom Banana Cheesecake Bars: A Decadent Twist on Comfort
The first time I tasted a dessert quite like this, it was at a potluck hosted by my Aunt Carol. She wasn’t known for her adventurous baking, so I was immediately intrigued. One bite of those Chocolate Bottom Banana Cheesecake Bars, and I was hooked. The rich, fudgy base, the creamy, banana-infused cheesecake layer – it was a symphony of textures and flavors that felt both comforting and surprisingly elegant. I badgered her for the recipe and have been making my own version ever since, tweaking it ever so slightly to reach chocolate banana perfection.
Recipe Overview
- Prep Time: 20 minutes
- Cook Time: 45 minutes
- Total Time: 1 hour 5 minutes (plus cooling time)
- Servings: 24
- Yield: 24 bars
- Dietary Type: Vegetarian
Ingredients
For the Base:
- 4 ounces cream cheese, softened to room temperature
- 1 large egg
- 1/2 cup (1 stick) butter, softened
- 1 (18 1/4 ounce) box devil’s food cake mix
For the Topping:
- 2 (8 ounce) packages cream cheese, softened to room temperature
- 2 large eggs
- 1 cup mashed ripe banana (approximately 2 large bananas)
- 1 cup powdered sugar
- 1 teaspoon vanilla extract
Equipment Needed
- 9-inch by 13-inch baking pan
- Foil (or cooking spray and flour)
- Electric mixer (stand or hand mixer)
- Mixing bowls
- Measuring cups and spoons
- Rubber spatula
Instructions
-
Preheat your oven to 350 degrees F (175 degrees C). Line a 9-inch by 13-inch baking pan with foil, leaving an overhang to easily lift the bars out later. Alternatively, you can grease and flour the pan thoroughly. Using foil makes removal and cleanup much easier.
-
Prepare the Base: In a mixing bowl, combine the 4 ounces of softened cream cheese, 1 egg, and 1/2 cup of softened butter. Beat with an electric mixer on low speed until well creamed. It’s crucial that the cream cheese and butter are properly softened, otherwise you’ll end up with lumps in your base.
-
Gradually blend in the entire box of devil’s food cake mix by hand until just combined. The mixture will be very thick, almost like a soft dough. Avoid overmixing at this stage, as it can lead to a tough base.
-
Press the cake mix mixture evenly into the bottom of the prepared baking pan. I find it easiest to use my fingers or the back of a spoon to spread it out. Make sure the base is uniformly thick to ensure even baking.
-
Prepare the Topping: In a separate, larger mixing bowl, beat the two 8-ounce packages of softened cream cheese, 1 cup of mashed ripe banana, 1 cup of powdered sugar, and 1 teaspoon of vanilla extract together with an electric mixer at medium speed until smooth and creamy. This should take at least 3 minutes. The longer you beat it, the smoother and more luxurious the cheesecake layer will be. Ensure there are no lumps of cream cheese remaining.
-
Add the 2 eggs one at a time, beating only until each egg is just incorporated. It is important not to overbeat the mixture after adding the eggs, as this can cause the cheesecake to crack during baking.
-
Spread the cream cheese batter evenly over the chocolate base in the baking pan. Gently smooth the surface with a spatula for a uniform appearance.
-
Bake: Bake in the preheated oven at 350 degrees F (175 degrees C) for 45 minutes. The cheesecake layer should be set around the edges but still have a slight jiggle in the center. A toothpick inserted near the center should come out with moist crumbs attached, not wet batter.
-
Cool Completely: Remove the baking pan from the oven and let the bars cool completely at room temperature. This is essential to allow the cheesecake to set properly. Do not attempt to cut them while they are still warm.
-
Once cooled, carefully lift the bars out of the pan using the foil overhang (if used). Peel off the foil. Cut into 24 even squares using a sharp knife. For clean cuts, wipe the knife clean between each slice.
Expert Tips & Tricks
- Room Temperature Ingredients: Ensuring that the cream cheese and butter are properly softened to room temperature is key to achieving a smooth and creamy texture in both the base and the topping. If they’re too cold, they won’t blend properly.
- Banana Ripeness: Use very ripe bananas for the topping. The riper the banana, the sweeter and more flavorful your cheesecake layer will be. Brown spots are your friend here!
- Preventing Cracks: To minimize the risk of cracks in your cheesecake, avoid overbaking. Also, let the bars cool slowly in the oven with the door slightly ajar after baking. This gradual cooling helps prevent drastic temperature changes that can cause cracking.
- Chocolate Boost: For an even richer chocolate flavor, consider adding 1/2 cup of chocolate chips to the cake mix base.
- Foil Trick: Using foil to line the pan is a lifesaver. It makes it so easy to remove the bars cleanly and avoids any sticking issues.
Serving & Storage Suggestions
These Chocolate Bottom Banana Cheesecake Bars are best served chilled. They can be served as a dessert for parties, gatherings, or simply as a treat for yourself. They pair wonderfully with a scoop of vanilla ice cream, a drizzle of chocolate sauce, or a dollop of whipped cream.
To store leftovers, place the bars in an airtight container and refrigerate. They will keep well in the refrigerator for up to 4 days. For longer storage, you can freeze them for up to 2 months. Thaw overnight in the refrigerator before serving. Freezing may slightly alter the texture, but they’ll still taste delicious.
Do not leave at room temperature for more than two hours due to the cream cheese content.
Nutritional Information
| Nutrient | Amount per Serving | % Daily Value |
|---|---|---|
| Calories | 243.3 kcal | N/A |
| Calories from Fat | 144 g | 59% |
| Total Fat | 16.1 g | 24% |
| Saturated Fat | 8.5 g | 42% |
| Cholesterol | 62.6 mg | 20% |
| Sodium | 283.9 mg | 11% |
| Total Carbohydrate | 22.9 g | 7% |
| Dietary Fiber | 0.7 g | 2% |
| Sugars | 14 g | N/A |
| Protein | 4 g | 7% |
Note: Nutritional information is an estimate and may vary based on specific ingredients used.
Variations & Substitutions
- Gluten-Free Option: Use a gluten-free devil’s food cake mix for a gluten-free version. You may need to adjust the baking time slightly, so keep an eye on it.
- Different Cake Mix: Experiment with other cake mix flavors like chocolate fudge, German chocolate, or even a vanilla cake mix for a completely different twist.
- Nutty Addition: Add 1/2 cup of chopped walnuts or pecans to the base for added texture and flavor.
- Banana Extract: For a more intense banana flavor, add 1/2 teaspoon of banana extract to the cheesecake topping.
- Dairy-Free: Although difficult, using vegan cream cheese alternatives and replacing the butter with a vegan butter substitute may work, though the texture and taste will differ slightly.
FAQs (Frequently Asked Questions)
Q: Can I use frozen bananas for the topping?
A: Yes, you can use frozen bananas. Just make sure to thaw them completely and drain any excess liquid before mashing.
Q: Why did my cheesecake crack?
A: Cracking is usually caused by overbaking or rapid temperature changes. Try reducing the baking time slightly and letting the bars cool gradually in the oven.
Q: Can I make these bars ahead of time?
A: Absolutely! These bars are perfect for making ahead of time. They actually taste better after chilling in the refrigerator for a few hours.
Q: Can I use a different size pan?
A: Using a different size pan will affect the thickness of the bars and the baking time. A smaller pan will result in thicker bars and require a longer baking time, while a larger pan will result in thinner bars and require a shorter baking time.
Q: Can I add chocolate chips to the topping?
A: Yes! Adding 1/2 cup of chocolate chips to the cheesecake topping would be a delicious addition.
Final Thoughts
These Chocolate Bottom Banana Cheesecake Bars are a guaranteed crowd-pleaser. The combination of the rich chocolate base and the creamy, banana-infused cheesecake layer is simply irresistible. Whether you’re baking for a special occasion or just craving a comforting treat, this recipe is sure to satisfy. So, gather your ingredients, preheat your oven, and get ready to create a truly unforgettable dessert. I encourage you to try out different variations to make this recipe your own and, most importantly, to share it with friends and family. Happy baking!