
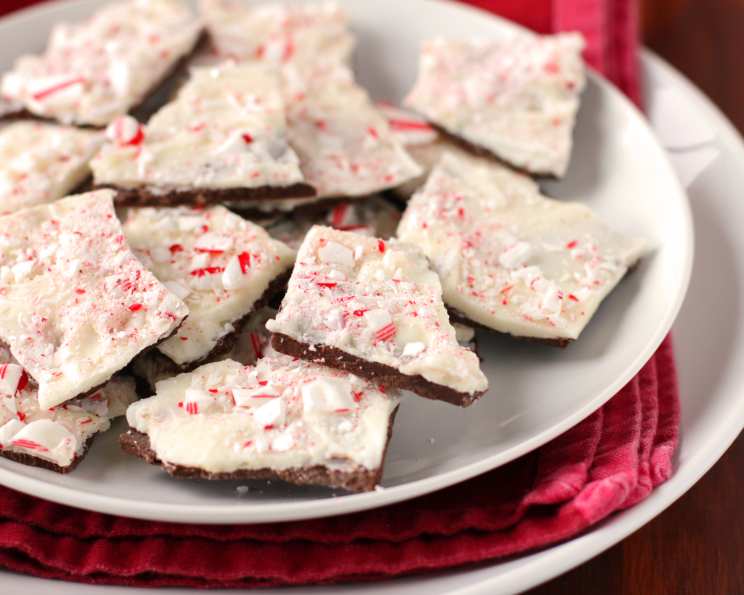
Chocolate Peppermint Bark: A Holiday Classic
The first time I tasted chocolate peppermint bark, I was eight years old, standing in my grandmother’s cozy kitchen, the scent of pine needles and cinnamon filling the air. She carefully unwrapped a piece, the contrasting dark and white chocolate layers gleaming under the warm kitchen light. The cool, crisp peppermint against the rich chocolate was pure magic, a taste that instantly transported me to Christmas mornings and crackling fireplaces. It wasn’t just a treat; it was a symbol of holiday joy, a sweet memory etched in my heart.
Recipe Overview
- Prep Time: 15 minutes
- Cook Time: 5 minutes
- Chill Time: 30 minutes
- Servings: Varies depending on size of pieces
- Yield: Approximately 2 pounds
- Dietary Type: Vegetarian (check chocolate labels for vegan option)
Ingredients
- 12 ounces semisweet chocolate or dark chocolate
- 12 ounces white chocolate
- 4 candy canes
- 1/4 teaspoon peppermint extract
Equipment Needed
- Double boiler or heatproof bowl and saucepan
- 9″x13″ baking dish
- Aluminum foil
- Plastic bag
- Rolling pin or mallet
- Rubber spatula or offset spatula
Instructions
- Begin by preparing the semisweet or dark chocolate layer. If using a double boiler, fill the bottom pot with about an inch of water and bring to a simmer. Place the semisweet or dark chocolate in the top of the double boiler, ensuring the bottom of the bowl doesn’t touch the water. If using a heatproof bowl, place it over a saucepan of simmering water. Stir the chocolate frequently until completely melted and smooth. Be patient and avoid overheating the chocolate, which can cause it to seize.
- Line a 9″x13″ baking dish with aluminum foil, leaving enough overhang on the sides for easy removal later. This ensures the bark doesn’t stick and makes it easier to lift out and break into pieces.
- Pour the melted semisweet or dark chocolate into the prepared baking dish. Using a rubber spatula or offset spatula, spread the chocolate evenly across the bottom of the dish, creating a smooth, uniform layer.
- Place the dish in the refrigerator or freezer to chill for about 15-20 minutes, or until the chocolate is firm but not completely hardened. This provides a stable base for the next layer.
- While the first layer chills, prepare the white chocolate layer. Using the same double boiler or heatproof bowl method as before, melt the white chocolate, stirring frequently until smooth. Be extra careful with white chocolate, as it tends to burn more easily than dark chocolate.
- Stir in the peppermint extract to the melted white chocolate. This infuses the white chocolate with a refreshing peppermint flavor that complements the chocolate layers and candy cane topping.
- Next, crush the candy canes. Place the candy canes in a sturdy plastic bag. Using a rolling pin or mallet, crush the candy canes into small pieces. You can control the size of the pieces to your preference – some people prefer a fine dust, while others like larger chunks for added texture.
- Remove the baking dish from the refrigerator. Pour the melted white chocolate over the chilled semisweet or dark chocolate layer. Spread the white chocolate evenly, creating a second smooth layer. Work quickly, as the cold base will start to harden the white chocolate as it’s poured.
- Immediately sprinkle the crushed candy cane pieces evenly over the white chocolate layer. Gently press the candy cane pieces into the white chocolate to ensure they adhere properly.
- Return the dish to the refrigerator and chill for at least 30 minutes, or until the bark is completely set and firm.
- Once the chocolate is fully hardened, remove the bark from the baking dish by lifting the foil overhang. Place the bark on a cutting board and carefully break it into irregular pieces using your hands or a large knife.
Expert Tips & Tricks
- For the best flavor and texture, use high-quality chocolate. The difference is noticeable, especially with a simple recipe like this.
- If you don’t have a double boiler, you can create one by placing a heatproof glass bowl over a pot of simmering water. Just make sure the bottom of the bowl doesn’t touch the water.
- To prevent the chocolate from seizing, avoid getting any water or steam into the melted chocolate.
- If the white chocolate seizes, try adding a teaspoon of vegetable oil or shortening and stirring vigorously until it smooths out.
- For a marbled effect, swirl the white chocolate and dark chocolate layers together with a toothpick or knife before chilling.
- You can add other toppings like chopped nuts, sprinkles, or dried cranberries for extra flavor and visual appeal.
- If you are having trouble cutting the bark, try warming your knife under hot water and drying it thoroughly before each cut.
Serving & Storage Suggestions
Serve the Chocolate Peppermint Bark as a festive holiday treat. It’s perfect for gifting, sharing at parties, or simply enjoying with a cup of hot cocoa.
Store the bark in an airtight container at room temperature for up to a week, or in the refrigerator for up to two weeks. For longer storage, you can freeze it for up to two months. To freeze, wrap the bark tightly in plastic wrap and then place it in a freezer-safe bag or container. Let it thaw in the refrigerator before serving.
Nutritional Information
| Nutrient | Amount per Serving | % Daily Value |
|---|---|---|
| Calories | 250 kcal | 13% |
| Total Fat | 15g | 23% |
| Saturated Fat | 9g | 45% |
| Cholesterol | 5mg | 2% |
| Sodium | 15mg | 1% |
| Total Carbohydrate | 25g | 8% |
| Dietary Fiber | 1g | 4% |
| Sugars | 20g | |
| Protein | 2g | 4% |
Note: Nutritional information is an estimate and may vary based on specific ingredients used.
Variations & Substitutions
- Vegan Chocolate Peppermint Bark: Use vegan dark chocolate and white chocolate alternatives. Ensure the candy canes are also vegan (some contain beeswax).
- Dark Chocolate Lover’s Bark: Use all dark chocolate with varying percentages for a more intense chocolate flavor.
- Nutty Peppermint Bark: Add chopped pecans, almonds, or walnuts to the crushed candy canes for a nutty crunch.
- Spiced Peppermint Bark: Add a pinch of cinnamon or nutmeg to the melted white chocolate for a warm, festive flavor.
- Salted Peppermint Bark: Sprinkle a pinch of sea salt over the white chocolate layer before adding the crushed candy canes to enhance the sweetness and create a more complex flavor profile.
FAQs (Frequently Asked Questions)
Q: Can I use milk chocolate instead of semi-sweet or dark chocolate?
A: Yes, you can use milk chocolate, but the flavor will be sweeter and less intense. Adjust the amount of peppermint extract to taste.
Q: Can I use peppermint oil instead of peppermint extract?
A: Yes, but use it very sparingly as peppermint oil is much more concentrated than extract. Start with a tiny drop and add more to taste.
Q: How do I prevent the white chocolate from seizing?
A: Melt the white chocolate over low heat and avoid getting any water or steam into it. Stir frequently and remove from the heat as soon as it’s melted.
Q: Can I make this bark ahead of time?
A: Absolutely! Chocolate peppermint bark is a great make-ahead treat. It can be stored in an airtight container for up to a week at room temperature or for longer in the refrigerator or freezer.
Q: What can I do if my chocolate is lumpy after melting?
A: This often happens when chocolate overheats or comes into contact with water. Try stirring in a teaspoon of vegetable oil or shortening to smooth it out.
Final Thoughts
Chocolate Peppermint Bark is more than just a recipe; it’s a tradition, a memory, and a delicious way to spread holiday cheer. Don’t be intimidated by the elegant presentation – it’s incredibly easy to make, and the results are always impressive. Gather your ingredients, put on some festive music, and create a batch of this delightful treat to share with loved ones. I hope this recipe brings as much joy to your kitchen as it has to mine! And feel free to experiment with different chocolates and toppings to create your own unique version. Happy baking!