
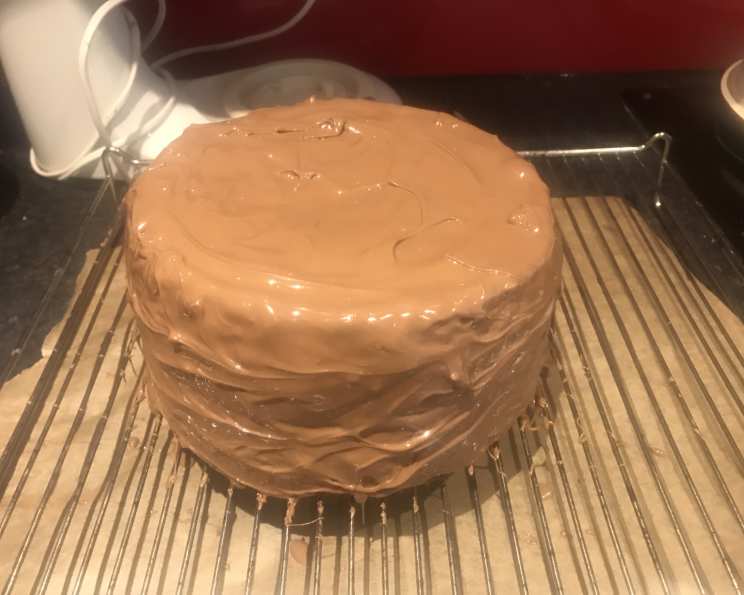
Chocolate Cake Kissed with Lemon: A Culinary Duet
The memory of this cake is etched in my mind: Sunday afternoons at my grandmother’s, the air thick with the scent of cocoa and citrus. She always baked this chocolate cake, its deep, dark sponge a perfect counterpoint to the vibrant tang of lemon curd hidden within. It wasn’t just dessert; it was a love letter baked with care, a symbol of family and comfort, and a taste of sunshine even on the greyest days. I can still feel the soft crumb on my tongue and the bright zing of the lemon that made my eyes squint in delight. Now, it’s my turn to share this cherished recipe with you.
Recipe Overview
- Prep Time: 30 minutes
- Cook Time: 50 minutes
- Total Time: 1 hour 20 minutes
- Servings: 8
- Yield: 1 cake
- Dietary Type: Not specified
Ingredients
For the Cake Batter:
- 200g self-raising flour
- 40g cocoa powder
- 230g caster sugar
- 4 large eggs
- 240g soft margarine
- 1/4 teaspoon vanilla extract
- 110g milk chocolate
- 2 teaspoons milk
For the Filling and Coating:
- 270g lemon curd (store-bought or homemade)
- 500g milk chocolate
Equipment Needed
- 2 x 8-inch round cake tins
- Greaseproof paper
- Large mixing bowl
- Electric mixer (handheld or stand mixer)
- Grater
- Spatula
- Knife
- Wire rack
- Glass bowl
- Saucepan
Instructions
- Preheat your oven to 160ºC/140ºC fan. This lower temperature ensures even baking and prevents the cake from drying out.
- Line the bottoms of two 8-inch round cake tins with greaseproof paper. This will make removing the cakes much easier after baking. You can also lightly grease the sides of the tins to prevent sticking.
- Grate 110g of milk chocolate using a box grater or a food processor. Set aside. This chocolate will be incorporated into the cake batter, adding depth of flavor and a delightful texture.
- In a large bowl, combine all the cake batter ingredients: 200g self-raising flour, 40g cocoa powder, 230g caster sugar, 4 large eggs, 240g soft margarine, 1/4 teaspoon vanilla extract, 2 teaspoons milk, and the grated chocolate.
- Using an electric mixer, start on a low speed to avoid a floury mess. Gradually increase the speed until all the ingredients are fully combined into a smooth, even batter. Be careful not to overmix, as this can result in a tough cake.
- Divide the cake batter evenly between the two prepared cake tins. Use a spatula to spread the batter to the edges of the tins, ensuring an even layer for consistent baking.
- Place the tins in the preheated oven and bake for 50 minutes.
- After 50 minutes, insert a skewer into the center of one of the cakes. If the skewer comes out clean, the cake is done. If it comes out with wet batter clinging to it, return the cakes to the oven and bake for an additional 10 minutes. Check again with a skewer.
- Once the cakes are cooked, remove them from the oven and let them cool in the tins for 20 minutes. This allows the cakes to settle and prevents them from breaking when you try to remove them.
- After 20 minutes, remove the cakes from their tins and carefully peel off the greaseproof paper. Place the cakes on a wire rack to cool completely. It’s crucial that the cakes are completely cool before assembling, or the lemon curd will melt.
- Once the cakes are completely cooled, use a long, serrated knife to level the top of one of the cakes. This will create a flat surface for the filling and ensure that the top layer sits evenly. You want to trim the top of the bottom cake.
- Spread the 270g lemon curd evenly over the leveled cake layer. Don’t be shy with the lemon curd – it’s the star of the show!
- Carefully place the second cake layer on top of the lemon curd filling.
- To prepare the chocolate coating, break the 500g milk chocolate into squares and place them in a heatproof glass bowl.
- Fill a saucepan with a small amount of water and bring it to a barely simmering point over low heat.
- Place the glass bowl of chocolate over the simmering water, ensuring that the bottom of the bowl doesn’t touch the water. This is called a double boiler.
- Melt the chocolate slowly and gently, stirring only occasionally. If you stir too vigorously or overheat the chocolate, it can seize and become grainy. Patience is key here!
- Once the chocolate is completely melted and smooth, remove the bowl from the heat.
- Pour the melted chocolate over the cake, ensuring it’s evenly coated. Use a spatula or knife to spread the chocolate down the sides of the cake.
- Let the chocolate cool and set completely before serving. This may take several hours at room temperature, or you can speed up the process by placing the cake in the refrigerator for a shorter period.
- Store the cake in an airtight container at room temperature for up to 3 days, or in the refrigerator for up to 5 days.
Expert Tips & Tricks
- For a richer chocolate flavor, use dark chocolate in the cake batter or for the coating.
- To prevent the cake from sticking, lightly grease and flour the cake tins in addition to lining them with parchment paper.
- If you don’t have self-raising flour, you can make your own by combining 1 cup (125g) all-purpose flour with 1 1/2 teaspoons baking powder and 1/4 teaspoon salt.
- To ensure the cakes bake evenly, use an oven thermometer to verify that your oven is accurately calibrated.
- If the chocolate coating is too thick, add a teaspoon of vegetable oil or shortening to thin it out.
- For a more decorative finish, drizzle melted white chocolate over the set chocolate coating.
Serving & Storage Suggestions
Serve this delightful chocolate cake with a scoop of vanilla ice cream or a dollop of whipped cream for an extra touch of indulgence. A sprinkle of powdered sugar or a few fresh berries also makes for an elegant presentation. The cake is best enjoyed at room temperature, allowing the flavors to fully develop. Store any leftover cake in an airtight container at room temperature for up to 3 days or in the refrigerator for up to 5 days. The cake can also be frozen for up to 2 months. Thaw completely in the refrigerator before serving.
Nutritional Information
| Nutrient | Amount per Serving | % Daily Value |
|---|---|---|
| Calories | 900.6 kcal | N/A |
| Calories from Fat | 451 g | 50% |
| Total Fat | 50.1 g | 77% |
| Saturated Fat | 18.9 g | 94% |
| Cholesterol | 110.7 mg | 36% |
| Sodium | 312.6 mg | 13% |
| Total Carbohydrate | 101.5 g | 33% |
| Dietary Fiber | 5.1 g | 20% |
| Sugars | 68.2 g | 272% |
| Protein | 13.4 g | 26% |
Note: Nutritional information is an estimate and may vary based on specific ingredients and portion sizes.
Variations & Substitutions
- Gluten-Free: Substitute the self-raising flour with a gluten-free self-raising flour blend. You may need to add a binder like xanthan gum to improve the texture.
- Vegan: Replace the eggs with flax eggs (1 tablespoon ground flaxseed mixed with 3 tablespoons water per egg). Use a vegan margarine and dairy-free milk chocolate.
- Different Citrus: Experiment with other citrus curds like orange or grapefruit for a unique flavor profile.
- Nutty Delight: Add chopped nuts like walnuts or pecans to the cake batter or sprinkle them over the chocolate coating.
- Spice it up: Add a pinch of cinnamon or chili powder to the cake batter for a warming kick.
FAQs (Frequently Asked Questions)
Q: Can I use store-bought lemon curd?
A: Yes, absolutely! Store-bought lemon curd is a convenient option and works perfectly in this recipe. Just be sure to choose a high-quality brand for the best flavor.
Q: How do I prevent the chocolate coating from cracking?
A: To prevent cracking, melt the chocolate slowly and avoid overheating it. Also, ensure that the cake is completely cool before applying the chocolate coating.
Q: Can I make the cake ahead of time?
A: Yes, you can bake the cake layers a day or two in advance. Wrap them tightly in plastic wrap and store them at room temperature. Assemble the cake with the lemon curd and chocolate coating on the day you plan to serve it.
Q: What if my chocolate seizes while melting?
A: If your chocolate seizes (becomes thick and grainy), try stirring in a teaspoon of vegetable oil or shortening. This can sometimes help to smooth it out.
Q: How can I tell if the cake is done without a skewer?
A: If you don’t have a skewer, you can gently press the center of the cake. If it springs back lightly, it’s likely done. The edges of the cake should also be slightly pulling away from the sides of the pan.
Final Thoughts
This Chocolate Cake with Lemon Curd Filling is more than just a dessert; it’s an experience. The contrasting flavors and textures create a symphony on your palate, leaving you wanting more with each bite. I encourage you to try this recipe and create your own cherished memories with it. Don’t be afraid to experiment with variations and make it your own. And, of course, I’d love to hear your feedback and see your creations. Perhaps serve this cake with a strong cup of coffee or a glass of dessert wine to truly elevate the experience! Happy baking!