
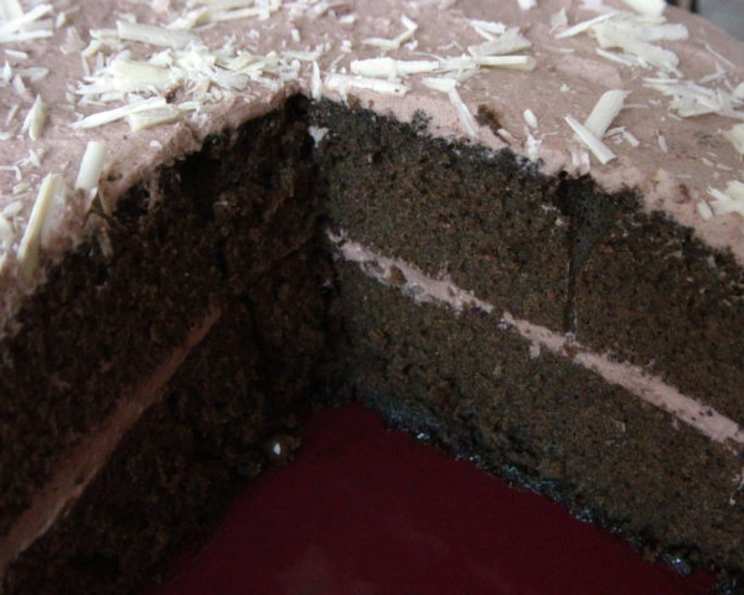
Chocolate Hot Milk Sponge: A Taste of Home
The aroma of chocolate, that unmistakable warmth that fills a kitchen, always transports me back to my grandmother’s cozy farmhouse. I can almost see her now, flour dusting her apron as she pulled a beautiful, deeply chocolate cake from her ancient oven. It wasn’t fancy, not like the elaborate pastries I create in my professional kitchen these days, but it was undeniably perfect – a Chocolate Hot Milk Sponge. That simple cake, slathered with a generous whipped cream frosting, was the embodiment of love and comfort, a tradition I’m thrilled to share with you.
Recipe Overview
- Prep Time: 20 minutes
- Cook Time: 10-15 minutes
- Total Time: 30-35 minutes
- Servings: 8-10
- Yield: 1 cake
- Dietary Type: Not Gluten-Free
Ingredients
For the Cake:
- 1 1/4 cups flour
- 1/2 cup cocoa
- 1 pinch salt
- 2 teaspoons baking powder
- 5 medium eggs
- 1 1/4 cups sugar
- 2 tablespoons olive oil
- 1 teaspoon vanilla
- 1 ounce dark chocolate, melted
- 1/2 cup milk
- 4 ounces butter
For the Filling Ingredients:
- 2 cups heavy whipping cream
- 4 tablespoons powdered sugar
- 4 tablespoons chocolate syrup, like Hershey’s
- 2 tablespoons cocoa
- 2 teaspoons vanilla
Equipment Needed
- Two 9-inch round cake pans
- Mixing bowls
- Electric mixer (handheld or stand mixer)
- Sifter
- Saucepan
- Measuring cups and spoons
- Rubber spatula or wooden spoon
- Cooling rack
Instructions
-
Begin by preparing the dry ingredients. Sift together the flour, cocoa, salt, and baking powder in a medium bowl. This ensures a light and airy texture for the cake. Set the mixture aside for later.
-
In a separate large bowl, using an electric mixer, beat the eggs and sugar together until the mixture is thick and creamy. This usually takes about 3-5 minutes. You’ll notice the mixture becomes lighter in color and significantly increases in volume.
-
Add the olive oil and vanilla to the egg mixture and beat for another 5 minutes. This extended beating incorporates air into the batter, contributing to the sponge-like texture of the cake.
-
Add the melted dark chocolate to the batter and mix until it’s evenly distributed. Be sure the chocolate isn’t too hot, as it could cook the eggs. If necessary, let it cool slightly before adding.
-
In a small saucepan, combine the milk and butter. Place the saucepan over medium heat and stir continuously until the butter is completely melted and the mixture comes to a boil. Remove the saucepan from the heat immediately.
-
Here’s the key to this unique cake: the hot milk mixture. Add the hot milk mixture alternately with the sifted dry ingredients to the egg mixture. Begin and end with the dry ingredients. This means adding about one-third of the dry ingredients, mixing until just combined, then adding half of the hot milk mixture, mixing again, then another third of the dry ingredients, the remaining milk, and finally the last of the dry ingredients. Be careful not to overmix; just combine until the batter is smooth. Important: Do not let the milk mixture cool before adding it to the batter.
-
Preheat your oven to 350°F (175°C). Grease and flour two 9-inch round cake pans. For an extra chocolatey flavor, dust the pans with cocoa instead of flour.
-
Pour the batter evenly into the prepared cake pans.
-
Bake for 10-15 minutes. The baking time can vary slightly depending on your oven, so start checking for doneness around 10 minutes. The cakes are done when a toothpick inserted into the center comes out clean or with a few moist crumbs attached. It is important to not overbake the cake, as the layers are relatively thin and can dry out easily.
-
Remove the cakes from the oven and let them cool in the pans for about 5-10 minutes before inverting them onto a cooling rack to cool completely.
-
While the cakes are cooling, prepare the filling. In a large bowl, beat the heavy whipping cream, powdered sugar, chocolate syrup, cocoa, and vanilla together until stiff peaks form. Be careful not to overwhip, or the cream will turn grainy.
-
Once the cakes are completely cool, it’s time to assemble. Place one cake layer on a serving plate or cake stand. Spread a generous layer of the whipped cream frosting over the top.
-
Carefully place the second cake layer on top of the frosting. Frost the entire cake with the remaining whipped cream.
-
For an extra touch of elegance, decorate the cake with white chocolate shavings, if desired.
Expert Tips & Tricks
- Melting the Chocolate: The best way to melt chocolate is gently, using a double boiler or in the microwave in short intervals (30 seconds at a time), stirring in between, to prevent burning.
- Measuring Flour: For the most accurate measurement of flour, use a kitchen scale. If measuring with cups, spoon the flour into the measuring cup and level it off with a knife. Avoid scooping directly from the flour container, as this can pack the flour and result in too much flour in the recipe.
- Hot Milk Secret: The hot milk helps to create a very tender and moist cake. Don’t skip this step!
- Even Layers: To ensure even cake layers, use a kitchen scale to weigh the batter before pouring it into the pans. Divide the batter equally between the two pans.
- Troubleshooting: If your cake layers are domed, it could be due to oven temperature fluctuations. Use an oven thermometer to ensure your oven is accurately calibrated.
Serving & Storage Suggestions
Serve the Chocolate Hot Milk Sponge chilled or at room temperature. It pairs perfectly with a scoop of vanilla ice cream, a dusting of cocoa powder, or a drizzle of chocolate sauce.
Store any leftover cake in an airtight container in the refrigerator. It will stay fresh for up to 3 days. The whipped cream frosting is best when fresh, so it’s not ideal for freezing.
Nutritional Information
Here is an estimation of the nutritional information per serving:
| Nutrient | Amount per Serving | % Daily Value |
|---|---|---|
| Calories | 450 kcal | 23% |
| Total Fat | 25g | 38% |
| Saturated Fat | 15g | 75% |
| Cholesterol | 150mg | 50% |
| Sodium | 200mg | 9% |
| Total Carbohydrate | 50g | 17% |
| Dietary Fiber | 2g | 8% |
| Sugars | 30g | N/A |
| Protein | 6g | 12% |
Please note that these are estimates and can vary based on specific ingredients and serving sizes.
Variations & Substitutions
- Gluten-Free: Substitute the all-purpose flour with a gluten-free all-purpose flour blend. Be sure to check that the blend contains xanthan gum or add it separately, as it helps to bind the ingredients in gluten-free baking.
- Dairy-Free: Replace the butter with a plant-based butter alternative and use a non-dairy milk, such as almond milk or soy milk. For the whipped cream frosting, use a dairy-free whipping cream alternative.
- Chocolate Intensity: Adjust the amount of cocoa powder in the cake and the chocolate syrup in the frosting to customize the chocolate intensity to your liking.
- Flavor Variations: Add a teaspoon of espresso powder to the cake batter for a mocha flavor. You could also add a pinch of cinnamon or nutmeg for a warmer, spicier flavor.
FAQs (Frequently Asked Questions)
Q: Can I make the cake layers ahead of time?
A: Yes, you can bake the cake layers a day in advance. Wrap them tightly in plastic wrap and store them at room temperature.
Q: Can I use a different type of chocolate?
A: Absolutely! While the recipe calls for dark chocolate, you can use milk chocolate or even white chocolate for a different flavor profile.
Q: What if I don’t have olive oil?
A: You can substitute the olive oil with another neutral-tasting oil, such as canola oil or vegetable oil.
Q: How do I prevent the cake from sticking to the pan?
A: Grease and flour the cake pans thoroughly. You can also use parchment paper to line the bottoms of the pans for extra insurance.
Q: Can I freeze the cake?
A: While freezing the entire cake frosted with whipped cream is not recommended, you can freeze the unfrosted cake layers. Wrap them tightly in plastic wrap and freeze for up to 2 months. Thaw completely before frosting.
Final Thoughts
This Chocolate Hot Milk Sponge is more than just a cake; it’s a slice of nostalgia, a taste of home, and a reminder that the simplest things in life are often the most satisfying. I encourage you to try this recipe, to adapt it to your own tastes, and to share it with those you love. Don’t be afraid to experiment with different flavors and decorations. And most importantly, enjoy the process of creating something delicious and memorable. I’d love to hear your feedback and see your creations! Perhaps you’ll pair it with a steaming mug of hot chocolate on a chilly evening, continuing the comforting tradition. Happy baking!