
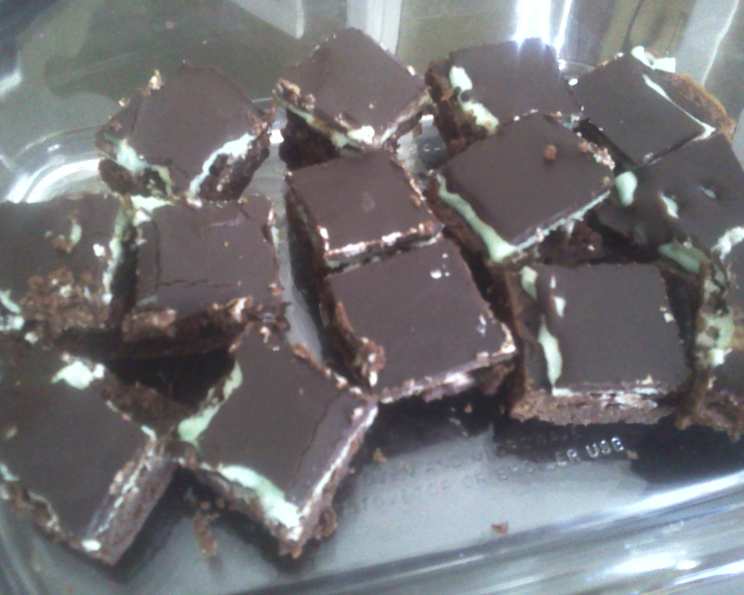
Chocolate Peppermint Bars: A Slice of Holiday Magic
The first time I tasted a chocolate peppermint bar was at my grandmother’s house during Christmas. The scent of peppermint mingled with warm chocolate filled the air, creating an irresistible invitation. I remember sneaking into the kitchen, drawn by the promise of that fudgy, minty goodness, and sneaking a bite before dinner. The cool, refreshing peppermint against the rich chocolate was pure holiday bliss, and these bars instantly became a symbol of warmth and family for me. To this day, the simple act of baking these bars transports me back to her cozy kitchen, surrounded by loved ones.
Recipe Overview
- Prep Time: 30 minutes (plus chilling time)
- Cook Time: 25 minutes
- Total Time: 55 minutes (plus chilling time)
- Servings: 24-30
- Yield: 1 8×8 inch pan
- Dietary Type: Vegetarian
Ingredients
For the Crust (Layer 1):
- 2 ounces unsweetened chocolate
- 1/2 cup butter (1 stick)
- 2 eggs
- 1 cup sugar
- 1/2 cup sifted flour
For the Peppermint Filling (Layer 2):
- 1 1/2 cups powdered sugar
- 3 tablespoons butter or margarine, softened
- 2-3 tablespoons cream
- 1 teaspoon peppermint extract
- Optional: Green food coloring
For the Chocolate Topping (Layer 3):
- 3 ounces unsweetened chocolate
- 3 tablespoons butter
Equipment Needed
- 8×8 inch baking pan
- Mixing bowls
- Double boiler or microwave-safe bowl
- Electric mixer or whisk
- Rubber spatula
- Measuring cups and spoons
- Parchment paper (optional, for lining the pan)
Instructions
- Preheat your oven to 350°F (175°C). If desired, line an 8×8 inch baking pan with parchment paper, leaving an overhang on the sides for easy removal of the finished bars.
- Prepare the crust: In a double boiler or microwave-safe bowl, melt 2 ounces of unsweetened chocolate and 1/2 cup of butter, stirring frequently until smooth. Be careful not to overheat the chocolate; melt it in short intervals in the microwave, stirring in between.
- In a separate mixing bowl, cream together 2 eggs and 1 cup of sugar until light and fluffy using an electric mixer or whisk.
- Add the melted chocolate mixture to the egg mixture, and mix well to combine.
- Sift 1/2 cup of flour into the chocolate mixture and mix until just combined. Do not overmix.
- Spread the batter evenly into the prepared 8×8 inch baking pan.
- Bake for 20 minutes at 350°F (175°C). Then, turn off the oven and bake for 5 minutes more. This helps to set the crust without overbaking it.
- Remove from the oven and let cool completely.
- Prepare the peppermint filling: In a mixing bowl, cream together 1 1/2 cups of powdered sugar and 3 tablespoons of softened butter (or margarine) until smooth and creamy.
- Blend in 2-3 tablespoons of cream and 1 teaspoon of peppermint extract. Add the cream gradually until you reach a smooth, spreadable consistency. The amount of cream needed may vary depending on the humidity. If desired, add a drop or two of green food coloring to tint the filling.
- Spread the peppermint filling evenly over the cooled crust layer.
- Refrigerate the pan until the peppermint layer is firm and chilled, about 30-60 minutes.
- Prepare the chocolate topping: In a double boiler or microwave-safe bowl, melt 3 ounces of unsweetened chocolate and 3 tablespoons of butter, stirring frequently until smooth.
- Pour the melted chocolate mixture evenly over the chilled peppermint layer.
- Chill the bars again until the chocolate topping is set, about 30-60 minutes.
- Cut the chilled bars into small squares. These bars are quite rich, so smaller squares are recommended. Use a warm, sharp knife for cleaner cuts.
Expert Tips & Tricks
- For a fudgier crust, slightly underbake it. The residual heat will continue to cook it as it cools.
- If you don’t have a double boiler, you can use a heatproof bowl set over a pot of simmering water, ensuring the bottom of the bowl doesn’t touch the water.
- To prevent the chocolate topping from cracking when cutting, dip your knife in hot water and wipe it dry between each cut.
- For a more intense peppermint flavor, add a few drops of peppermint oil to the filling instead of or in addition to the extract. Be careful, though, as peppermint oil is very potent.
- If the chocolate topping is too thick, add a teaspoon of vegetable oil to thin it out.
- If your peppermint layer is too soft, add more powdered sugar, a tablespoon at a time, until it reaches the desired consistency.
Serving & Storage Suggestions
Serve these chocolate peppermint bars chilled. They are perfect as an after-dinner treat, a holiday dessert, or a special snack. For an extra touch, dust the tops with powdered sugar or sprinkle with crushed peppermint candies.
Store leftover bars in an airtight container in the refrigerator for up to a week. They can also be frozen for up to 2 months. To freeze, wrap the bars individually in plastic wrap and then place them in a freezer-safe container. Thaw in the refrigerator before serving. They are best enjoyed cold, as they hold their shape and flavor better.
Nutritional Information
| Nutrient | Amount per Serving | % Daily Value |
|---|---|---|
| Calories | 170 kcal | – |
| Calories from Fat | 95 kcal | – |
| Total Fat | 10.6 g | 16% |
| Saturated Fat | 6.5 g | 32% |
| Cholesterol | 34.7 mg | 11% |
| Sodium | 67.2 mg | 2% |
| Total Carbohydrate | 19.7 g | 6% |
| Dietary Fiber | 1.1 g | 4% |
| Sugars | 15.8 g | – |
| Protein | 1.6 g | 3% |
Variations & Substitutions
- Gluten-Free: Substitute the all-purpose flour in the crust with a gluten-free flour blend.
- Dairy-Free: Use dairy-free butter alternatives and coconut cream or another non-dairy cream in the filling. For the chocolate layers, use dairy-free chocolate.
- Different Extracts: Try using vanilla extract or almond extract in the crust for a different flavor profile.
- Nutty Crust: Add chopped nuts like pecans or walnuts to the crust for added texture and flavor.
- Festive Colors: Use red food coloring in addition to green, or create a layered effect by tinting half the peppermint filling green and the other half red.
- Chocolate Chips: Add chocolate chips to the crust or sprinkle them on top of the chocolate topping before it sets.
FAQs (Frequently Asked Questions)
Q: Can I use semi-sweet chocolate instead of unsweetened chocolate?
A: While you can, the bars will be significantly sweeter. If you do, reduce the amount of sugar in the crust to compensate.
Q: My peppermint layer is too soft. What can I do?
A: Add more powdered sugar, a tablespoon at a time, until it reaches the desired consistency.
Q: How do I prevent the chocolate from cracking when cutting?
A: Dip your knife in hot water and wipe it dry between each cut. This helps to create clean slices.
Q: Can I make these bars ahead of time?
A: Yes, these bars can be made a day or two in advance. Store them in an airtight container in the refrigerator.
Q: Can I freeze these bars?
A: Yes, wrap the bars individually in plastic wrap and then place them in a freezer-safe container. Thaw in the refrigerator before serving.
Final Thoughts
These Chocolate Peppermint Bars are a delightful treat that’s sure to please any chocolate and peppermint lover. Don’t be intimidated by the multiple layers; the process is quite simple, and the result is well worth the effort. The combination of the rich chocolate crust, the creamy peppermint filling, and the smooth chocolate topping is simply irresistible. I encourage you to give this recipe a try and share your creations with friends and family. These bars are perfect for the holidays, but they’re also a delicious way to brighten any day. Enjoy!