
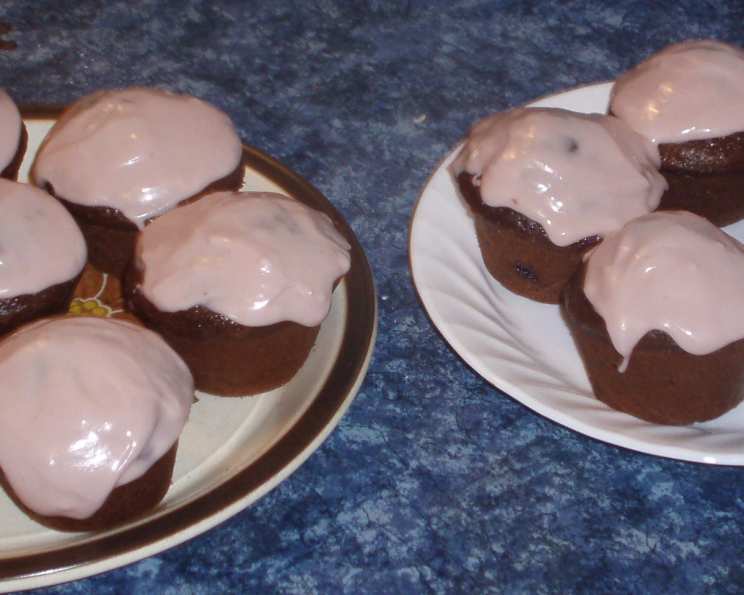
Chocolate Pudding Cupcakes: A Decadent Delight
I remember the first time I tasted a cupcake that genuinely surprised me. It wasn’t just sweet; it was deeply, intensely chocolatey, with a texture that was almost impossibly moist. It was at a bake sale, and the woman who made them told me her secret: chocolate pudding. That little tip unlocked a whole new world of cupcake possibilities, and this recipe is my perfected version of that life-changing moment. Each bite is a testament to the power of simple ingredients transformed into something truly special.
Recipe Overview
- Prep Time: 20 minutes
- Cook Time: 20 minutes
- Total Time: 40 minutes
- Yields: 12 cupcakes
- Serves: 12
- Dietary Type: Not specified
Ingredients
- 2 cups all-purpose unbleached flour
- 2 tablespoons premium dried cocoa
- 1/4 teaspoon salt
- 1 teaspoon baking powder
- 1/2 teaspoon baking soda
- 1/2 cup granulated sugar
- 3 ounces dark chocolate, chopped (use good quality chocolate for the best flavor)
- 1 cup milk (dairy or non-dairy works fine)
- 2 tablespoons cornstarch
- 2 tablespoons butter (salted or unsalted, your preference)
- 1/2 cup granulated sugar
- 1 cup milk (again, dairy or non-dairy)
- 2 eggs
- 1/4 cup canola oil
Icing
- 1 cup icing sugar
- 1/2 cup butter, softened
- 2 tablespoons milk
- 1 tablespoon seedless raspberry jam
Equipment Needed
- 12-cup muffin pan
- Medium mixing bowl
- Small saucepan
- Large mixing bowl
- Wire whisk
- Electric mixer (optional, for icing)
Instructions
-
Preheat your oven to 350 degrees F (175 degrees C). Grease a 12-cup muffin pan thoroughly. This step is crucial to prevent sticking. You can also use cupcake liners if preferred.
-
In a medium-sized mixing bowl, combine the dry ingredients: all-purpose flour, premium dried cocoa, salt, baking powder, and baking soda. Whisk these together to ensure they are evenly distributed. This will help with the texture of your cupcakes. Set aside.
-
Now, let’s make the chocolate pudding base. In a small saucepan, combine the chopped dark chocolate, milk, cornstarch, and butter. Place the saucepan over medium heat. Stir continuously until the chocolate and butter are completely melted and the mixture is smooth with no lumps of cornstarch remaining. It’s important to stir constantly to prevent the chocolate from burning.
-
Once the pudding is smooth, remove it from the heat and transfer it to a bowl. Cover the bowl with plastic wrap, pressing the wrap directly onto the surface of the pudding to prevent a skin from forming. Place the bowl in the refrigerator for about 15 minutes, or until the pudding is set. You want it to be firm enough to incorporate into the batter but not rock solid.
-
In a large mixing bowl, combine the wet ingredients: eggs, milk, and canola oil. Use a wire whisk to stir the ingredients together until the mixture is frothy. This helps to emulsify the mixture and gives the cupcakes a lighter texture.
-
Add the chilled chocolate pudding to the egg mixture. Stir until the pudding is just incorporated into the batter. Be careful not to overmix at this stage. Overmixing can lead to tough cupcakes.
-
Gradually add the dry ingredients to the wet ingredients. Stir until the batter is smooth and creamy. Again, avoid overmixing. Stop stirring as soon as the dry ingredients are fully incorporated.
-
Grease the prepared 12-cup muffin pan (even if you are using liners) and fill each muffin cup approximately 3/4 full with the batter. This will ensure the cupcakes rise nicely without overflowing.
-
Bake the cupcakes in the preheated oven for 20 minutes, or until a toothpick inserted into the center comes out clean. Check for doneness after 18 minutes, as baking times may vary depending on your oven.
-
Once baked, remove the muffin pan from the oven and allow the cupcakes to cool in the pan for 10 minutes. This allows them to set slightly before being removed.
-
After 10 minutes, carefully transfer the cupcakes to a serving plate or cooling rack to cool completely before icing.
-
Prepare the raspberry icing: In a mixing bowl, combine the softened butter and icing sugar. Beat with an electric mixer (or by hand) until light and fluffy. Gradually add the milk and seedless raspberry jam, mixing until smooth and well combined. If the icing is too thick, add a little more milk. If it’s too thin, add a little more icing sugar.
-
Once the cupcakes are completely cool, ice them generously with the raspberry icing. You can use a piping bag for a more decorative look, or simply spread the icing on with a knife.
Expert Tips & Tricks
- For an even richer chocolate flavor, add a tablespoon of instant espresso powder to the dry ingredients.
- If you don’t have seedless raspberry jam, you can use another flavor or omit it entirely for a plain vanilla buttercream.
- To prevent cupcakes from sticking, make sure your muffin pan is well-greased or use paper liners.
- For perfectly domed cupcakes, avoid opening the oven door during the first 15 minutes of baking.
- If the tops of the cupcakes start to brown too quickly, tent the muffin pan with foil.
- The chocolate pudding can be made a day in advance and stored in the refrigerator until ready to use.
Serving & Storage Suggestions
Serve the chocolate pudding cupcakes at room temperature for the best flavor and texture. The raspberry icing is best when freshly made, but the cupcakes themselves can be stored in an airtight container at room temperature for up to 3 days. For longer storage, refrigerate the cupcakes for up to a week, but be aware that the icing may become slightly firm. You can also freeze the un-iced cupcakes for up to 2 months. Thaw them completely at room temperature before icing.
Nutritional Information
| Nutrient | Amount per Serving | % Daily Value |
|---|---|---|
| Calories | 196.2 kcal | N/A |
| Calories from Fat | N/A | 47% |
| Total Fat | 10.2 g | 15% |
| Saturated Fat | 5 g | 24% |
| Cholesterol | 31.2 mg | 10% |
| Sodium | 125.9 mg | 5% |
| Total Carbohydrate | 24.8 g | 8% |
| Dietary Fiber | 1 g | 3% |
| Sugars | 13.7 g | 54% |
| Protein | 2.9 g | 5% |
Note: Nutritional information is an estimate and may vary based on specific ingredients used.
Variations & Substitutions
- Gluten-Free: Substitute the all-purpose flour with a gluten-free blend. Be sure to use a blend that contains xanthan gum for best results.
- Dairy-Free: Use non-dairy milk (almond, soy, or oat) and vegan butter in both the cupcakes and the icing.
- Different Frosting: Try a chocolate ganache, vanilla buttercream, or cream cheese frosting instead of the raspberry icing.
- Seasonal Flavors: Add a teaspoon of cinnamon or nutmeg to the dry ingredients for a festive fall flavor.
FAQs (Frequently Asked Questions)
Q: Can I use a different type of chocolate?
A: Yes, you can use milk chocolate or semi-sweet chocolate instead of dark chocolate. Just keep in mind that it will alter the overall sweetness and intensity of the chocolate flavor.
Q: Why is my chocolate pudding lumpy?
A: Lumpy pudding is usually caused by the cornstarch not dissolving properly. Make sure to whisk the cornstarch well with the cold milk before heating. Stir constantly while heating to prevent lumps from forming.
Q: Can I make these cupcakes ahead of time?
A: Yes, you can bake the cupcakes a day in advance. Store them in an airtight container at room temperature. Ice them just before serving.
Q: What can I do if my icing is too thin?
A: If your icing is too thin, gradually add more icing sugar, one tablespoon at a time, until it reaches your desired consistency.
Q: Can I freeze these cupcakes?
A: Yes, you can freeze the cupcakes (un-iced) for up to 2 months. Wrap them individually in plastic wrap and then place them in a freezer-safe bag or container. Thaw completely at room temperature before icing.
Final Thoughts
These Chocolate Pudding Cupcakes are more than just a dessert; they’re a celebration of simple pleasures and the magic that happens when you combine quality ingredients with a little bit of love. Don’t be afraid to experiment with different flavors and frostings to create your own signature cupcake. Whether you’re baking for a special occasion or just craving a sweet treat, I encourage you to give this recipe a try. And please, let me know how they turn out! I’d love to hear about your baking adventures and any creative twists you add along the way.