
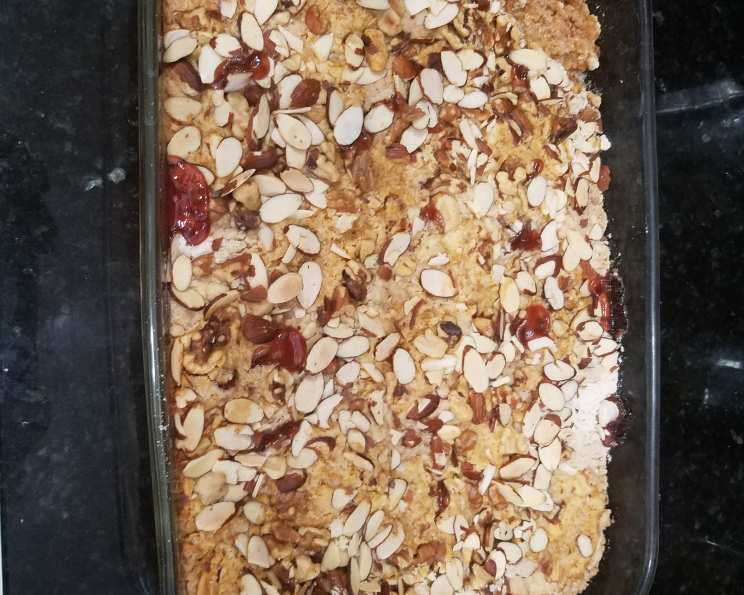
Christmas Dump Cake: Effortless Holiday Magic
Every year, the holiday season brings a flurry of cookie exchanges and elaborate desserts. But amidst the perfectly frosted sugar plums and meticulously decorated gingerbread houses, there’s always a place for a little rustic charm. I remember one Christmas Eve in particular, a last-minute invitation meant I had to whip up something quick. Digging through my pantry, I unearthed a can of cranberry sauce, a forlorn apple pie filling, and a box of yellow cake mix. The result? A surprisingly delicious, deeply comforting dump cake that became an instant family favorite. The beauty of this dessert lies in its simplicity – a testament to the fact that holiday magic doesn’t always require hours in the kitchen.
Recipe Overview
- Prep Time: 15 minutes
- Cook Time: 1 hour 15 minutes
- Total Time: 1 hour 30 minutes
- Servings: 12
- Yield: 1 (9×13 inch) cake
- Dietary Type: Vegetarian (can be made vegan with substitutions – see Variations)
Ingredients
- 1 (16 ounce) can cranberry sauce, whole
- 1 (21 ounce) can apple pie filling
- 1 (18 1/4 ounce) box yellow cake mix
- 1/2 cup (1 stick) butter
- 1/2 cup walnuts, chopped or 1/2 cup granola cereal
Equipment Needed
- 9×13 inch baking pan
- Oven
- Knife or pastry cutter
- Measuring cups
Instructions
-
Preheat your oven to 325°F (160°C). It’s crucial to get the oven temperature right for even baking.
-
Pour the cranberry sauce into an ungreased 9 x 13 inch pan. Spread the cranberry sauce evenly across the bottom of the pan as best as you can. This forms the base of your dump cake, so ensure good coverage.
-
Next, dump the apple pie filling into the pan on top of the cranberry sauce. Spread the apple pie filling evenly over the cranberry sauce layer. Try not to mix the layers too much; we want distinct flavors in each bite.
-
Now for the “dump” part. Evenly sprinkle the dry yellow cake mix over the apple pie filling. Aim for a thin, even layer across the entire surface. You can use a sifter or your fingers to break up any clumps and ensure uniform coverage.
-
Cut the butter into small pieces. Dot the top of the cake mix with the butter pieces, distributing them evenly. This helps the cake mix bake properly and creates a golden-brown crust. If you’re using vegan butter, make sure it’s well chilled for easier cutting.
-
Sprinkle the chopped walnuts or granola cereal evenly over the top of the cake. This adds a delightful crunch and nutty flavor to the finished dessert.
-
Bake in the preheated oven for 1 hour 15 minutes. The cake is done when the top is golden brown and bubbly, and a toothpick inserted into the center comes out clean. Be mindful of your oven; baking times can vary slightly.
-
Let the cake cool for 10 minutes before cutting it into squares. This allows the cake to set slightly, making it easier to serve.
-
Serve warm with a dollop of Cool Whip or a scoop of ice cream, if desired. The contrast of warm cake and cold topping is simply divine!
Expert Tips & Tricks
- Even Butter Distribution: Ensure the butter is evenly distributed across the cake mix. This will prevent dry patches and guarantee a moist, delicious cake. If you find that your butter isn’t melting evenly during baking, gently nudge the larger pieces with a fork to help them melt.
- Pre-chop Your Nuts: Save time by pre-chopping the walnuts or using pre-chopped nuts. Store them in an airtight container in the freezer to maintain freshness.
- Prevent Burning: If the top of the cake is browning too quickly, tent it with aluminum foil for the last 15-20 minutes of baking.
- Cake Mix Variations: Experiment with different cake mix flavors to change the profile of the dump cake. Spice cake mix or butter pecan can add a unique twist.
- Fruit Combinations: Get creative with your fruit fillings! Try a combination of peaches and blueberries, or cherries and chocolate chips.
Serving & Storage Suggestions
This Christmas Dump Cake is best served warm, straight from the oven. It’s delicious on its own, but even better with a scoop of vanilla ice cream or a dollop of whipped cream. A sprinkle of extra chopped nuts or a drizzle of caramel sauce can elevate the presentation.
To store leftovers, cover the cake tightly with plastic wrap or transfer it to an airtight container. It can be stored at room temperature for up to 2 days, in the refrigerator for up to 5 days, or in the freezer for up to 2 months. To reheat, simply microwave individual slices for 30-60 seconds, or warm the entire cake in a low oven (250°F/120°C) until heated through. If frozen, thaw overnight in the refrigerator before reheating.
Nutritional Information
| Nutrient | Amount per Serving | % Daily Value |
|---|---|---|
| Calories | 395.7 kcal | N/A |
| Calories from Fat | 142 g | 36% |
| Total Fat | 15.8 g | 24% |
| Saturated Fat | 5.8 g | 29% |
| Cholesterol | 21.2 mg | 7% |
| Sodium | 405.3 mg | 16% |
| Total Carbohydrate | 62.7 g | 20% |
| Dietary Fiber | 2 g | 7% |
| Sugars | 40.2 g | 160% |
| Protein | 3.3 g | 6% |
Note: Nutritional information is an estimate and may vary based on specific ingredients used.
Variations & Substitutions
- Vegan Version: Substitute the butter with a vegan butter alternative. Ensure it’s a brand that bakes well.
- Gluten-Free: Use a gluten-free yellow cake mix. You may need to adjust the baking time slightly, so keep an eye on the cake.
- Nut-Free: Omit the walnuts or granola. You can substitute with sunflower seeds or pumpkin seeds for a similar crunch.
- Different Fruit: Experiment with different fruit fillings. Cherry pie filling, blueberry pie filling, or even a combination of mixed berries would work well.
- Spice it Up: Add a teaspoon of cinnamon, nutmeg, or ginger to the cake mix for a warm, festive flavor.
- Chocolate Chip Addition: Sprinkle chocolate chips over the top of the cake before baking for an extra layer of indulgence.
FAQs (Frequently Asked Questions)
Q: Can I use a different size pan?
A: While a 9×13 inch pan is ideal, you can use an 8×8 inch pan. Keep in mind that the baking time may need to be increased slightly, and the cake will be thicker.
Q: Can I make this ahead of time?
A: Yes! You can assemble the dump cake ahead of time and store it in the refrigerator, unbaked, for up to 24 hours. Bake as directed when ready to serve.
Q: My cake is browning too quickly. What should I do?
A: Tent the cake loosely with aluminum foil for the last 15-20 minutes of baking to prevent the top from burning.
Q: Can I use fresh fruit instead of canned pie filling?
A: Absolutely! You’ll need about 4-5 cups of chopped fresh fruit. Toss it with a tablespoon of cornstarch and a squeeze of lemon juice before adding it to the pan.
Q: How do I know when the cake is done?
A: The cake is done when the top is golden brown and bubbly, and a toothpick inserted into the center comes out clean.
Final Thoughts
This Christmas Dump Cake is more than just a recipe; it’s a celebration of simplicity, resourcefulness, and the joy of sharing something delicious with loved ones. Don’t be afraid to experiment with different variations and make it your own. Whether you’re a seasoned baker or a kitchen novice, this cake is guaranteed to impress with minimal effort. So gather your ingredients, preheat your oven, and prepare to create a holiday dessert that will be remembered long after the last crumb is gone. Share your creations and feedback – happy baking!