
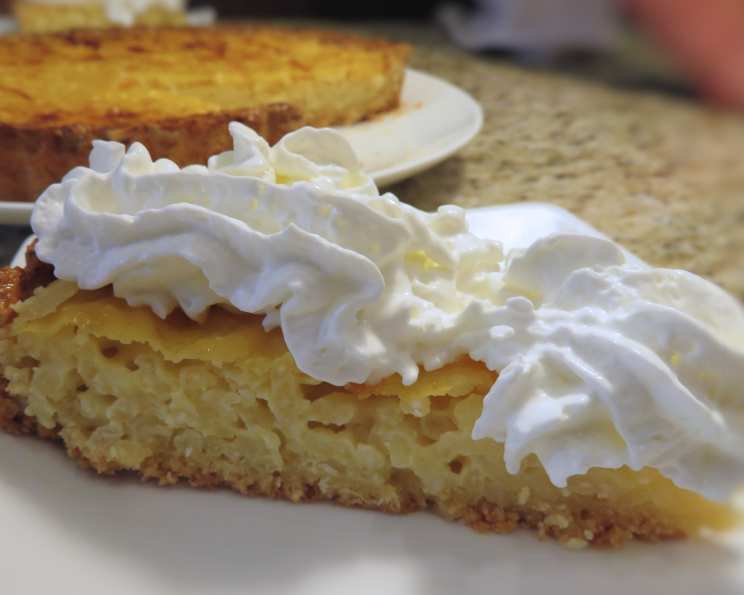
Classic Homemade Belgian Rice Pie (Rijsttaart): A Taste of Nostalgia
The scent of vanilla and warm milk always transports me back to my grandmother’s kitchen in Brussels. Every Sunday, without fail, she’d have a Rijsttaart – Belgian rice pie – cooling on the counter, its golden crust promising comfort and joy. The anticipation of that first bite, the creamy sweetness of the rice filling against the slightly yeasty crust, is a memory etched in my heart. This recipe is my attempt to recreate that feeling, to share a little piece of my heritage with you.
Recipe Overview
- Prep Time: 1 hour (includes dough resting)
- Cook Time: 35 minutes
- Total Time: 1 hour 35 minutes
- Servings: 6-8
- Yield: 1 pie
- Dietary Type: Not Gluten-Free
Ingredients
-
For the Crust:
- 5 ½ ounces (155 g, roughly 1 cup) plain flour
- ⅓ ounce (10 g, just under 1 tablespoon) fresh yeast
- ¼ cup (60 ml) whole milk, warmed until tepid
- 1 ½ ounces (40 g, just under 3 tablespoons) unsalted butter, cold
- 1 egg yolk
- Pinch of salt
- 2 teaspoons caster sugar
- Extra flour for dusting
-
For the Filling:
- 4 ½ ounces (125 g, just over 2/3 cup) long grain rice or arborio rice
- 2 ¾ cups (660 ml) whole milk
- 4 tablespoons cream
- 4 ounces (115 g, 1/2 cup) caster sugar, divided
- ½ vanilla bean, split open
- 2 teaspoons cornstarch or 2 teaspoons instant vanilla pudding
- 1 egg yolk
- 1 small egg
- Pinch of salt
Equipment Needed
- Blender or food processor
- Medium saucepan
- Small saucepan
- Whisk
- Tart tin (approximately 8 inches / 20 cm diameter)
- Rolling pin
- Pastry brush
Instructions
- Prepare the Crust: Warm ¼ cup (60 ml) of milk until tepid – it should feel just warmer than lukewarm, not hot. Be careful not to overheat it, as this can kill the yeast.
- In a blender or food processor, combine the plain flour, fresh yeast, cold unsalted butter, 1 egg yolk, a pinch of salt, and 2 teaspoons of the caster sugar.
- Pulse the mixture until it resembles dry crumbs.
- Pour in the tepid milk and pulse again until a firm dough forms. If the dough is too wet or sticky, add a little extra flour, a tablespoon at a time, until it comes together.
- Transfer the dough to a well-floured surface. Sprinkle the dough with a little extra flour and begin kneading for 3 to 4 minutes until smooth and elastic.
- Shape the dough into a ball and wrap it loosely in cling film. The dough will rise slightly, so don’t wrap it too tightly. Let it rest at room temperature for at least 30 minutes to activate the yeast. This step is crucial for a light and airy crust.
- Prepare the Rice Filling: While the dough is resting, combine the rice, 1 ¼ cups (300 ml) of milk, the vanilla bean (split open), a tiny pinch of salt, and 2 ounces (55 g) of caster sugar in a medium saucepan.
- Place the pan over medium-high heat and bring to a gentle boil. Then, reduce the heat to low and simmer the rice for about 20 minutes, or until it is almost tender and the milk has almost been absorbed. Stir frequently to prevent the rice from sticking and burning.
- Remove the pan from the heat and stir in the cream. This helps to keep the rice moist, preventing a dry pie. Remove the vanilla bean. Set the rice mixture aside.
- Prepare the Custard: Heat the remaining milk in a small saucepan until it is warm, but do not boil.
- In a separate saucepan, add 1 egg yolk and half of the remaining caster sugar.
- Whisk until the mixture is pale and creamy. Add the rest of the sugar and continue stirring for another minute.
- Place the saucepan over medium heat and gradually pour in the warm milk while stirring constantly. This prevents the egg yolk from scrambling.
- Once all the milk is added, add the cornstarch (or instant vanilla pudding).
- Bring the yolk mixture to a light boil for about 4 minutes, until it thickens and turns into a runny custard consistency. Stir regularly to prevent scorching.
- Add the warm custard to the cooked rice and stir well to combine.
- Assemble the Pie: Roll out the dough on a well-floured surface. The dough should be thin enough to easily fit into your tart tin.
- Carefully line a tart tin (approximately 8 inches / 20 cm in diameter) with the rolled-out dough, pressing it gently into the corners. Trim any excess dough from the edges.
- Scoop the creamy rice filling into the prepared crust and spread it evenly.
- In a small bowl, beat the remaining egg and use a pastry brush to brush the top of the rice filling with the egg wash. This will give the pie a beautiful golden-brown color.
- Bake: Bake the rice pie in a preheated oven at 356°F (180°C) for about 35 minutes, or until the crust is golden brown and the filling is set.
- Remove the freshly baked pie from the oven and let it cool in the tin for 10 minutes before slicing and serving.
Expert Tips & Tricks
- Yeast Activation: Make sure your milk isn’t too hot when activating the yeast. If it’s too hot, it will kill the yeast, and your crust won’t rise properly.
- Rice Doneness: The rice should be almost fully cooked during the simmering stage, as it will continue to cook in the oven. Undercooked rice will result in a grainy filling.
- Custard Consistency: Achieving the right custard consistency is key. You want it thick enough to bind the rice but not so thick that it becomes clumpy. Constant stirring is essential.
- Preventing a Soggy Crust: Blind baking the crust for 10 minutes before adding the filling can help prevent a soggy bottom.
- Cooling: Allowing the pie to cool slightly before slicing helps the filling set and makes it easier to cut clean slices.
Serving & Storage Suggestions
Serve the Belgian rice pie warm or at room temperature. A dusting of powdered sugar before serving adds a touch of elegance. It pairs wonderfully with a cup of coffee or tea.
To store leftovers, cover the pie tightly with plastic wrap or transfer it to an airtight container and refrigerate. It will last for up to 3 days in the refrigerator. You can reheat slices in the microwave or in a low oven until warmed through. Freezing is not recommended as the texture of the rice filling may change.
Nutritional Information
| Nutrient | Amount per Serving | % Daily Value |
|---|---|---|
| Calories | 420 kcal | 21% |
| Total Fat | 14.5g | 22% |
| Saturated Fat | 8.2g | 41% |
| Cholesterol | 115.4mg | 38% |
| Sodium | 65.1mg | 3% |
| Total Carbohydrate | 62.6g | 21% |
| Dietary Fiber | 1.1g | 4% |
| Sugars | 24.6g | 49% |
| Protein | 9.6g | 19% |
Note: Nutritional information is an estimate and may vary based on specific ingredients and portion sizes.
Variations & Substitutions
- Gluten-Free Crust: Substitute the plain flour with a gluten-free all-purpose flour blend for a gluten-free version. You may need to adjust the liquid content slightly.
- Dairy-Free: While it will slightly alter the flavor, use plant-based milk and cream substitutes to make this recipe dairy-free.
- Spice it Up: Add a pinch of cinnamon or nutmeg to the rice filling for a warmer, spicier flavor.
- Citrus Zest: Grated lemon or orange zest adds a bright, fresh note to the filling.
FAQs (Frequently Asked Questions)
Q: Can I use pre-made pie crust?
A: While a homemade crust is recommended for the best flavor and texture, you can use a store-bought pie crust to save time. Just make sure it is a good quality crust.
Q: Can I make this pie ahead of time?
A: Yes, you can make the rice filling a day in advance and store it in the refrigerator. However, it’s best to bake the pie on the day you plan to serve it for the freshest flavor and texture.
Q: What type of rice is best for this recipe?
A: Both long-grain rice and arborio rice work well in this recipe. Arborio rice will give the filling a creamier texture.
Q: How do I prevent the crust from burning?
A: If the crust starts to brown too quickly, you can tent it with foil during the last 10-15 minutes of baking.
Q: Can I add fruit to the filling?
A: While traditionally this is a rice-only pie, you could add a layer of cooked apples or pears to the bottom of the crust before adding the rice filling for a delicious variation.
Final Thoughts
This classic Belgian Rice Pie is more than just a dessert; it’s a comforting taste of home. Don’t be intimidated by the multiple steps – each one is simple and contributes to the overall deliciousness of the pie. I encourage you to try this recipe and share the joy of Rijsttaart with your loved ones. And, if you do, I’d love to hear about your experience. Perhaps pair it with a strong Belgian ale or a simple cup of coffee. Enjoy!