
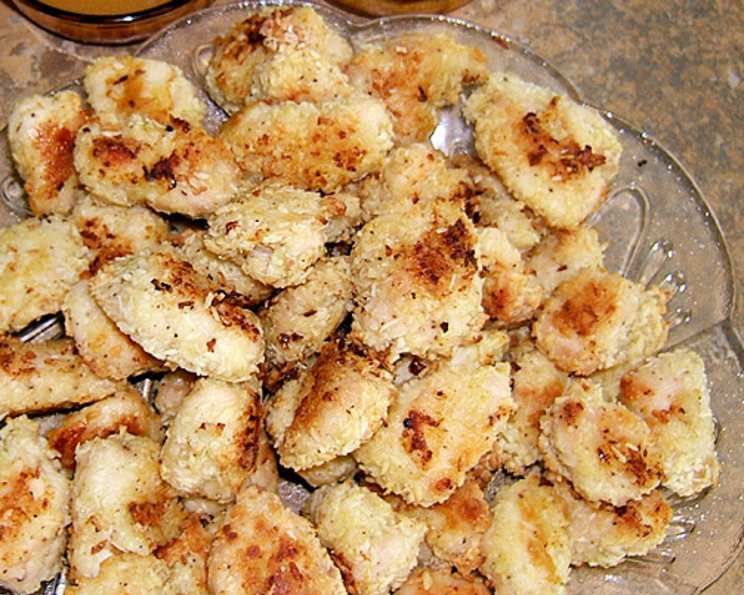
Crispy Coconut Chicken Bites: A Tropical Twist on a Classic
I still remember the first time I tasted coconut chicken. It wasn’t in some fancy restaurant, but at a potluck hosted by my aunt, a woman known for her adventurous spirit and love for all things tropical. The aroma alone, a sweet and savory dance of coconut and spices, drew me in. One bite, and I was hooked. The crispy, golden exterior gave way to tender, juicy chicken, the coconut providing a subtle sweetness that perfectly complemented the savory seasonings. It was a simple dish, but it transported me to sun-kissed beaches and swaying palm trees, a culinary escape I’ve craved ever since. This recipe captures that same magic, bringing a taste of the tropics to your table with every bite.
Recipe Overview
- Prep Time: 15 minutes
- Cook Time: 25 minutes
- Total Time: 40 minutes
- Servings: 2
- Yield: Varies depending on chicken size
- Dietary Type: Can be adapted to be Gluten-Free
Ingredients
- 1 lb chicken breast (cut into 2-inch or 3-inch pieces)
- 1 cup coconut (flaked or shredded, unsweetened recommended)
- ½ cup flour (all-purpose)
- ½ teaspoon salt
- ¼ teaspoon black pepper
- ¼ teaspoon garlic powder
- 1 egg, lightly beaten
- ⅓ cup butter, melted
Equipment Needed
- Baking sheet or baking pan
- Shallow dishes or bowls for breading
- Fork or whisk
- Measuring cups and spoons
Instructions
- Preheat your oven to 400°F (200°C). Ensure your oven rack is positioned in the center for even cooking.
- In a shallow dish or bowl, combine the flour, coconut, salt, pepper, and garlic powder. Mix thoroughly to ensure the spices are evenly distributed throughout the flour and coconut mixture. This is your breading station.
- In a separate shallow dish or bowl, lightly beat the egg with a fork or whisk until the yolk and white are fully combined.
- Now, it’s time to bread the chicken. Dip each piece of chicken into the beaten egg, ensuring it’s fully coated. Allow any excess egg to drip off before moving on to the next step.
- Immediately transfer the egg-coated chicken to the flour and coconut mixture. Press gently to ensure the chicken is completely coated with the mixture on all sides. Pack the breading firmly onto the chicken for a good, crispy crust.
- Place the breaded chicken bites onto a greased baking sheet or baking pan. Using parchment paper or a silicone baking mat under the chicken will prevent sticking and make cleanup easier.
- Drizzle the melted butter evenly over the chicken bites. This will help them to brown beautifully and add richness to the flavor.
- Bake for approximately 25 minutes, or until the chicken is browned and cooked through. Turn the chicken bites once halfway through the cooking time to ensure even browning on all sides.
- Check for doneness. The internal temperature of the chicken should reach 165°F (74°C). You can use a meat thermometer to check the temperature at the thickest part of a chicken bite. If you don’t have a thermometer, cut into a piece and check that the juices run clear and the meat is no longer pink.
- Remove from the oven and let the coconut chicken bites rest for a few minutes before serving.
Expert Tips & Tricks
- For extra crispy chicken: Before breading, lightly dredge the chicken pieces in cornstarch. This helps to dry the surface and allows the egg and coconut mixture to adhere better, resulting in a crispier crust.
- Toast the coconut: For a deeper, nuttier flavor, toast the shredded coconut in a dry skillet over medium heat before mixing it with the flour. Watch it carefully as it can burn quickly.
- Spice it up: Add a pinch of cayenne pepper or a dash of your favorite hot sauce to the flour mixture for a bit of heat.
- Don’t overcrowd the pan: Ensure the chicken bites are arranged in a single layer on the baking sheet. Overcrowding will steam the chicken instead of baking it, preventing the crust from getting crispy.
- Make ahead: You can prepare the breaded chicken bites ahead of time and store them in the refrigerator for up to 24 hours before baking. This is great for meal prep or when you’re short on time. Just be sure to cover them tightly to prevent the chicken from drying out.
Serving & Storage Suggestions
These Coconut Chicken Bites are delicious served hot straight from the oven. They pair well with a variety of dipping sauces, such as sweet chili sauce, plum sauce, apricot preserves, or even a simple honey mustard. For a complete meal, serve them with a side of rice, roasted vegetables, or a fresh salad.
Leftover coconut chicken bites can be stored in an airtight container in the refrigerator for up to 3-4 days. To reheat, bake them in a preheated oven at 350°F (175°C) for about 10-15 minutes, or until heated through. You can also reheat them in a microwave, but they may lose some of their crispiness. For longer storage, you can freeze the cooked chicken bites. Allow them to cool completely before placing them in a freezer-safe bag or container. They can be frozen for up to 2-3 months. Thaw them in the refrigerator overnight before reheating.
Nutritional Information
| Nutrient | Amount per Serving | % Daily Value |
|---|---|---|
| Calories | 1094.1 kcal | N/A |
| Calories from Fat | 736 kcal | N/A |
| Total Fat | 81.8 g | 125% |
| Saturated Fat | 50.7 g | 253% |
| Cholesterol | 319.5 mg | 106% |
| Sodium | 1046.4 mg | 43% |
| Total Carbohydrate | 34.6 g | 11% |
| Dietary Fiber | 7.9 g | 31% |
| Sugars | 3.3 g | N/A |
| Protein | 57 g | 114% |
Note: Nutritional information is an estimate and may vary based on specific ingredients and portion sizes.
Variations & Substitutions
- Gluten-Free: Substitute the all-purpose flour with a gluten-free blend, almond flour, or tapioca starch. Ensure your baking powder is also gluten-free.
- Dairy-Free: Replace the melted butter with melted coconut oil or another dairy-free butter alternative.
- Spicier: Add a pinch of red pepper flakes or a dash of cayenne pepper to the coconut mixture for a spicy kick. You can also use a spicy dipping sauce.
- Sweetener: A touch of brown sugar or maple syrup can be added to the coconut mixture to enhance the sweetness.
- Different Nuts: Experiment with different nuts like chopped almonds or macadamia nuts in addition to or instead of coconut.
- Air Fryer: These coconut chicken bites can be easily cooked in an air fryer. Preheat the air fryer to 375°F (190°C) and cook for 12-15 minutes, or until the chicken is cooked through and golden brown, flipping halfway through.
FAQs (Frequently Asked Questions)
Q: Can I use sweetened coconut instead of unsweetened?
A: Yes, but be mindful of the added sweetness. You may want to reduce or omit any additional sweetener in the recipe.
Q: How do I keep the coconut from burning while baking?
A: Ensure the oven temperature is accurate and keep an eye on the chicken during baking. If the coconut starts to brown too quickly, tent the baking sheet with foil.
Q: Can I use chicken thighs instead of chicken breasts?
A: Yes, chicken thighs will work well. They are generally more flavorful and will remain moist during baking. Adjust the cooking time as needed, ensuring the internal temperature reaches 165°F (74°C).
Q: What’s the best dipping sauce for coconut chicken bites?
A: Sweet chili sauce, plum sauce, apricot preserves, or honey mustard are all excellent choices. Experiment and find your favorite!
Q: Can I make these ahead of time and freeze them?
A: Yes, you can freeze the cooked chicken bites. Allow them to cool completely before placing them in a freezer-safe bag or container. They can be frozen for up to 2-3 months.
Final Thoughts
These Crispy Coconut Chicken Bites are more than just a recipe; they’re a mini-vacation for your taste buds. With their delightful blend of savory and sweet, they’re perfect for a quick weeknight dinner, a fun appetizer, or a crowd-pleasing party snack. I encourage you to try this recipe and experience the tropical flavors for yourself. Don’t be afraid to experiment with different variations and dipping sauces to create your own unique twist. And most importantly, share your creations with friends and family – good food is always best enjoyed together! I’d love to hear your feedback and see your culinary creations. Happy cooking!