
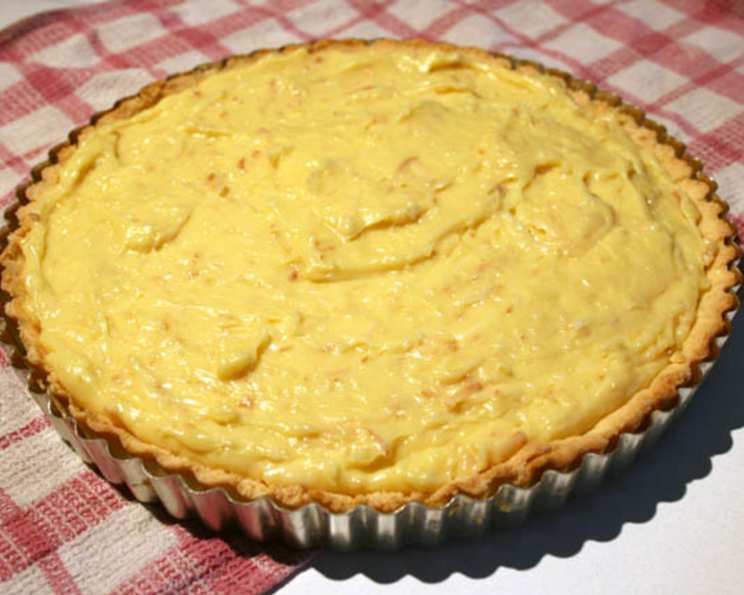
The Dreamy Delight of Coconut Cream Pie
My grandmother, bless her heart, wasn’t much of a baker, but there was one dessert she made that I still crave: her Coconut Cream Pie. It wasn’t fancy, and I’m pretty sure it came from a box mix, but the creamy coconut filling and the snowy peaks of whipped cream always felt like pure love on a plate. Every bite transported me back to her sunny kitchen, the scent of toasted coconut filling the air. I’ve spent years chasing that memory, tweaking and perfecting recipes until I finally captured the essence of her simple, comforting pie, but with a chef’s touch.
Recipe Overview
- Prep Time: 30 minutes
- Cook Time: 35 minutes
- Total Time: 2 hours 35 minutes (includes chilling time)
- Servings: 8
- Yield: 1 9-inch pie
- Dietary Type: Not Gluten-Free (can be adapted)
Ingredients
-
For the Pie Crust:
- 1 9-inch deep dish pie crust, baked per package instructions and cooled
-
For the Coconut Custard:
- 2/3 cup sugar
- 1/4 cup cornstarch
- 1 pinch salt
- 2 cups half-and-half
- 6 large eggs, at room temperature, lightly beaten
- 2 tablespoons unsalted butter
- 1 tablespoon vanilla extract
- 1 1/4 cups shredded coconut, lightly toasted (plus more for garnish)
-
For the Whipped Topping:
- 1 cup heavy cream, very cold
- 1 tablespoon powdered sugar
- 1 teaspoon vanilla extract
-
For the Garnish:
- 1/4 cup shredded coconut, lightly toasted
- 1/4 cup macadamia nuts, chopped and toasted (optional, other nuts can be substituted)
Equipment Needed
- 9-inch deep dish pie pan
- Heavy saucepan
- Whisk
- Fine-mesh sieve
- Mixing bowls
- Electric mixer
- Baking sheet
- Wire rack
- Plastic wrap
Instructions
-
Prepare the Coconut Custard: In a heavy saucepan, whisk together the sugar, cornstarch, and salt. This ensures there are no lumps of cornstarch in your final product.
-
Slowly stir in the half-and-half until the mixture is smooth. This gradual addition prevents clumping.
-
Bring the mixture to a boil over medium-high heat, stirring constantly. Constant stirring is key here to prevent the mixture from sticking to the bottom of the pan and burning.
-
Once boiling, lower the heat to maintain a simmer and cook, stirring constantly, for 2 to 3 minutes. The mixture will thicken during this time.
-
Place the egg yolks in a bowl and slowly whisk 1 cup of the hot cream mixture into them. This process is called tempering and prevents the eggs from scrambling when added to the hot saucepan. Whisk constantly and ensure the hot cream is added very slowly.
-
Pour the egg yolk mixture back into the saucepan and cook over low heat, stirring constantly, until the mixture thickens and just begins to steam, about 4 to 5 minutes. The custard is ready when it coats the back of a spoon.
-
Do not let the custard boil. Boiling will cause the eggs to curdle and ruin the texture.
-
Remove the pan from the heat and stir in the butter and vanilla extract until smooth. The butter adds richness and flavor, while the vanilla enhances the sweetness.
-
Strain the custard through a fine-mesh sieve into a bowl. This removes any lumps and ensures a smooth, silky texture.
-
Cover the custard with plastic wrap, pressing the wrap directly onto the surface to prevent a skin from forming.
-
Cool the custard on a wire rack until it reaches room temperature.
-
When the custard is cool, gently fold in the toasted shredded coconut. Reserve some coconut for garnish.
-
Chill the coconut custard in the refrigerator for at least 1 hour to allow it to set properly.
-
Make the Whipped Cream: In a chilled bowl, combine the very cold heavy cream, powdered sugar, and vanilla extract. The colder the cream and the bowl, the better the cream will whip.
-
Beat the mixture with an electric mixer on high speed until stiff peaks form. Be careful not to overwhip, as this can turn the cream into butter.
-
Assemble the Pie: Pour the cooled coconut custard into the prebaked and cooled pie crust.
-
Mound the whipped cream over the filling. You can use a piping bag for a more decorative look, or simply spread it with a spoon.
-
Sprinkle the top of the pie with the remaining toasted shredded coconut and chopped macadamia nuts (if using).
-
Chill the assembled pie for at least 2 hours before serving to allow the filling to set completely and the flavors to meld.
Expert Tips & Tricks
- Toasting the Coconut: Toasting the coconut brings out its nutty flavor and prevents it from becoming soggy in the filling. Spread the shredded coconut in an even layer on a baking sheet and bake in a preheated oven at 325°F (160°C) for 5-10 minutes, or until lightly golden, stirring every few minutes to prevent burning. Watch it closely, as coconut can burn quickly.
- Preventing a Soggy Crust: To prevent a soggy crust, you can brush the cooled baked pie crust with melted chocolate before adding the filling. The chocolate acts as a barrier against moisture.
- Room Temperature Eggs: Using room temperature eggs helps them incorporate more easily into the custard, resulting in a smoother texture. If you forget to take the eggs out of the refrigerator in advance, you can quickly warm them by placing them in a bowl of warm water for a few minutes.
- Make Ahead: The custard can be made up to 2 days in advance and stored in the refrigerator. The crust can also be baked a day in advance. Assemble the pie just before serving for the best texture and flavor.
- Coconut Extract Boost: For an even more intense coconut flavor, add a 1/2 teaspoon of coconut extract to the custard along with the vanilla extract.
Serving & Storage Suggestions
Coconut Cream Pie is best served chilled. Cut into slices and serve immediately. A dollop of extra whipped cream or a sprinkle of toasted coconut can be added as a final touch.
Leftovers should be stored in the refrigerator, covered, for up to 3 days. The whipped cream may deflate slightly over time. Freezing is not recommended, as the texture of the custard and whipped cream will change. This pie is best enjoyed fresh!
Nutritional Information
| Nutrient | Amount per Serving | % Daily Value |
|---|---|---|
| Calories | 550 kcal | 28% |
| Total Fat | 39g | 50% |
| Saturated Fat | 22g | 110% |
| Cholesterol | 229mg | 76% |
| Sodium | 257mg | 11% |
| Carbohydrates | 42g | 15% |
| Fiber | 1g | 4% |
| Sugars | 27g | – |
| Protein | 9g | 18% |
Note: Nutritional information is an estimate and may vary based on specific ingredients and portion sizes.
Variations & Substitutions
- Gluten-Free: Use a gluten-free pie crust to make this recipe gluten-free. Many store-bought options are available.
- Dairy-Free: Substitute coconut milk for the half-and-half and use a vegan butter alternative. Be aware that the texture may be slightly different.
- Chocolate Coconut Cream Pie: Add 1/4 cup of cocoa powder to the custard mixture along with the sugar and cornstarch for a chocolate twist.
- Tropical Twist: Add a layer of diced mango or pineapple to the bottom of the pie crust before pouring in the custard.
- Nutty Delight: Use a variety of toasted nuts, such as pecans, walnuts, or almonds, for the garnish.
FAQs (Frequently Asked Questions)
Q: Can I use store-bought whipped cream?
A: While homemade whipped cream tastes best, you can use store-bought whipped cream in a pinch. Just be sure to use a high-quality brand.
Q: Why is my custard lumpy?
A: Lumpy custard is usually caused by not stirring constantly or by letting the custard boil. Make sure to stir the custard continuously over low heat and avoid boiling. Straining the custard through a fine-mesh sieve can also help remove lumps.
Q: How do I prevent the pie crust from shrinking?
A: To prevent the pie crust from shrinking, dock the crust with a fork before baking and use pie weights or dried beans to weigh it down during baking. This helps the crust maintain its shape.
Q: Can I freeze the unbaked pie crust?
A: Yes, you can freeze the unbaked pie crust. Wrap it tightly in plastic wrap and then in foil. It can be frozen for up to 2 months. Thaw completely before baking.
Q: How do I know when the custard is done cooking?
A: The custard is done when it thickens enough to coat the back of a spoon. You should be able to draw a line through the custard on the back of the spoon, and the line should remain visible. Also, it should reach a temperature of 170-175°F (77-79°C) on a thermometer.
Final Thoughts
Coconut Cream Pie is more than just a dessert; it’s a nostalgic journey back to simpler times, filled with warmth and comfort. This recipe, adapted and refined over the years, brings together the best of traditional flavors with a chef’s attention to detail. I encourage you to try this recipe and share the joy of homemade Coconut Cream Pie with your loved ones. It’s the perfect ending to any meal and a guaranteed crowd-pleaser. Don’t be afraid to experiment with variations and make it your own. And please, let me know what you think. I’d love to hear about your Coconut Cream Pie adventures! Perhaps serve it with a cup of freshly brewed coffee or a sweet dessert wine for an even more indulgent experience. Happy baking!