
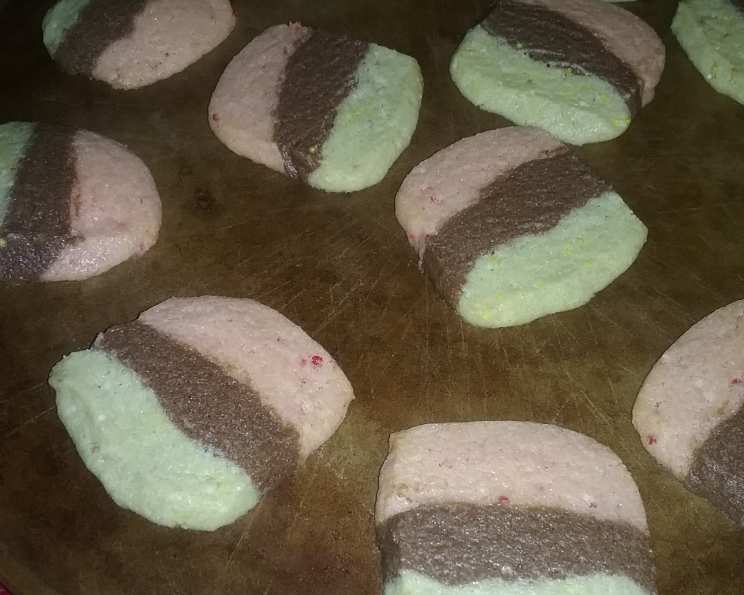
Holiday Magic in Every Bite: Colored Striped Icebox Cookies
The first time I made these cookies, I was barely tall enough to see over the kitchen counter. My grandmother, a whirlwind of flour and laughter, guided my small hands as we carefully layered the colored doughs. The anticipation of seeing those vibrant stripes after the chilling and slicing was almost unbearable. The aroma of butter and peppermint filled the air, instantly transporting me to Christmas mornings filled with joy and family. Even now, decades later, the scent of these cookies baking evokes that same warm, fuzzy feeling. They’re more than just cookies; they’re edible memories.
Recipe Overview
- Prep Time: 30 minutes
- Cook Time: 10-12 minutes
- Total Time: 2 hours 42 minutes (includes chilling time)
- Servings: 48-56 cookies
- Dietary Type: Vegetarian
Ingredients
- 1 cup unsalted butter, softened (NO SUBSTITUTIONS)
- 1 1/2 cups sugar
- 1 large egg
- 2 1/2 cups flour
- 1 1/2 teaspoons baking powder
- 1/4 teaspoon salt
- 2 tablespoons finely crushed peppermint candies
- 1-2 drops red food coloring
- 1 ounce semisweet chocolate, melted (1 square)
- 1 tablespoon multicolored sugar nonpareils
- 1-2 drops green food coloring
Equipment Needed
- 9x5x3-inch loaf pan
- Wax paper or parchment paper
- Large mixing bowl
- Small mixing bowls (3)
- Electric mixer (optional, but helpful)
- Plastic wrap
- Cutting board
- Large knife
- Baking sheets
Instructions
-
Prepare the Loaf Pan: Line a 9x5x3-inch loaf pan with wax paper or parchment paper. Try to smooth out most of the wrinkles for a cleaner cookie shape. Set aside.
-
Cream Butter and Sugar: In a large mixing bowl, cream together the softened butter and sugar until light and fluffy. This is a crucial step for achieving a tender cookie.
-
Incorporate the Egg: Beat in the egg until well combined. Make sure the egg is at room temperature for easier incorporation.
-
Combine Dry Ingredients: In a separate bowl, whisk together the flour, baking powder, and salt. This ensures even distribution of the leavening agent and prevents pockets of saltiness.
-
Gradually Add Dry Ingredients: Gradually beat the dry ingredients into the creamed mixture until just combined. Be careful not to overmix, as this can lead to tough cookies.
-
Divide the Dough: Divide the dough into thirds, placing each portion in its own small bowl.
-
Flavor and Color the Doughs:
- Peppermint Dough: Add the crushed peppermint candies and red food coloring to one third of the dough. Mix well, using your hands if necessary, to evenly distribute the color.
- Chocolate Dough: Add the melted semisweet chocolate to another third of the dough. Mix well, again using your hands if needed, until the chocolate is fully incorporated.
- Nonpareil Dough: Add the multicolored sugar nonpareils and green food coloring to the last third of the dough. Mix thoroughly.
-
Layer the Doughs in the Pan: Spread the red (peppermint) dough evenly on the bottom of the lined loaf pan. Next, spread the chocolate dough on top of the peppermint layer. Finally, spread the green (nonpareil) dough on top of the chocolate layer.
-
Chill the Dough: Cover the loaf pan tightly with plastic wrap and chill in the refrigerator for at least 2 hours, or in the freezer for 1 hour. This allows the dough to firm up, making it easier to slice. The longer chill time also enhances the flavor.
-
Preheat the Oven: When the dough is chilled and firm, preheat your oven to 375°F (190°C).
-
Slice the Dough: Remove the dough from the loaf pan, using the wax paper or parchment paper to lift it out. Lay the loaf flat on a cutting board, just as it was positioned in the pan. Use a large, sharp knife to cut the dough down the middle lengthwise. Now, cut each strip into 1/4″ – 1/2″ slices across, creating the signature striped effect.
-
Bake the Cookies: Place the sliced cookies 1 inch apart on lightly greased baking sheets. Bake at 375°F (190°C) for 10-12 minutes, or until the edges just begin to brown.
-
Cool and Enjoy: Let the cookies cool on the baking sheets for a few minutes before transferring them to a wire rack to cool completely.
Expert Tips & Tricks
- Butter Consistency: The butter must be softened but not melted. If it’s too soft, the cookies will spread too much during baking.
- Color Intensity: Adjust the amount of food coloring to achieve your desired shade. Gel food coloring is recommended for more vibrant colors.
- Preventing Sticking: If the dough sticks to the knife while slicing, try chilling it for a slightly longer period. You can also lightly dust the knife with flour.
- Even Baking: Ensure even baking by using a baking sheet that is not warped or damaged. Rotate the baking sheets halfway through baking for consistent results.
- Customization: Feel free to experiment with different flavors and colors to match any holiday or occasion. Almond extract, lemon zest, or different types of chocolate can add unique twists.
Serving & Storage Suggestions
These cookies are perfect served with a glass of cold milk, a cup of hot cocoa, or a festive holiday beverage. They also make a wonderful addition to a cookie platter or a homemade gift.
- Storage: Store the cooled cookies in an airtight container at room temperature for up to 5 days.
- Freezing: For longer storage, freeze the cookies in an airtight container for up to 2 months. Thaw at room temperature before serving. You can also freeze the sliced, unbaked cookies. Bake them directly from frozen, adding a minute or two to the baking time.
Nutritional Information
| Nutrient | Amount per Serving | % Daily Value |
|---|---|---|
| Calories | 86.4 kcal | N/A |
| Calories from Fat | 38 g | 45% |
| Total Fat | 4.3 g | 6% |
| Saturated Fat | 2.7 g | 13% |
| Cholesterol | 14 mg | 4% |
| Sodium | 25.8 mg | 1% |
| Total Carbohydrate | 11.4 g | 3% |
| Dietary Fiber | 0.3 g | 1% |
| Sugars | 6.3 g | 25% |
| Protein | 0.9 g | 1% |
Note: Nutritional information is an estimate and may vary based on specific ingredients and preparation methods.
Variations & Substitutions
- Gluten-Free: Substitute the all-purpose flour with a gluten-free flour blend. Be sure to use a blend that contains xanthan gum for binding.
- Vegan: While the original recipe isn’t easily adapted to be vegan due to the butter content, you could experiment with a vegan butter substitute. The taste and texture might be altered.
- Flavor Extracts: Add a few drops of almond, vanilla, or lemon extract to the dough for a subtle flavor enhancement.
- Nut Additions: Incorporate finely chopped nuts, such as pecans or walnuts, into one or more of the dough layers.
FAQs (Frequently Asked Questions)
Q: Can I use different colors for the stripes?
A: Absolutely! Get creative and customize the colors to match any holiday, theme, or personal preference.
Q: Can I make the dough ahead of time?
A: Yes, the dough can be made up to 2 days in advance and stored in the refrigerator. Just make sure to wrap it tightly in plastic wrap.
Q: Why is my dough crumbly?
A: Overmixing the dough or using too much flour can result in a crumbly texture. Be gentle when mixing and measure the flour accurately.
Q: My cookies spread too much while baking. What did I do wrong?
A: This could be due to using butter that was too soft, not chilling the dough enough, or overmixing the dough. Make sure the butter is softened but still firm, chill the dough for at least 2 hours, and avoid overmixing.
Q: Can I freeze the baked cookies?
A: Yes, baked cookies freeze very well. Store them in an airtight container for up to 2 months.
Final Thoughts
These Colored Striped Icebox Cookies are a delightful way to add a touch of whimsy and flavor to any occasion. The process of creating those vibrant stripes is both fun and rewarding, and the resulting cookies are sure to impress. Don’t be afraid to experiment with different flavors and colors to make them your own. I encourage you to gather your loved ones, put on some festive music, and create a batch of these cookies together. Share them with friends, family, or even a neighbor – spreading joy, one striped cookie at a time!