
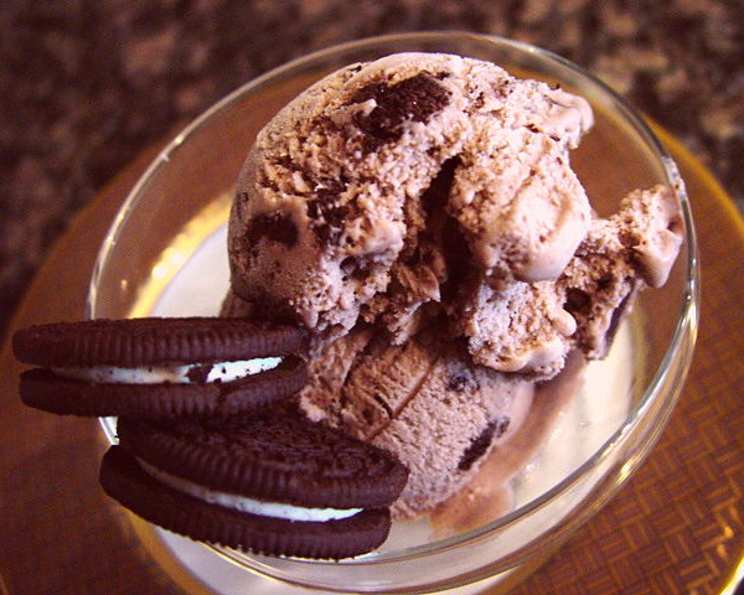
Cookies and Cream Ice Cream: A Classic Reimagined
The scent of vanilla hangs in the air, mingling with the unmistakable aroma of chocolate cookies. As a child, the anticipation of that first spoonful of cookies and cream ice cream was almost unbearable. My grandma, with her mischievous grin, would always save the biggest chunks of Oreo for me, knowing my love for the contrast of creamy vanilla and the satisfying crunch of chocolate. This ice cream, a tribute to those cherished memories, captures the essence of that simple joy.
Recipe Overview
- Prep Time: 20 minutes
- Cook Time: 15 minutes
- Chill Time: 1 hour
- Freeze Time: According to ice cream maker instructions
- Yields: Approximately 3 1/2 – 4 quarts
- Serves: 32
- Dietary Type: Not suitable for dairy-free or vegan diets
Ingredients
- 2 1⁄4 cups sugar
- 1⁄2 cup flour
- 2 tablespoons flour
- 1⁄2 teaspoon salt
- 5 cups milk
- 4 eggs, beaten
- 2 cups half-and-half
- 4 cups whipping cream
- 2 tablespoons vanilla extract
- 25 chocolate sandwich style cookies, crumbled (like Oreos)
Equipment Needed
- Large saucepan
- Whisk
- Measuring cups and spoons
- Large bowl
- Wire whisk
- Ice cream maker
Instructions
- In a large saucepan, combine sugar, flour (both 1/2 cup and 2 tablespoons), and salt. Make sure to whisk these dry ingredients together well to avoid lumps later on.
- Gradually stir in milk. It’s important to add the milk slowly, whisking constantly, to ensure a smooth, lump-free mixture.
- Cook over medium heat for approximately 15 minutes, or until the mixture has thickened. It’s crucial to stir constantly during this process. This prevents scorching on the bottom of the pan and promotes even thickening. The mixture is ready when it coats the back of a spoon.
- In a separate bowl, gradually stir in 1 cup of the hot mixture into the beaten eggs. This process is called tempering. Adding the hot mixture slowly prevents the eggs from scrambling and ensures a smooth, creamy custard.
- Add the egg mixture back into the remaining hot mixture in the saucepan, stirring constantly.
- Cook for 1 minute, continuing to stir constantly. This short cooking time ensures the eggs are fully incorporated and the custard reaches the desired consistency. Then, remove from heat.
- Refrigerate for at least 1 hour, or preferably longer. This chilling period is essential for the custard to cool completely and allows the flavors to meld together. A colder base freezes more efficiently in the ice cream maker, resulting in a smoother texture.
- In a large bowl, combine whipping cream, half-and-half, and vanilla extract.
- Add the chilled custard mixture to the cream mixture, stirring with a wire whisk to combine thoroughly. Ensure everything is well incorporated for a consistent flavor profile.
- Just before freezing, gently fold in the crumbled cookies. Be careful not to overmix, as you want to maintain distinct cookie chunks.
- Freeze as directed, following your ice cream maker manufacturer’s instructions. The churning process incorporates air into the mixture, creating a light and fluffy texture.
Expert Tips & Tricks
- For a more intense vanilla flavor, try using vanilla bean paste instead of extract.
- If you prefer a smoother ice cream, you can pulse the cookies in a food processor before adding them. But I find the chunks of cookies are what make it irresistible.
- Make the custard base a day ahead for an even richer flavor.
- If your custard develops any lumps, strain it through a fine-mesh sieve before chilling.
- Don’t overfill your ice cream maker, as this can prevent it from churning properly.
- For the creamiest texture, store your finished ice cream in an airtight container in the back of your freezer, where the temperature is most consistent.
Serving & Storage Suggestions
Serve your cookies and cream ice cream immediately after churning for the softest texture. For a firmer scoop, transfer it to an airtight container and freeze for a few hours. Garnish with extra crumbled cookies, a drizzle of chocolate sauce, or a sprig of fresh mint for an elegant presentation.
Store leftover ice cream in an airtight container in the freezer for up to 2 weeks. After this time, the texture may start to deteriorate due to ice crystal formation. Avoid temperature fluctuations by keeping the container tightly sealed and storing it in the back of the freezer.
Nutritional Information
Estimated per serving, based on recipe yield of 32 servings.
| Nutrient | Amount per Serving | % Daily Value |
|---|---|---|
| Calories | 258 kcal | – |
| Calories from Fat | 146 kcal | – |
| Total Fat | 16.3 g | 25% |
| Saturated Fat | 9.3 g | 46% |
| Cholesterol | 78.1 mg | 26% |
| Sodium | 119.1 mg | 4% |
| Total Carbohydrate | 24.9 g | 8% |
| Dietary Fiber | 0.3 g | 1% |
| Sugars | 17.4 g | – |
| Protein | 3.8 g | 7% |
Daily values are based on a 2,000 calorie diet.
Variations & Substitutions
- Different Cookies: While Oreo cookies are the classic choice, feel free to experiment with other chocolate sandwich cookies or even other types of cookies entirely, like chocolate chip or peanut butter cookies.
- Extract Variations: Try using almond extract or peppermint extract in addition to the vanilla for a unique flavor profile.
- Chocolate Chunks: For an even more decadent treat, add chocolate chunks or mini chocolate chips along with the crumbled cookies.
- Coffee Infusion: For a mocha twist, dissolve instant coffee granules in the milk before cooking the custard.
- Reduced Sugar: Reduce the sugar to 2 cups for a less sweet version.
FAQs (Frequently Asked Questions)
Q: Why is it important to cook the custard base?
A: Cooking the custard base helps to thicken the mixture and create a smoother, creamier texture in the final ice cream. It also pasteurizes the eggs, making the ice cream safer to eat.
Q: Can I use a different type of milk?
A: While whole milk is recommended for the best texture, you can experiment with lower-fat milk. However, the resulting ice cream may not be as rich or creamy.
Q: How long can I store homemade ice cream?
A: Homemade ice cream is best enjoyed within 2 weeks of making it. After this time, the texture may deteriorate due to ice crystal formation.
Q: My ice cream is too hard after freezing. What can I do?
A: Allow the ice cream to sit at room temperature for 5-10 minutes before scooping to soften it slightly. Also, ensure your freezer isn’t set too cold.
Q: Can I make this recipe without an ice cream maker?
A: While an ice cream maker is recommended for the best texture, you can try the no-churn method. Pour the mixture into a freezer-safe container and freeze for 3-4 hours, stirring every 30 minutes to break up ice crystals. However, the texture will be denser and less creamy.
Final Thoughts
This cookies and cream ice cream recipe is more than just a dessert; it’s a journey back to the simple pleasures of childhood. The creamy vanilla base, punctuated by the satisfying crunch of crumbled chocolate cookies, is a combination that never fails to delight. I encourage you to try this recipe and create your own unforgettable memories. Feel free to experiment with different variations and share your feedback. For an extra special treat, pair it with a warm chocolate brownie or a glass of cold milk.