
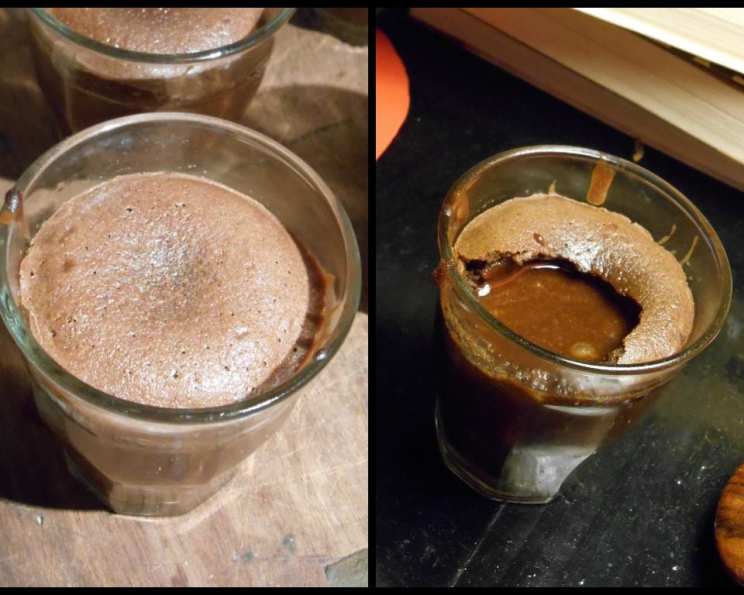
Individual Chocolate Lava Cakes: A Decadent Delight
The memory of my first molten chocolate cake is etched in my mind. It was a chilly autumn evening, and the warm, gooey center of the cake mingled with the cold vanilla ice cream in the most glorious way. The intense chocolate flavor was pure comfort, and it felt like a little hug in a dessert. From that moment on, I was determined to master the art of creating these individual pockets of chocolate heaven. And after a couple of attempts (and a few slightly too molten disasters), I finally nailed it! These individual chocolate lava cakes are now a staple in my repertoire.
Recipe Overview
- Prep Time: 20 minutes
- Cook Time: 8-10 minutes
- Total Time: 30 minutes
- Servings: 8
- Yield: 8 cakes
- Dietary Type: Not specified
Ingredients
- 6 eggs
- 1 1/2 cups granulated sugar
- 1 1/4 cups chopped bittersweet chocolate (at least 72% cacao)
- 11 tablespoons softened butter (plus more for greasing molds)
- 1 1/4 cups cake flour
- Powdered sugar (for dusting tops)
Equipment Needed
- Double boiler (or saucepan and heatproof bowl)
- Electric mixer with whisk attachment (optional)
- 8 (4-ounce) ramekins or tins with a smaller bottom than top rim
- Oven
- Measuring cups and spoons
Instructions
-
Preheat your oven to 425°F (220°C). It’s crucial to have the oven at the right temperature for the perfect molten center.
-
Prepare a double boiler. Fill a saucepan about halfway with water and bring it to a gentle simmer. Place a larger metal or glass bowl on top of the saucepan, ensuring the bottom of the bowl doesn’t touch the water. This prevents the chocolate from scorching.
-
In the double boiler, combine the softened butter and chopped bittersweet chocolate. Stir continuously until the butter and chocolate are completely melted and smooth. Remove the bowl from the heat and set aside to cool slightly. This cooling period is important to prevent the eggs from cooking when added later.
-
In a separate bowl, using an electric mixer with a whisk attachment (or a wire whisk), whip the eggs and granulated sugar together until they reach the ribbon stage. This means the mixture should be pale, thick, and leave a ribbon-like trail when the whisk is lifted. This incorporates air, giving the cakes a light and airy texture.
-
Slowly pour the slightly cooled chocolate and butter mixture into the egg mixture, gently combining until just incorporated. Be careful not to overmix, as this can deflate the batter.
-
Add the cake flour to the batter and gently fold it in until just combined. Again, avoid overmixing to keep the cakes tender.
-
Generously grease eight 4-ounce ramekins or tins with soft butter. Pay close attention to the bottoms and sides, ensuring every area is completely covered. This step is crucial for easy release after baking.
-
Pour the batter into the prepared ramekins, filling them just below the rim.
-
At this point, you can chill the filled ramekins for at least 1 hour if you plan to bake them immediately. Alternatively, you can store them in the refrigerator for up to a week before baking. This make-ahead option is fantastic for dinner parties or when you need to prep in advance.
-
Bake in the preheated 425°F (220°C) oven for 8 minutes, plus or minus a minute depending on your oven. The key is to watch them closely. You’re looking for the outer edge to be set and slightly risen above the rim, while the center remains soft and squishy. Undercooking is better than overcooking!
-
Let the cakes rest for about 2 minutes after baking. This allows them to set up slightly, making them easier to unmold.
-
To unmold, carefully run a thin knife or spatula around the edge of each cake. Place a plate over the ramekin and invert it, gently tapping to release the cake. Be careful not to tear the outer cake.
-
Sprinkle the tops with powdered sugar if desired. Serve immediately with a scoop of vanilla ice cream, whipped cream, or enjoy them plain.
Expert Tips & Tricks
- Use high-quality chocolate: The flavor of the chocolate is the star of the show, so opt for a good-quality bittersweet chocolate with at least 72% cacao.
- Don’t overmix the batter: Overmixing develops gluten, which can result in a tougher cake.
- Grease the ramekins thoroughly: This is essential for preventing the cakes from sticking. You can also dust the greased ramekins with cocoa powder for an extra layer of insurance.
- Watch the baking time carefully: The baking time is crucial for achieving the perfect molten center. Start checking the cakes after 7 minutes and adjust the time as needed. Every oven is different.
- For an extra touch of flavor: Add a pinch of sea salt to the batter or a teaspoon of espresso powder to enhance the chocolate flavor.
Serving & Storage Suggestions
Serve these individual chocolate lava cakes immediately for the best experience. The warm, gooey center is at its peak right after baking. They are delicious on their own, but even better with a scoop of vanilla ice cream, fresh berries, or a dollop of whipped cream.
If you have any leftover cakes (though that’s unlikely!), you can store them in the refrigerator for up to 2 days. Reheat them gently in the microwave for about 15-20 seconds before serving. The center may not be as molten as when they were freshly baked, but they’ll still be delicious. These are best eaten the day they’re baked.
Nutritional Information
| Nutrient | Amount per Serving | % Daily Value |
|---|---|---|
| Calories | 416 kcal | N/A |
| Total Fat | 19.6 g | 30% |
| Saturated Fat | 11.2 g | 56% |
| Cholesterol | 181.5 mg | 60% |
| Sodium | 193.5 mg | 8% |
| Total Carbohydrate | 54.5 g | 18% |
| Dietary Fiber | 0.4 g | 1% |
| Sugars | 37.6 g | N/A |
| Protein | 6.6 g | 13% |
Note: Nutritional information is an estimate and may vary based on specific ingredients and portion sizes.
Variations & Substitutions
- Gluten-free: Substitute the cake flour with a gluten-free all-purpose flour blend.
- Dairy-free: Use a dairy-free butter substitute and a dairy-free chocolate.
- Different chocolate: Experiment with different types of chocolate, such as milk chocolate or dark chocolate with a higher percentage of cacao.
- Flavor additions: Add a teaspoon of vanilla extract, almond extract, or orange zest to the batter for a different flavor profile.
FAQs (Frequently Asked Questions)
Q: Can I make the batter ahead of time?
A: Yes, you can prepare the batter and store it in the refrigerator for up to a week before baking. Just make sure to bring it to room temperature before baking.
Q: How do I know when the cakes are done?
A: The outer edges should be set and slightly risen, while the center remains soft and squishy. A toothpick inserted into the edge should come out clean, but the center should still be gooey.
Q: What if my cakes stick to the ramekins?
A: Make sure you grease the ramekins very thoroughly with softened butter. You can also dust them with cocoa powder for extra insurance.
Q: Can I freeze the baked cakes?
A: While possible, it’s not recommended to freeze baked lava cakes as the texture can change upon thawing. It’s best to enjoy them fresh.
Q: What’s the best way to serve these cakes?
A: Serve them immediately while they’re still warm and the center is molten. Pair them with vanilla ice cream, whipped cream, or fresh berries for a complete dessert experience.
Final Thoughts
These individual chocolate lava cakes are a guaranteed crowd-pleaser. With their rich, intense chocolate flavor and gooey molten center, they’re the perfect ending to any meal. Don’t be intimidated by the slightly fussy nature of the recipe – once you get the hang of it, you’ll be whipping these up in no time. So go ahead, preheat your oven, and get ready to indulge in a little bit of chocolate heaven. And don’t forget to let me know how they turn out! I’d love to hear about your experience. Perhaps pair it with a dessert wine for an extra layer of sophistication. Happy baking!