
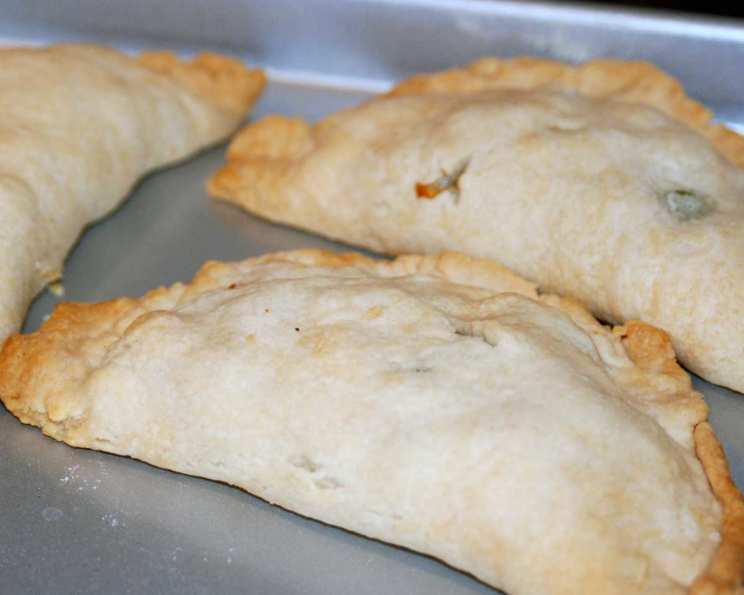
Cornish Pasties Filling (Omaha Steaks Inspired)
The memory of my grandmother’s kitchen is forever intertwined with the aroma of savory pastries baking in the oven. Growing up, she’d often make Cornish pasties, her hands deftly crimping the edges of the dough, creating those iconic, hearty pockets filled with tender meat and vegetables. Each bite was a warm hug, a connection to our family’s Cornish heritage, and a delicious reminder of her love. While she always made her own pastry, I often cheat and use store-bought to focus on what really matters – the savory filling.
Recipe Overview
- Prep Time: 15 minutes
- Cook Time: Varies based on pasty recipe
- Total Time: Varies based on pasty recipe
- Servings: 6
- Yield: Filling for 6 pasties
- Dietary Type: Not specified (adjust according to pastry used)
Ingredients
- 1 lb beef tenderloin steak, finely diced
- ¾ potato, grated
- 1 cup carrot, grated (sweet potato can be substituted)
- ¼ cup onion, grated
- ½ cup frozen peas
- 1 tablespoon cold water
- Salt, to taste
- Pepper, to taste
Equipment Needed
- Mixing Bowl
- Grater
- Pastry dough & rolling pin (for completing the pasties)
- Biscuit cutter (optional, if using pre-made dough)
Instructions
- In a large mixing bowl, combine the diced beef tenderloin, grated potato, grated carrot (or sweet potato), grated onion, and frozen peas.
- Add the cold water to the bowl. This helps to bind the ingredients together slightly.
- Season the mixture generously with salt and pepper. Don’t be shy! The filling needs to be well-seasoned to flavor the entire pasty.
- Thoroughly mix all the ingredients together, ensuring that the seasoning is evenly distributed throughout the mixture.
- Prepare your pasty dough. If using refrigerated pie crusts, unroll them and lightly flour your work surface. Use a rolling pin to slightly thin the dough. Cut out circles using a biscuit cutter or a knife. (If you have a traditional pasty recipe, follow that instead).
- Spoon the beef and vegetable mixture into the center of each pastry circle.
- Fold the pastry over to form a half-moon shape. Crimp the edges tightly to seal, using a fork or your fingers. Make sure there are no gaps to prevent the filling from leaking during baking.
- Follow the baking instructions in your pasty recipe (or on your refrigerated dough package). Typical baking temperatures range from 375°F (190°C) to 400°F (200°C), and baking times can range from 30-45 minutes, depending on the size and thickness of your pasties.
- Bake until the pasties are golden brown and the filling is cooked through. A good way to check is to insert a knife into the filling – it should be hot.
Expert Tips & Tricks
- Beef Selection: While beef tenderloin is called for in this recipe, you can experiment with other cuts of beef. Chuck steak, finely diced, can also work well and offers a more budget-friendly option. Just be sure to cook the pasties long enough to ensure the beef is tender.
- Grate Expectations: Grating the potato, carrot, and onion is key to ensuring they cook evenly within the pasty. If the vegetables are in larger chunks, they may not fully cook through before the pastry is done.
- Sweet Potato Boost: Swapping regular carrots for sweet potatoes adds a touch of sweetness and a beautiful orange hue to the filling. It’s a great way to subtly change the flavor profile.
- Seasoning Savvy: Don’t underestimate the importance of proper seasoning. Taste the filling mixture before assembling the pasties and adjust the salt and pepper accordingly. A dash of Worcestershire sauce or a pinch of dried thyme can also enhance the savory flavor.
- Egg Wash Shine: Before baking, brush the pasties with an egg wash (1 egg beaten with 1 tablespoon of water or milk) to give them a beautiful golden-brown sheen.
- Consider adding a small knob of butter to each pasty before sealing; this adds richness and flavor.
Serving & Storage Suggestions
Serve the Cornish pasties warm, straight from the oven. They are delicious on their own, or you can accompany them with a side of HP sauce or a simple green salad.
Leftover pasties can be stored in the refrigerator for up to 3 days. To reheat, warm them in a 350°F (175°C) oven for about 15-20 minutes, or until heated through. You can also microwave them, but the pastry may become a bit soggy.
For longer storage, pasties can be frozen for up to 2 months. Wrap them individually in plastic wrap and then place them in a freezer-safe bag or container. To reheat from frozen, bake them in a preheated oven at 350°F (175°C) for about 30-40 minutes, or until heated through.
Nutritional Information
Note: Nutritional information can vary depending on the specific ingredients used and the size of the pasties.
| Nutrient | Amount per Serving (estimated) | % Daily Value (estimated) |
|---|---|---|
| Calories | 300 kcal | 15% |
| Total Fat | 15g | 23% |
| Saturated Fat | 6g | 30% |
| Cholesterol | 75mg | 25% |
| Sodium | 300mg | 13% |
| Total Carbohydrate | 25g | 9% |
| Dietary Fiber | 3g | 12% |
| Sugars | 5g | N/A |
| Protein | 15g | 30% |
Variations & Substitutions
- Vegetarian Option: Substitute the beef with an equal amount of finely diced mushrooms or lentils for a vegetarian pasty.
- Spicy Kick: Add a pinch of red pepper flakes or a finely chopped chili pepper to the filling for a touch of heat.
- Root Vegetable Medley: Experiment with different root vegetables, such as parsnips or turnips, in addition to or in place of the carrots or potatoes.
- Crust Customization: For a gluten-free option, use a gluten-free pie crust recipe or a store-bought gluten-free crust.
- Add herbs: Consider adding fresh or dried herbs to the filling, such as thyme, rosemary, or parsley.
FAQs (Frequently Asked Questions)
Q: Can I make the filling ahead of time?
A: Yes, you can prepare the filling up to 24 hours in advance and store it in the refrigerator. This can save you time on the day you plan to bake the pasties.
Q: Can I use frozen vegetables instead of fresh?
A: While fresh vegetables are preferable, you can use frozen vegetables if necessary. Just be sure to thaw them completely and drain any excess liquid before adding them to the filling.
Q: How do I prevent the bottom of the pasties from getting soggy?
A: To prevent soggy bottoms, bake the pasties on a baking sheet lined with parchment paper. You can also place a baking stone in the oven to help distribute heat evenly.
Q: What’s the best way to crimp the edges of the pasties?
A: The traditional Cornish crimp is a side crimp, but any tight seal will do. Use your fingers to fold the dough over the filling and then crimp the edges tightly with a fork or your fingers. You can also brush the edges with a little water or egg wash to help them seal.
Q: Can I add gravy to the filling?
A: While traditionally the pasty is filled with only the raw ingredients which then create their own “gravy,” a small amount of thick gravy can be added to the filling before sealing the pasties. Be careful not to add too much, as it can make the filling too wet and cause the pastry to become soggy.
Final Thoughts
This Cornish pasties filling recipe, inspired by Omaha Steaks, is a delightful way to experience a taste of culinary heritage. Whether you choose to make your own pastry from scratch or use store-bought dough, the savory combination of tender beef, hearty vegetables, and simple seasonings is sure to please. Don’t be afraid to experiment with different variations and substitutions to create a pasty that is uniquely your own. Gather your ingredients, roll up your sleeves, and get ready to enjoy a warm, comforting, and truly satisfying meal! I hope you create memories as warm as the ones I have, baking with my grandmother.