
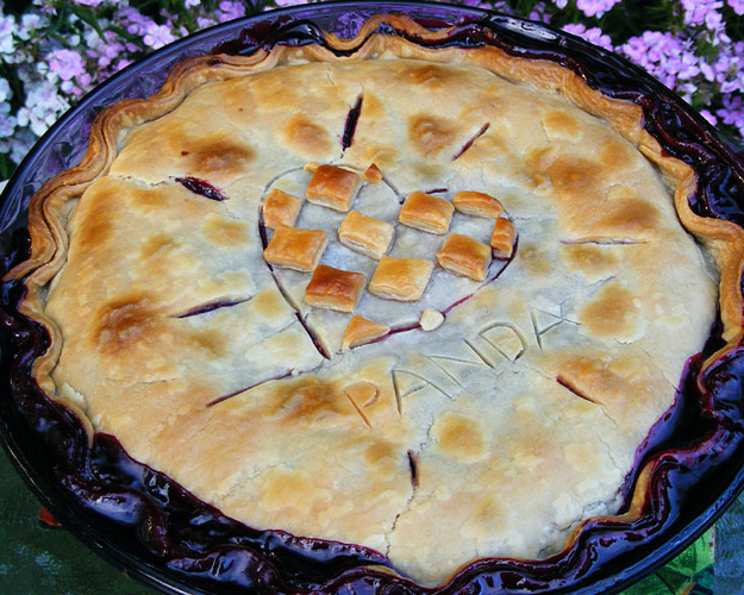
Country-Style Fresh Blackberry Pie
The memory is as clear as the summer sky that day. I was perched on a sun-drenched ladder, reaching into a thorny thicket, my fingers stained purple with the sweet juice of wild blackberries. My grandmother, her face framed by a wide-brimmed straw hat, hummed a gentle tune as she expertly navigated the brambles below, her own basket overflowing. That afternoon, the air in her kitchen was thick with the warm, comforting aroma of baking pie – a fragrance that instantly transports me back to those cherished summer days. This recipe attempts to capture that same rustic charm and simple, honest flavor.
Recipe Overview
- Prep Time: 30 minutes
- Cook Time: 40-45 minutes
- Total Time: 1 hour 15 minutes
- Servings: 6-8
- Yield: 1 9-inch pie
- Dietary Type: Vegetarian
Ingredients
- 2 pints fresh blackberries
- 1 tablespoon fresh lemon juice
- 1 cup sugar
- ¼ cup flour
- ¼ teaspoon cinnamon
- ⅛ teaspoon nutmeg
- 2 tablespoons butter, cut into small pieces
- 1 (9 inch) double crust pie crusts, store-bought or homemade
- Milk, for brushing
- 1 tablespoon sugar, plus more for sprinkling, if desired
- Vanilla ice cream (optional), for serving
Equipment Needed
- 9-inch pie plate
- Colander
- Paper towels
- Large bowl
- Small bowl
- Plastic wrap
- Rolling pin
- Cookie sheet
- Aluminum foil
- Wire rack
Instructions
-
Begin by gently rinsing the blackberries in a colander, then drying them thoroughly on paper towels. This step is crucial to prevent a soggy pie.
-
Prepare your pie crust. Whether you opt for store-bought or homemade, roll out enough pie dough to line a regular (not deep-dish) 9-inch pie plate. Once the plate is lined, cover it with plastic wrap and refrigerate to keep it cold. Wrap the remaining dough and chill it as well. A cold crust is key to preventing shrinkage during baking.
-
In a large bowl, place the rinsed and dried blackberries. Sprinkle them with fresh lemon juice. The lemon juice brightens the berries’ flavor and balances the sweetness. Set the bowl aside.
-
In a small bowl, combine 1 cup of sugar with the flour, cinnamon, and nutmeg. Mix well to ensure even distribution of the spices.
-
Sprinkle the sugar-flour mixture over the blackberries. Gently toss the berries, being careful not to crush them. The flour will help thicken the juices as the pie bakes.
-
Remove the dough-lined pie plate from the refrigerator and uncover it. Carefully pour the blackberry mixture into the pie plate. Be sure to slightly mound the berries in the center, as they will settle during baking.
-
Evenly dot the top of the berries with the cut-up butter. The butter adds richness and helps create a tender crust.
-
Roll out the second portion of pie dough to an 11-inch circle. This will be your top crust.
-
Using a sharp knife, cut a 2-inch cross in the center of the top crust. Fold back each center point to create a steam vent. These vents are essential for allowing steam to escape during baking, preventing the crust from becoming soggy.
-
Place the top crust over the filling.
-
Fold the edge of the top crust under the edge of the bottom crust and press together to seal. This creates a neat and secure edge that will prevent the filling from leaking.
-
Stick four toothpicks down through the points (folds) of the steam vents on the top crust to hold in place while baking.
-
Crimp the edge of the pie crust all the way around for a decorative finish.
-
Brush the top crust with milk and sprinkle with sugar. The milk helps the crust brown beautifully, and the sugar adds a touch of sweetness and sparkle.
-
Place the pie on a foil-lined cookie sheet to catch any spills.
-
Cover the edge of the pie crust with foil to prevent over-browning.
-
Bake in a preheated 400-degree oven for 40-45 minutes, or until the juices are bubbling through the steam vent and the crust is golden brown. Keep an eye on it, as baking times can vary depending on your oven.
-
Remove the pie to a wire rack to cool.
-
Remove the toothpicks.
-
Serve warm with vanilla ice cream, if desired.
Expert Tips & Tricks
- For a richer crust, use butter-flavored shortening in addition to butter.
- If the crust is browning too quickly, tent the entire pie with foil after the initial edge protection.
- To prevent a soggy bottom crust, blind bake the bottom crust for 10 minutes before adding the filling.
- For a more intense blackberry flavor, consider adding a tablespoon of blackberry liqueur to the filling.
- If your berries are particularly tart, you may need to add a bit more sugar to the filling. Taste the mixture before pouring it into the crust to adjust the sweetness to your liking.
Serving & Storage Suggestions
This blackberry pie is best served warm, either on its own or with a scoop of creamy vanilla ice cream. The contrast of the warm pie and cold ice cream is simply divine. Leftovers can be stored at room temperature for up to 2 days, or in the refrigerator for up to 4 days. To reheat, simply warm in a preheated 350-degree oven for 10-15 minutes, or until heated through. You can also freeze the baked pie for up to 3 months. Thaw completely in the refrigerator before reheating.
Nutritional Information
(Estimated per serving)
| Nutrient | Amount per Serving | % Daily Value |
|---|---|---|
| Calories | 420 kcal | 21% |
| Total Fat | 20g | 31% |
| Saturated Fat | 12g | 60% |
| Cholesterol | 30mg | 10% |
| Sodium | 250mg | 10% |
| Total Carbohydrate | 60g | 20% |
| Dietary Fiber | 5g | 20% |
| Sugars | 30g | |
| Protein | 4g | 8% |
Variations & Substitutions
- Gluten-Free Crust: Use a store-bought or homemade gluten-free pie crust.
- Different Berries: Substitute raspberries, blueberries, or a mixed berry combination for the blackberries.
- Vegan Option: Use a vegan pie crust and replace the butter with a vegan butter substitute.
- Spice Variations: Experiment with different spices, such as ground ginger or cardamom, in addition to or instead of the cinnamon and nutmeg.
- Lattice Top: Instead of a full top crust, create a lattice top for a more rustic look.
FAQs (Frequently Asked Questions)
Q: Can I use frozen blackberries in this recipe?
A: Yes, you can use frozen blackberries. However, be sure to thaw them completely and drain off any excess liquid before using them in the filling.
Q: How do I prevent the bottom crust from becoming soggy?
A: Blind baking the bottom crust for a few minutes before adding the filling can help prevent a soggy bottom. Also, be sure to dry the blackberries thoroughly after rinsing them.
Q: Can I make the pie crust ahead of time?
A: Absolutely! You can make the pie crust up to 2 days in advance and store it in the refrigerator, wrapped tightly in plastic wrap.
Q: My pie crust is browning too quickly. What should I do?
A: Cover the edges of the pie crust with foil to prevent over-browning. If the entire crust is browning too quickly, tent the entire pie with foil.
Q: Can I freeze this blackberry pie?
A: Yes, you can freeze the baked pie for up to 3 months. Thaw completely in the refrigerator before reheating.
Final Thoughts
I hope this recipe brings as much joy to your kitchen as it does to mine. There’s something truly special about a homemade pie, especially one filled with the simple goodness of fresh blackberries. Don’t be afraid to experiment with variations and make it your own. If you create your own version of this recipe, I would love to hear from you in the comments below. And why not serve this pie alongside a generous dollop of freshly whipped cream, or a scoop of homemade lavender ice cream? Enjoy!