
Sun-Kissed Jewels: Drying Blood Plums for Intense Flavor
The scent always takes me back. As a child, summers in my grandmother’s orchard were defined by the deep, almost wine-like aroma of blood plums ripening on the branch. Their vibrant ruby flesh stained our fingers as we devoured them, juice dripping down our chins. While most were destined for her famous plum preserves, a select few were carefully dried in the sun, transforming into intensely flavored, chewy delights – nature’s candy. This recipe captures that simple magic, allowing you to preserve the taste of summer and enjoy it year-round.
Recipe Overview
- Prep Time: 30 minutes
- Cook Time: 24 hours
- Total Time: 24 hours 30 minutes
- Servings: 48
- Yield: 8 trays
- Dietary Type: Vegan, Gluten-Free, Dairy-Free
Ingredients
- 10 lbs of blood plums (or any amount you wish to dry. A twenty-pound box from the farmer’s market works perfectly). Ruby Blood, Satsuma, and Mariposa varieties all work beautifully.
- Water, for washing plums.
Equipment Needed
- Knife
- Cutting board
- Dehydrator (or oven with a very low temperature setting)
- Dehydrator racks (or baking sheets lined with parchment paper)
- Ziplock freezer bags
Instructions
- Begin by thoroughly washing the blood plums under cold running water. This removes any dirt, debris, or residual pesticides.
- Using a sharp knife and a stable cutting board, carefully cut the plums into wedges. Aim for either quarters or sixths, depending on the size of the plum. The goal is to create pieces that will dry evenly. At the same time, remove the pit from each wedge.
- Arrange the plum wedges in a single layer on your dehydrator racks. Ensure that there’s some space between each wedge to allow for proper air circulation. If using an oven, line baking sheets with parchment paper and arrange the plum wedges similarly.
- Dry the plums. If using a dehydrator, set the temperature to 135 degrees Fahrenheit (57 degrees Celsius). If using an oven, set it to the lowest possible temperature, ideally around 170 degrees Fahrenheit (77 degrees Celsius), and prop the door slightly open to allow moisture to escape.
- Allow the plums to dry for approximately 24 hours. Keep in mind that the drying time can vary significantly depending on the humidity levels in your environment. Check the plums periodically throughout the drying process.
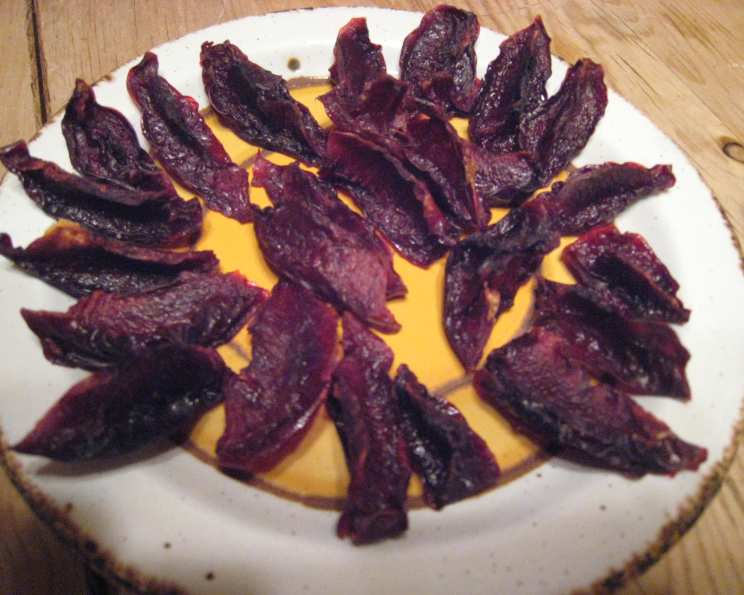
- Test for doneness. The dried plums are ready when they are leathery and sticky to the touch, but no longer juicy. They should have a slightly tacky feel but shouldn’t be wet or oozing any liquid.
- Once the plums are sufficiently dried, remove them from the dehydrator or oven and allow them to cool completely.
- Store the dried blood plums in ziplock freezer bags. For optimal preservation of flavor and texture, store them in the freezer until ready to use.
Expert Tips & Tricks
- Choose ripe but firm plums: Plums that are slightly underripe will hold their shape better during the drying process and prevent them from becoming overly sticky.
- Don’t overcrowd the trays: Ensure there is adequate space between the plum wedges for good air circulation. Overcrowding will significantly increase drying time and could result in unevenly dried fruit.
- Rotate the trays: If using a dehydrator, rotate the trays every 6-8 hours to promote even drying. If using an oven, flip the plum wedges halfway through the drying process.
- Check for even drying: Smaller pieces will dry faster than larger ones. Remove any pieces that are fully dried before the rest to prevent them from becoming too hard.
- For extra sweetness: Lightly sprinkle the plum wedges with a little sugar before drying. Use about 1 tablespoon of sugar per pound of fruit.
Serving & Storage Suggestions
These dried blood plums are delicious on their own as a healthy and flavorful snack. They can also be added to trail mixes, granola, or used as a topping for yogurt or oatmeal. Chop them up and add them to baked goods such as muffins, scones, or cakes for a burst of intense plum flavor.
Store dried blood plums in airtight ziplock freezer bags in the freezer. They will keep for up to a year. In the refrigerator, they will last for about 2-3 months. At room temperature, they will only last for a week or two, depending on the humidity.
Nutritional Information
| Nutrient | Amount per Serving | % Daily Value |
|---|---|---|
| Calories | 43.5 kcal | N/A |
| Calories from Fat | 2g | 5% |
| Total Fat | 0.3 g | 0% |
| Saturated Fat | 0 g | 0% |
| Cholesterol | 0 mg | 0% |
| Sodium | 0 mg | 0% |
| Total Carbohydrate | 10.8 g | 3% |
| Dietary Fiber | 1.3 g | 5% |
| Sugars | 9.4 g | 37% |
| Protein | 0.7 g | 1% |
Variations & Substitutions
- Spice it up: Add a sprinkle of cinnamon, nutmeg, or ginger to the plums before drying for a warm, spicy flavor.
- Citrus zest: Grate some lemon or orange zest over the plums for a bright, citrusy twist.
- Other fruits: This drying method works well with other stone fruits, such as peaches, apricots, and nectarines.
- Smoked paprika: For a savory-sweet flavor, dust the plums with smoked paprika before drying.
FAQs (Frequently Asked Questions)
Q: Can I dry the plums whole instead of cutting them into wedges?
A: While possible, drying whole plums takes significantly longer and can result in uneven drying. Cutting them into wedges ensures quicker and more even dehydration.
Q: How do I know if my oven is low enough to dry the plums?
A: The ideal oven temperature for drying fruit is around 170 degrees Fahrenheit (77 degrees Celsius). If your oven’s lowest setting is higher than this, prop the door slightly open to allow moisture to escape and prevent the plums from cooking instead of drying.
Q: My dried plums are too sticky. What did I do wrong?
A: Overly sticky plums usually indicate that they weren’t dried long enough. Return them to the dehydrator or oven for a few more hours until they reach the desired leathery and sticky, but not juicy, consistency.
Q: Can I use this method to dry other types of plums?
A: Yes, this method works well for drying most types of plums. However, drying times may vary depending on the plum variety and its moisture content.
Q: Do I need to wash the plums even if they look clean?
A: Yes, it’s always recommended to wash fruits before drying to remove any dirt, debris, or potential pesticide residue.
Final Thoughts
Drying blood plums is a simple and rewarding way to preserve the delicious flavors of summer. These sun-kissed jewels offer a taste of sunshine and can be enjoyed in countless ways throughout the year. Don’t be afraid to experiment with different spices and flavor combinations to create your own unique dried plum creations. We encourage you to try this recipe and share your experience with friends and family. Pair these dried plums with a sharp cheddar cheese or a glass of port wine for a truly decadent treat. Happy drying!