
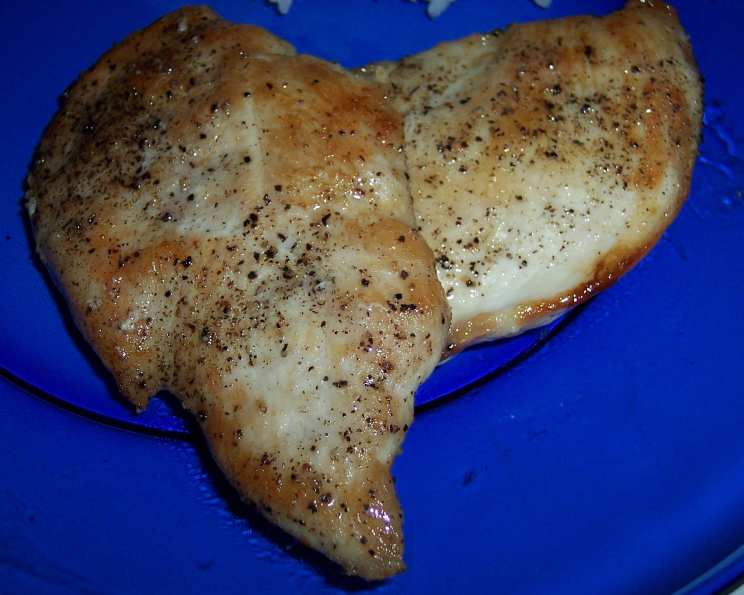
Crispy Sautéed Chicken Breasts: A Weeknight Delight
There’s a certain magic in the simplicity of a perfectly cooked chicken breast. I remember countless weeknights, rushing home after a long day, the pressure to get dinner on the table looming. This simple technique, achieving crispy, golden-brown chicken breasts, became my absolute go-to. The sizzle in the pan, the aroma filling the kitchen, and the satisfied faces at the dinner table – it was a little pocket of joy amidst the chaos. This recipe isn’t just about cooking; it’s about creating a comforting, reliable meal that delivers every single time.
Recipe Overview
- Prep Time: 5 minutes
- Cook Time: 10-12 minutes
- Total Time: 15-17 minutes
- Servings: 2
- Yield: 2 chicken breasts
- Dietary Type: Gluten-Free, Dairy-Free
Ingredients
- 2 (4 ounce) boneless skinless chicken breast halves
- 2 tablespoons oil (vegetable, canola, or olive oil work well)
- Salt & pepper, to taste
Equipment Needed
- Large nonstick skillet
- Meat mallet or rolling pin (optional, for flattening)
Instructions
- Begin by preparing the chicken breasts. If desired, flatten the chicken to about 1/4-inch thickness. This helps them cook evenly and quickly. You can do this by placing each chicken breast between two sheets of plastic wrap and gently pounding with a meat mallet or rolling pin. Be careful not to tear the chicken. This step is optional, but it does result in a more tender and evenly cooked final product.
- Season both sides of the flattened chicken breasts generously with salt and pepper. Don’t be shy with the seasoning; it’s crucial for flavor.
- Heat the oil in a large nonstick skillet over medium heat. Make sure the pan is hot before adding the chicken; this is key to achieving that beautiful crispy exterior.
- Carefully place the seasoned chicken breasts in the hot skillet, ensuring they aren’t overcrowded. Overcrowding the pan will lower the temperature and cause the chicken to steam instead of sear. Cook for 5-6 minutes on each side, or until the juices run clear when pierced with a fork. The internal temperature should reach 165°F (74°C) to ensure the chicken is cooked through.
- Remove the cooked chicken breasts from the skillet and place them on a plate. Let them rest for a few minutes before serving. This allows the juices to redistribute, resulting in a more tender and flavorful final product.
Expert Tips & Tricks
- Patience is key: Don’t rush the cooking process. Allow the pan to heat up properly before adding the chicken, and avoid moving the chicken around too much while it’s searing. This will ensure a beautiful golden-brown crust.
- Don’t overcrowd the pan: If you’re cooking more than two chicken breasts, work in batches to avoid overcrowding.
- Even thickness: Flattening the chicken breasts ensures even cooking. Uneven thickness can lead to some parts being overcooked while others are still undercooked.
- Oil Choice: While olive oil adds flavor, vegetable or canola oil have higher smoke points, making them ideal for high-heat searing.
- Flavor Boost: Consider adding a pinch of garlic powder, onion powder, or paprika to the salt and pepper mixture for added flavor.
Serving & Storage Suggestions
Serve these crispy sautéed chicken breasts immediately for the best flavor and texture. They pair well with a variety of sides, such as roasted vegetables, a simple salad, mashed potatoes, rice, or quinoa. A squeeze of lemon juice or a sprinkle of fresh herbs (like parsley or thyme) can add a bright finishing touch.
Leftover cooked chicken breasts can be stored in an airtight container in the refrigerator for up to 3-4 days. To reheat, you can microwave them (although this may make them slightly less crispy), bake them in a preheated oven at 350°F (175°C) for about 10-15 minutes, or pan-fry them briefly to re-crisp the exterior. Reheating is best done in the oven or skillet to keep the chicken from drying out. Avoid leaving cooked chicken at room temperature for more than two hours.
Nutritional Information
(Estimates based on generic ingredients. Actual values may vary.)
| Nutrient | Amount per Serving | % Daily Value |
|---|---|---|
| Calories | 200 kcal | 10% |
| Total Fat | 8g | 12% |
| Saturated Fat | 1.5g | 8% |
| Cholesterol | 75mg | 25% |
| Sodium | 100mg | 4% |
| Carbohydrates | 0g | 0% |
| Fiber | 0g | 0% |
| Sugar | 0g | 0% |
| Protein | 30g | 60% |
Variations & Substitutions
- Spice it up: Add a pinch of red pepper flakes to the seasoning for a little heat.
- Herb-infused: Mix dried herbs like thyme, rosemary, or oregano into the salt and pepper mixture.
- Citrus burst: Marinate the chicken in a mixture of lemon or lime juice, olive oil, and garlic before cooking.
- Breaded chicken: For an even crispier texture, dredge the chicken breasts in seasoned breadcrumbs before sautéing. Use gluten-free breadcrumbs for a gluten-free option.
- Sauce it: After cooking, deglaze the pan with white wine or chicken broth and add a dollop of cream for a simple pan sauce.
- Different protein: While this recipe focuses on chicken breast, the technique can be adapted for other lean proteins like pork tenderloin or turkey cutlets.
FAQs (Frequently Asked Questions)
Q: How do I know when the chicken is cooked through?
A: The best way to ensure the chicken is cooked through is to use a meat thermometer. Insert the thermometer into the thickest part of the breast; it should read 165°F (74°C). Alternatively, you can pierce the chicken with a fork; if the juices run clear, it’s likely done.
Q: My chicken is always dry. What am I doing wrong?
A: Overcooking is the most common cause of dry chicken. Using a meat thermometer can help you avoid overcooking. Also, flattening the chicken ensures even cooking and reduces the risk of drying out the thinner parts. Don’t forget to let the chicken rest for a few minutes after cooking to allow the juices to redistribute.
Q: Can I use frozen chicken breasts?
A: Yes, but you must thaw them completely before cooking. Thawing in the refrigerator is the safest method. Avoid thawing at room temperature, as this can promote bacterial growth. Ensure the chicken is patted dry before seasoning and cooking.
Q: The chicken sticks to the pan, even with a nonstick skillet. What can I do?
A: Make sure the pan is hot enough before adding the chicken. If the pan isn’t hot enough, the chicken will stick. Also, ensure there’s enough oil in the pan to create a barrier between the chicken and the surface.
Q: Can I prepare the chicken ahead of time?
A: You can flatten and season the chicken breasts up to 24 hours in advance. Store them covered in the refrigerator. Bring them to room temperature for about 15 minutes before cooking for best results.
Final Thoughts
This crispy sautéed chicken breast recipe is a testament to the fact that simple ingredients and straightforward techniques can yield truly delicious results. It’s a foundation upon which you can build countless meals, adding your own personal touches and flavors along the way. So, grab your skillet, season those chicken breasts, and get ready to experience the satisfying crunch and juicy tenderness of perfectly cooked chicken. Don’t be afraid to experiment with different seasonings, sauces, and side dishes to create your own signature version. And most importantly, enjoy the process and the delicious meal that awaits!