
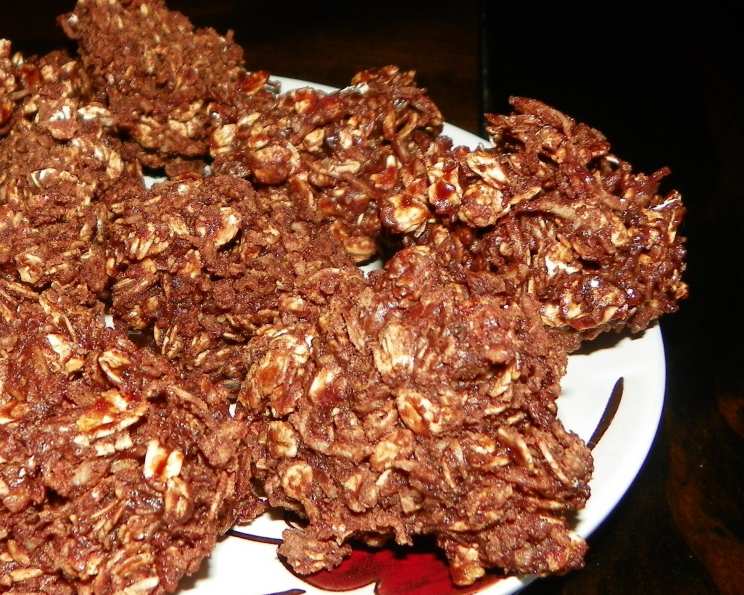
Porcupine Cookies: A Sweet Nostalgic Treat
The scent of cocoa still takes me back to my grandmother’s kitchen, especially around the holidays. I remember her standing at the stove, a wooden spoon in hand, carefully stirring a bubbling mixture. These weren’t ordinary chocolates or fudge; they were her famous Porcupine Cookies – a no-bake delight that always disappeared within minutes. Each bite was a perfect blend of chewy oats, sweet coconut, and rich chocolate, a treat that felt as warm and comforting as Grandma’s hug.
Recipe Overview
- Prep Time: 15 minutes
- Cook Time: 3-4 minutes
- Total Time: 20 minutes
- Servings: 24 cookies
- Yield: 24 cookies
- Dietary Type: Vegetarian
Ingredients
- 1 cup coconut
- 3 cups quick-cooking oatmeal
- 2 cups sugar
- 1/3 cup cocoa powder
- 1/2 cup butter
- 1/2 cup milk
- 1 teaspoon vanilla
Equipment Needed
- Large mixing bowl
- Heavy saucepan
- Measuring cups and spoons
- Wax paper
- Teaspoon
- Wooden spoon or spatula
Instructions
-
In a large mixing bowl, combine the coconut and quick-cooking oatmeal. Mix well and set aside. This will form the base of your cookies, providing a delightful texture and subtle sweetness.
-
In a heavy saucepan, combine the sugar, cocoa powder, butter, and milk. Place the saucepan over medium heat. Using a wooden spoon or spatula, stir constantly until the sugar dissolves and the mixture is smooth. This step is crucial to prevent burning and ensure a velvety chocolate base.
-
Continue to cook, stirring constantly, until the mixture comes to a rolling boil. Once boiling, continue to boil for approximately 3 to 4 minutes, until the mixture reaches the soft ball stage. A candy thermometer can be helpful here, but if you don’t have one, you can test for the soft ball stage by dropping a small amount of the mixture into a cup of cold water. If it forms a soft ball that can be easily flattened, it’s ready.
-
Remove the saucepan from the heat and immediately stir in the vanilla extract. The vanilla will enhance the chocolate flavor and add a touch of warmth to the cookies.
-
Quickly add the bowl of coconut and oatmeal to the hot chocolate mixture. Mix thoroughly until everything is well blended. It’s important to work quickly in this step to ensure the oats and coconut are evenly coated before the chocolate mixture starts to set.
-
Drop the mixture by teaspoonfuls onto sheets of wax paper. The wax paper will prevent the cookies from sticking and make it easy to remove them once they’ve cooled.
-
Let the cookies stand at room temperature until they are completely cool and set. This may take about 30 minutes to an hour, depending on the room temperature and humidity. Once cooled, the cookies should be firm to the touch and easy to handle.
Expert Tips & Tricks
- Toasting the Coconut: For a deeper, nuttier flavor, toast the coconut before adding it to the mixture. Spread the coconut on a baking sheet and toast in a preheated oven at 350°F (175°C) for 5-7 minutes, or until lightly golden brown, watching carefully to prevent burning.
- Choosing the Right Oatmeal: Quick-cooking oats are recommended for this recipe because they absorb the chocolate mixture well and create a chewy texture. Rolled oats can also be used, but the cookies will have a slightly different texture. Avoid using instant oatmeal, as it may become too mushy.
- Soft Ball Stage Accuracy: Getting to the soft ball stage is crucial for the right cookie consistency. If you undercook it, the cookies will be too soft and sticky. If you overcook it, they’ll be too hard. Practice makes perfect!
- Adding a Pinch of Salt: A small pinch of salt to the chocolate mixture can enhance the sweetness and balance the flavors.
- Preventing Sticking: Make sure your wax paper is smooth and free of wrinkles to prevent the cookies from sticking. You can also lightly grease the wax paper with butter or cooking spray for extra insurance.
Serving & Storage Suggestions
Serve these Porcupine Cookies as a delightful treat with a glass of cold milk, a warm cup of coffee, or a scoop of vanilla ice cream. They are perfect for holiday gatherings, potlucks, or as a simple after-dinner dessert.
To store, keep the cookies in an airtight container at room temperature. They will stay fresh for about 3-4 days. For longer storage, you can freeze the cookies in a freezer-safe container for up to 2 months. When ready to eat, thaw them at room temperature. Freezing them does not compromise the flavor or texture.
Nutritional Information
| Nutrient | Amount per Serving | % Daily Value |
|---|---|---|
| Calories | 166.7 kcal | – |
| Calories from Fat | 64 g | 39% |
| Total Fat | 7.1 g | 10% |
| Saturated Fat | 4.8 g | 23% |
| Cholesterol | 10.9 mg | 3% |
| Sodium | 38.6 mg | 1% |
| Total Carbohydrate | 25.3 g | 8% |
| Dietary Fiber | 2 g | 8% |
| Sugars | 17 g | 68% |
| Protein | 2 g | 4% |
Note: Nutritional information is an estimate and may vary based on specific ingredients used.
Variations & Substitutions
- Gluten-Free: To make these cookies gluten-free, simply use gluten-free quick-cooking oats.
- Dairy-Free: Substitute the butter with a dairy-free butter alternative and the milk with almond milk, soy milk, or oat milk. Be sure to choose a dairy-free butter that melts and behaves similarly to regular butter for the best results.
- Nut Addition: Add chopped walnuts, pecans, or almonds to the coconut and oatmeal mixture for added crunch and flavor.
- Chocolate Chips: Stir in 1/2 cup of semi-sweet chocolate chips or dark chocolate chips for an extra chocolatey treat.
- Peanut Butter: Add 1/4 cup of peanut butter to the chocolate mixture for a delicious peanut butter and chocolate combination.
- Spice it Up: Add a dash of cinnamon or nutmeg to the chocolate mixture for a warm and comforting flavor.
FAQs (Frequently Asked Questions)
Q: Why are my cookies too soft and sticky?
A: This likely means that the chocolate mixture was not cooked long enough to reach the soft ball stage. Next time, ensure you boil the mixture for the full 3-4 minutes, or until a small amount dropped in cold water forms a soft, pliable ball.
Q: Can I use regular rolled oats instead of quick-cooking oats?
A: Yes, you can, but the texture of the cookies will be slightly different. Rolled oats will create a chewier, more rustic cookie.
Q: How do I prevent the cookies from sticking to the wax paper?
A: Ensure that the wax paper is smooth and free of wrinkles. You can also lightly grease the wax paper with butter or cooking spray before dropping the cookies onto it.
Q: Can I make these cookies ahead of time?
A: Absolutely! These cookies are great for making ahead. Simply store them in an airtight container at room temperature for up to 3-4 days, or freeze them for longer storage.
Q: What is the best way to melt the butter without burning it?
A: Use a heavy-bottomed saucepan and keep the heat at medium. Stir the mixture constantly to ensure even heating and prevent burning.
Final Thoughts
These no-bake Porcupine Cookies are a testament to the simple joys of home cooking. They are easy to make, require minimal ingredients, and are always a crowd-pleaser. Whether you’re looking for a quick and easy dessert, a fun baking project with kids, or a nostalgic treat that brings back cherished memories, these cookies are sure to delight. So go ahead, gather your ingredients, and experience the joy of creating these delightful Porcupine Cookies. I encourage you to share your creations and any variations you try – happy baking!