
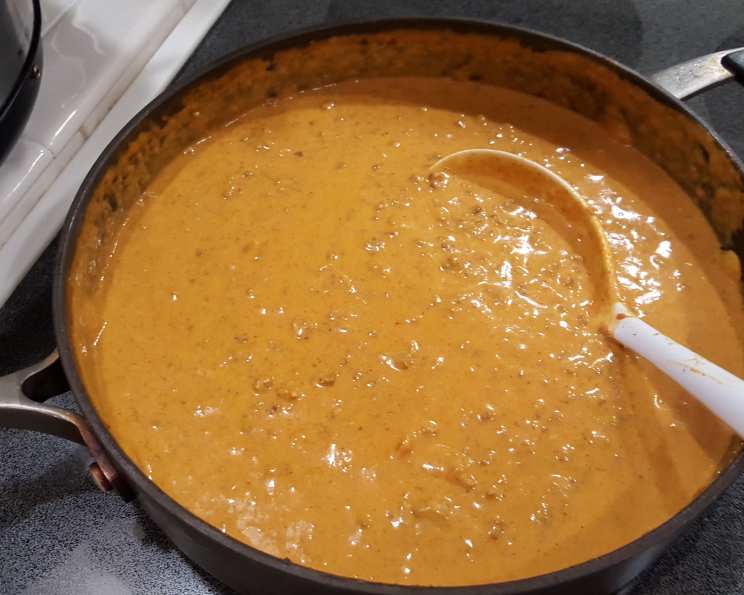
Delicious Chili Cheese Dip: A Crowd-Pleasing Classic
There’s something magical about a bubbling pot of chili cheese dip. I can still remember my first Super Bowl party, a sea of jerseys and roaring cheers filling my friend’s basement. But amidst all the excitement, the real star of the show, in my young eyes, was the chili cheese dip. The rich, savory aroma, the molten cheese stretching with every scoop, the satisfying crunch of tortilla chips – it was an unforgettable experience that cemented chili cheese dip as my ultimate comfort food and party appetizer.
Recipe Overview
- Prep Time: 10 minutes
- Cook Time: 15 minutes
- Total Time: 25 minutes
- Servings: 10
- Yields: 6 Cups
- Dietary Type: Not Gluten-Free
Ingredients
- 1 lb lean ground beef
- 1 (1 ounce) packet taco seasoning mix
- 1 (15 ounce) can Hormel no-bean chili
- 1 (16 ounce) jar salsa (mild, medium, or hot, depending on your preference)
- 1 (8 ounce) package cream cheese
- 1 (8 ounce) package cheddar cheese, shredded
Equipment Needed
- Large Sauté Pan
- Spatula or Spoon
- Measuring Cups and Spoons
Instructions
- Begin by browning the lean ground beef in a large sauté pan over medium-high heat. Break the beef apart with a spatula as it cooks, ensuring it’s evenly browned. Drain any excess grease from the pan.
- Reduce the heat to medium and add the taco seasoning mix to the browned ground beef. Stir thoroughly to ensure the seasoning is evenly distributed and coats all the beef.
- Pour in the Hormel no-bean chili and stir to combine it with the beef and taco seasoning. The chili adds a deep, savory flavor and a rich, thick texture to the dip.
- Add the salsa to the pan. The type of salsa you use will determine the heat level of the final dip, so choose mild, medium, or hot according to your preference. Stir all ingredients together until well blended.
- Cut the cream cheese into approximately 8 cubes. This will help it melt more quickly and evenly into the mixture. Add the cream cheese cubes to the pan.
- Continue to stir the mixture gently until the cream cheese is completely melted and incorporated, creating a smooth and creamy base for the dip. This may take a few minutes, so be patient and keep stirring to prevent sticking.
- Add the shredded cheddar cheese to the pan. Stir continuously until the cheddar cheese is fully melted and the dip is smooth, cheesy, and irresistibly gooey. This is the point where the dip truly transforms into its final, delicious form.
- Once the cheese is completely melted and the dip is heated through, remove the pan from the heat. Serve immediately with your favorite dipping vessels, such as tortilla chips or ruffle potato chips.
Expert Tips & Tricks
- For a richer, more complex flavor, consider using a blend of cheeses, such as Monterey Jack, pepper jack, or even a smoked gouda in addition to the cheddar.
- If you prefer a chunkier dip, you can add a can of drained and rinsed diced tomatoes or some chopped onions and bell peppers when you add the salsa.
- To make the dip ahead of time, prepare it according to the instructions, then let it cool completely before storing it in an airtight container in the refrigerator for up to 3 days. Reheat gently on the stovetop or in the microwave before serving.
- If the dip becomes too thick, add a splash of milk or beef broth to thin it out.
- To prevent the dip from sticking to the pan, use a non-stick sauté pan or coat the pan with cooking spray before you start.
- To add a touch of smoky flavor, consider using smoked paprika in the taco seasoning mixture.
Serving & Storage Suggestions
Serve the chili cheese dip hot, straight from the pan, for the best texture and flavor. Offer a variety of dipping options, such as tortilla chips, ruffle potato chips, toasted baguette slices, or even fresh vegetables like celery sticks and carrot sticks.
Leftovers can be stored in an airtight container in the refrigerator for up to 3 days. To reheat, microwave in 30-second intervals, stirring in between, until heated through. You can also reheat it on the stovetop over low heat, stirring frequently. The dip can also be frozen for up to 2 months. Thaw it in the refrigerator overnight before reheating.
Do not leave the dip at room temperature for more than 2 hours.
Nutritional Information
| Nutrient | Amount per Serving | % Daily Value |
|---|---|---|
| Calories | 266.7 kcal | N/A |
| Calories from Fat | 179 g | 67% |
| Total Fat | 19.9 g | 30% |
| Saturated Fat | 11 g | 55% |
| Cholesterol | 78.3 mg | 26% |
| Sodium | 744.8 mg | 31% |
| Total Carbohydrate | 5.7 g | 1% |
| Dietary Fiber | 1.3 g | 5% |
| Sugars | 2.8 g | 11% |
| Protein | 16.8 g | 33% |
Variations & Substitutions
- Spicy Chili Cheese Dip: Use hot salsa, add a pinch of cayenne pepper, or include some chopped jalapeños to kick up the heat.
- Vegetarian Chili Cheese Dip: Substitute the ground beef with plant-based ground beef alternative or black beans.
- White Cheddar Chili Cheese Dip: Use white cheddar cheese instead of regular cheddar for a slightly different flavor profile.
- Creamy Southwestern Dip: Add a dollop of sour cream or Greek yogurt to each serving for extra creaminess and tang. Garnish with chopped cilantro and a squeeze of lime juice.
- Pizza-Style Dip: Add a can of diced tomatoes with basil and oregano, and substitute the cheddar cheese with mozzarella. Serve with garlic bread for dipping.
FAQs (Frequently Asked Questions)
Q: Can I make this chili cheese dip in a slow cooker?
A: Yes, you can! After browning the ground beef, combine all ingredients in a slow cooker and cook on low for 2-3 hours, or until the cheese is melted and the dip is heated through. Stir occasionally.
Q: Can I use a different type of chili?
A: Absolutely! While the recipe calls for Hormel no-bean chili, you can use your favorite chili recipe or any canned chili you prefer. Just be mindful of the spice level.
Q: What if I don’t have cream cheese?
A: You can substitute the cream cheese with sour cream or Greek yogurt, but the texture and flavor will be slightly different. Start with half the amount and add more to taste.
Q: Can I freeze this dip?
A: Yes, you can freeze chili cheese dip. Allow it to cool completely before transferring it to a freezer-safe container. Thaw in the refrigerator overnight before reheating.
Q: What are some other things I can serve with this dip besides chips?
A: This dip is also delicious with pretzels, crackers, vegetable sticks (celery, carrots), or even spread on burgers or hot dogs.
Final Thoughts
Chili cheese dip is more than just a recipe; it’s a tradition, a memory maker, and a guaranteed crowd-pleaser. Whether you’re hosting a game day party, a casual get-together, or simply craving a comforting snack, this recipe is sure to hit the spot. Gather your ingredients, follow the simple steps, and prepare to indulge in a bowl of cheesy, savory goodness. Don’t be afraid to experiment with variations and make it your own. And most importantly, share the love and enjoy every delicious bite!