
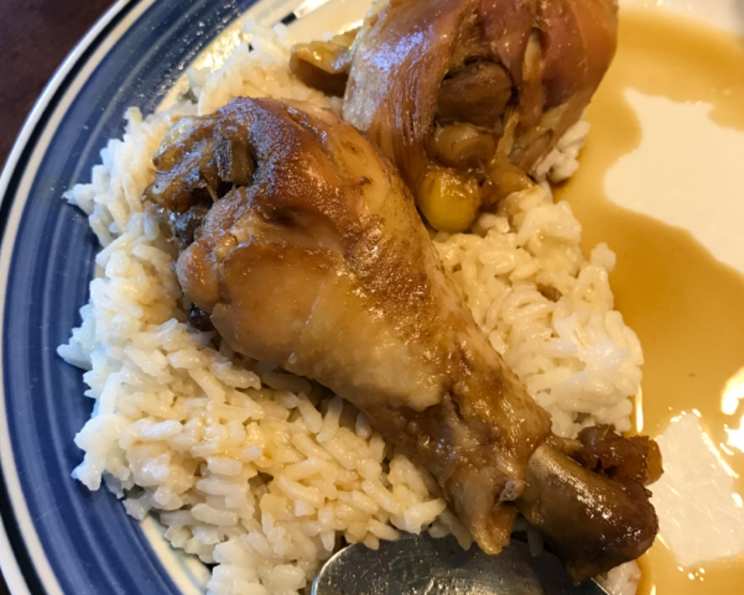
Teriyaki Chicken Drumsticks: A Taste of Home
The first time I tasted teriyaki chicken, I was a gawky teenager at a local summer fair. The smoky aroma drifted through the air, a siren call I couldn’t resist. The vendor handed me a steaming skewer of glistening chicken, and that first bite was pure magic. The sweet and savory glaze clung to the tender meat, creating an explosion of flavor that instantly transported me to a place of pure culinary joy. It wasn’t just food; it was an experience, a memory etched in my mind that I’ve been chasing in my own kitchen ever since.
Recipe Overview
- Prep Time: 10 minutes
- Cook Time: 30 minutes
- Total Time: 40 minutes
- Servings: 8-12 drumsticks (4-6 servings)
- Yield: 4-6 servings
- Dietary Type: Not Gluten-Free (contains soy sauce)
Ingredients
- 8-12 chicken drumsticks
- 1 cup soy sauce
- 1 cup brown sugar, packed
- 1 cup water
- 3 tablespoons olive oil or canola oil
- 1 teaspoon ginger (optional)
Equipment Needed
- Large saucepan or Dutch oven
Instructions
- Heat the oil in a large saucepan or Dutch oven over medium-high heat. Be sure the pan is large enough to accommodate all the drumsticks in a single layer, if possible. This helps with even browning.
- Carefully place the chicken drumsticks in the hot oil. Brown the chicken on all sides, turning occasionally to ensure even coloring. This step is crucial for developing a rich flavor and creating a beautiful presentation. Browning takes approximately 5-7 minutes per side, depending on the heat and the size of the drumsticks.
- While the chicken is browning, prepare the teriyaki sauce. In a separate bowl, mix together the soy sauce, brown sugar, water, and ginger (if using). Stir until the brown sugar is completely dissolved. Taste and adjust sweetness or saltiness to your preference. Some people prefer a little more sugar, others a little less.
- Once the chicken is nicely browned, pour the teriyaki sauce over the drumsticks. Ensure the sauce covers as much of the chicken as possible.
- Bring the sauce to a boil, then immediately reduce the heat to medium-low. The goal is to simmer gently, not to continue boiling vigorously, which could cause the sauce to burn.
- Simmer, uncovered, for approximately 20 to 30 minutes, or until the chicken is cooked through and the sauce has thickened to a desirable consistency. A thickened sauce should coat the back of a spoon. The internal temperature of the chicken should reach 165°F (74°C).
- Turn the chicken pieces occasionally during the cooking process. This ensures even cooking and allows the drumsticks to be evenly coated in the glaze.
- Serve the teriyaki chicken drumsticks hot, preferably over cooked rice. Short-grain “sticky rice” prepared in a rice cooker is a classic accompaniment.
- Serve any excess sauce alongside the chicken. Many people enjoy drizzling extra sauce over their rice or using it as a dipping sauce.
- To reduce the calorie content, consider using skinless chicken drumsticks. However, keep in mind that the skin adds flavor and helps to keep the chicken moist during cooking.
Expert Tips & Tricks
- Achieve a Deeper Color: For a richer, darker color and more complex flavor, consider adding a tablespoon of molasses or honey to the teriyaki sauce.
- Thickening the Sauce: If the sauce isn’t thickening to your liking, you can whisk together 1 tablespoon of cornstarch with 2 tablespoons of cold water to create a slurry. Slowly drizzle this into the simmering sauce, stirring constantly, until it reaches the desired thickness. Be careful not to add too much, or the sauce will become overly thick and gloppy.
- Marinating the Chicken: For even more intense flavor, marinate the chicken drumsticks in half of the teriyaki sauce for at least 30 minutes (or up to overnight) before cooking. This allows the flavors to penetrate the meat more deeply.
- Broiling for Glaze: For a final touch, after simmering, transfer the drumsticks to a baking sheet lined with foil. Broil for 2-3 minutes, watching carefully to prevent burning, to create a beautifully caramelized glaze.
Serving & Storage Suggestions
Serve these teriyaki chicken drumsticks immediately while they are hot and glistening. Garnish with sesame seeds and chopped green onions for added visual appeal. The sweetness of the teriyaki pairs beautifully with a side of steamed broccoli or a crisp Asian slaw.
Leftover teriyaki chicken can be stored in an airtight container in the refrigerator for up to 3-4 days. To reheat, you can use the microwave, oven, or stovetop. For the microwave, heat in 30-second intervals until warmed through. For the oven, bake at 350°F (175°C) for about 10-15 minutes. On the stovetop, heat in a pan over medium heat, adding a splash of water or chicken broth to prevent sticking.
For longer storage, you can freeze the cooked chicken. Wrap the drumsticks individually in plastic wrap and then place them in a freezer bag. They can be stored in the freezer for up to 2-3 months. Thaw overnight in the refrigerator before reheating.
Nutritional Information
| Nutrient | Amount per Serving (estimated) | % Daily Value* |
|---|---|---|
| Calories | 450 kcal | 23% |
| Total Fat | 25g | 38% |
| Saturated Fat | 6g | 30% |
| Cholesterol | 130mg | 43% |
| Sodium | 3500mg | 146% |
| Total Carbohydrate | 30g | 10% |
| Dietary Fiber | 1g | 4% |
| Sugars | 28g | – |
| Protein | 30g | 60% |
*Percent Daily Values are based on a 2,000 calorie diet. Your daily values may be higher or lower depending on your calorie needs. Note: This is an estimate and will vary based on specific ingredient brands and portion sizes.
Variations & Substitutions
- Gluten-Free Teriyaki: To make this recipe gluten-free, use tamari instead of soy sauce. Tamari is a Japanese soy sauce that is typically gluten-free (but always check the label to be sure).
- Honey Teriyaki: Replace half or all of the brown sugar with honey for a slightly different flavor profile.
- Spicy Teriyaki: Add a pinch of red pepper flakes or a dash of sriracha to the sauce for a little heat.
- Garlic Teriyaki: Add 1-2 cloves of minced garlic to the sauce for a more pungent flavor.
- Vegetarian Teriyaki: While this recipe is for chicken, the teriyaki sauce itself is incredibly versatile. Use it to glaze tofu, tempeh, or vegetables like broccoli, mushrooms, or bell peppers.
FAQs (Frequently Asked Questions)
Q: Can I use chicken thighs instead of drumsticks?
A: Absolutely! Chicken thighs are a great substitute. They may require a slightly longer cooking time, so ensure they reach an internal temperature of 165°F (74°C).
Q: The sauce is too salty. What can I do?
A: Add a squeeze of lemon juice or a tablespoon of rice vinegar to balance the saltiness. You can also add a little more water to dilute the sauce.
Q: Can I make this in a slow cooker?
A: Yes! Brown the chicken first, then place it in a slow cooker with the teriyaki sauce. Cook on low for 4-6 hours, or on high for 2-3 hours, until the chicken is tender. Thicken the sauce with cornstarch slurry if needed.
Q: How do I prevent the chicken from sticking to the pan?
A: Make sure the pan is properly preheated before adding the oil and chicken. Also, avoid overcrowding the pan, as this can lower the temperature and cause the chicken to steam instead of brown.
Q: Can I grill the chicken drumsticks with this sauce?
A: Yes, you can. Grill the drumsticks over medium heat, brushing frequently with the teriyaki sauce during the last 10-15 minutes of grilling. Watch carefully to prevent burning, as the sugar in the sauce can caramelize quickly.
Final Thoughts
Teriyaki chicken drumsticks are a culinary hug in a pan – a simple yet satisfying dish that brings comfort and joy to any meal. Whether you’re a seasoned chef or a kitchen novice, this recipe is easy to master and endlessly adaptable to your personal tastes. So, gather your ingredients, fire up the stove, and prepare to create a dish that will transport you to a place of pure deliciousness. Don’t be afraid to experiment with variations, and most importantly, have fun in the kitchen! I’d love to hear how yours turns out, maybe pair it with a crisp Japanese beer!