
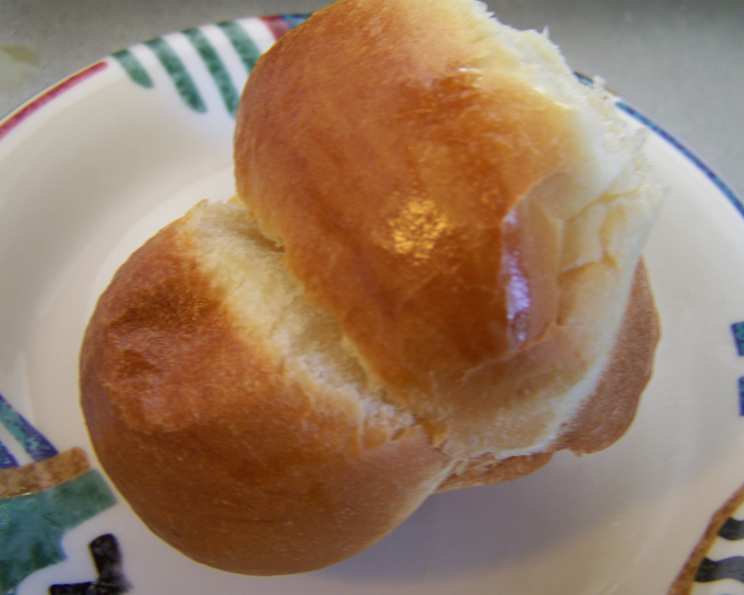
Delicious Dinner Buns: A Taste of Home
There’s something magical about the smell of baking bread that instantly transports me back to my grandmother’s kitchen. I remember watching, mesmerized, as she effortlessly transformed simple ingredients into the most comforting and delicious dinner rolls. They were always perfectly golden brown, impossibly soft, and pulled apart with the gentlest touch, releasing a cloud of warm, yeasty steam. Each bite was a little piece of heaven, slathered with melting butter and shared with loved ones around a bustling table. This recipe captures that same feeling of warmth and homemade goodness.
Recipe Overview
- Prep Time: 25 minutes
- Cook Time: 18-20 minutes
- Total Time: At least 2 hours 23 minutes (including proofing)
- Servings: Varies
- Yields: 14-16 buns
- Dietary Type: Not specified
Ingredients
- 1 cup whole milk, homogenized, warmed (divided)
- 1/4 cup granulated sugar
- 1 tablespoon active dry yeast
- 1 large egg
- 1/4 cup butter, melted
- 1 1/2 teaspoons salt
- 3 cups all-purpose flour
- 1 large egg (for egg wash)
- 1 tablespoon whole milk, homogenized (for egg wash)
Equipment Needed
- Small bowl
- Large bowl
- Stand mixer with dough hook (optional, can knead by hand)
- Plastic wrap
- 8″ x 8″ pan or 8″ round pan
- Damp cloth or towel
- Pastry brush
Instructions
-
In a small bowl, combine 1/2 cup of the warmed whole milk with the granulated sugar and active dry yeast. Let the mixture stand for about 10 minutes, or until it becomes frothy. This step is crucial; the frothiness indicates that the yeast is active and will properly leaven the dough. If it doesn’t froth, your yeast might be old, and you’ll need to replace it.
-
In another bowl, whisk together the egg and the remaining 1/2 cup of warmed whole milk. Add the melted butter to this mixture and whisk to combine. Ensure the butter isn’t too hot, as it could cook the egg.
-
In the bowl of a stand mixer fitted with a dough hook, combine the all-purpose flour and salt. If you don’t have a stand mixer, you can do this in a large bowl and knead the dough by hand later.
-
Add the yeast mixture and the egg mixture to the bowl with the flour and salt.
-
With the mixer on low speed, begin mixing the ingredients. As the flour starts to incorporate, gradually increase the speed. Continue mixing until the dough comes together.
-
Once the dough has come together, continue to mix it for another 2 minutes, or until it forms a cohesive mass. The dough should be slightly sticky but not overly wet.
-
Turn the dough out onto a lightly floured surface. Knead the dough for about 5 minutes, until it becomes smooth and elastic. If kneading by hand, use a rocking motion, pressing the dough away from you with the heel of your hand, then folding it over and repeating.
-
Form the dough into a ball and place it in a lightly greased large bowl. This prevents the dough from sticking.
-
Cover the bowl with plastic wrap to prevent the dough from drying out.
-
Leave the dough in the refrigerator overnight for a slow, cold proof. Alternatively, you can let it proof in a warm area until it doubles in size, which should take about 45 minutes to an hour. The overnight proof develops a more complex flavor, but the faster method works well if you’re short on time.
-
Once the dough has doubled in size, punch it down gently to release the air. Turn the dough out onto a very lightly floured surface.
-
Tear off pieces of the dough and form 14 to 16 balls, each about 1 to 1 1/2 inches in diameter.
-
Roll each piece of dough between your hands to create a smooth ball. This helps ensure even baking and a pleasant texture.
-
Place the dough balls in a buttered 8″ x 8″ pan or an 8″ round pan. Arrange the balls so they are touching each other. This creates that delightful pull-apart effect when serving.
-
Cover the pan with plastic wrap, then cover the plastic wrap with a damp cloth or towel. This helps create a warm, humid environment for the second proof.
-
Let the dough rest in a warm area for about 40 minutes, or until the buns have doubled in size.
-
Preheat your oven to 350°F (175°C). Make sure the oven is fully preheated before baking for even results.
-
In a small bowl, whisk together the remaining egg and whole milk to create an egg wash.
-
Using a pastry brush, generously coat the top of the dough buns with the egg wash. This will give them a beautiful golden-brown sheen.
-
Bake the buns in the preheated oven for about 18 to 20 minutes, or until the top is golden brown. Keep an eye on them, as oven temperatures can vary. A toothpick inserted into the center should come out clean.
-
Pull apart the warm dinner buns at the table and serve immediately with butter.
Expert Tips & Tricks
- For extra flavor: Add a touch of honey or molasses to the dough.
- To ensure even baking: Rotate the pan halfway through the baking time.
- If the buns are browning too quickly: Tent the pan loosely with foil during the last few minutes of baking.
- Make-ahead tip: You can prepare the dough through step 16, then refrigerate it for up to 24 hours before baking. Let the buns come to room temperature for about 30 minutes before baking.
Serving & Storage Suggestions
These dinner buns are best served warm, straight from the oven, alongside your favorite meal. They are delicious with soups, salads, roasted meats, or simply spread with butter or jam.
Store any leftover buns in an airtight container at room temperature for up to 2 days, or in the refrigerator for up to 5 days. To reheat, wrap the buns in foil and warm them in a 350°F (175°C) oven for about 10 minutes, or until heated through. You can also microwave them for a shorter amount of time, but this may make them a bit tougher. For longer storage, freeze the buns in an airtight container or freezer bag for up to 2 months. Thaw them overnight in the refrigerator before reheating.
Nutritional Information
| Nutrient | Amount per Serving | % Daily Value |
|---|---|---|
| Calories | 164.5 kcal | N/A |
| Calories from Fat | 44 g | 27% |
| Total Fat | 4.9 g | 7% |
| Saturated Fat | 2.7 g | 13% |
| Cholesterol | 40.8 mg | 13% |
| Sodium | 290.9 mg | 12% |
| Total Carbohydrate | 25.2 g | 8% |
| Dietary Fiber | 0.9 g | 3% |
| Sugars | 4.7 g | 18% |
| Protein | 4.6 g | 9% |
Note: Nutritional information is an estimate and may vary depending on specific ingredients and portion sizes.
Variations & Substitutions
- Whole Wheat Dinner Buns: Substitute 1 1/2 cups of all-purpose flour with 1 1/2 cups of whole wheat flour for a nuttier flavor and added fiber.
- Garlic Herb Dinner Buns: Add 2 cloves of minced garlic and 1 tablespoon of chopped fresh herbs (such as rosemary, thyme, or parsley) to the dough.
- Sweet Dinner Buns: Increase the sugar to 1/2 cup and add 1/4 teaspoon of ground cinnamon for a slightly sweeter bun.
- Dairy-Free Dinner Buns: Substitute the whole milk with almond milk or soy milk and use a vegan butter substitute.
FAQs (Frequently Asked Questions)
Q: Can I use instant yeast instead of active dry yeast?
A: Yes, you can. If using instant yeast, you can skip the proofing step in the beginning and add it directly to the dry ingredients.
Q: My dough is too sticky. What should I do?
A: Gradually add a tablespoon of flour at a time while kneading until the dough becomes more manageable. Be careful not to add too much flour, or the buns will be dry.
Q: How do I know if my dough has proofed enough?
A: The dough should have doubled in size and feel light and airy. When you gently press a finger into the dough, the indentation should remain.
Q: Can I freeze the unbaked dough balls?
A: Yes, you can freeze the dough balls after shaping them. Place them on a baking sheet lined with parchment paper and freeze until solid. Then, transfer them to a freezer bag. When ready to bake, thaw them overnight in the refrigerator and let them proof as directed in the recipe.
Q: Why are my buns not as soft as I expected?
A: Over-baking can lead to dry buns. Make sure to check for doneness at the minimum baking time and adjust accordingly. Also, kneading the dough enough to develop gluten is essential for soft buns.
Final Thoughts
I hope this recipe brings as much joy to your table as it has to mine. These delicious dinner buns are more than just a side dish; they’re a symbol of warmth, comfort, and connection. So, gather your ingredients, preheat your oven, and get ready to fill your home with the irresistible aroma of freshly baked bread. Don’t be afraid to experiment with variations and make this recipe your own. And please, share your creations and experiences – I’d love to hear how they turn out! Perhaps serve them with a hearty stew or a vibrant salad for a complete and satisfying meal. Happy baking!