
Delicious Eggless Zucchini Bread: A Culinary Adventure
I remember the first time I smelled zucchini bread baking – it was at my grandmother’s house, a comforting aroma that wrapped around you like a warm hug. The sweet cinnamon spice mingling with the earthy scent of zucchini always signaled a special occasion. While her recipe was a cherished family secret, it relied heavily on eggs, something I’ve since had to work around due to dietary restrictions. But that didn’t stop me! After much experimentation, I’ve crafted a truly exceptional eggless zucchini bread that captures the essence of that nostalgic flavor, without sacrificing moisture or taste. It’s a testament to the fact that sometimes, limitations breed the most delicious innovations.
Recipe Overview
- Prep Time: 20 minutes
- Cook Time: 60-90 minutes
- Total Time: 1 hour 20 minutes to 1 hour 50 minutes
- Servings: Varies
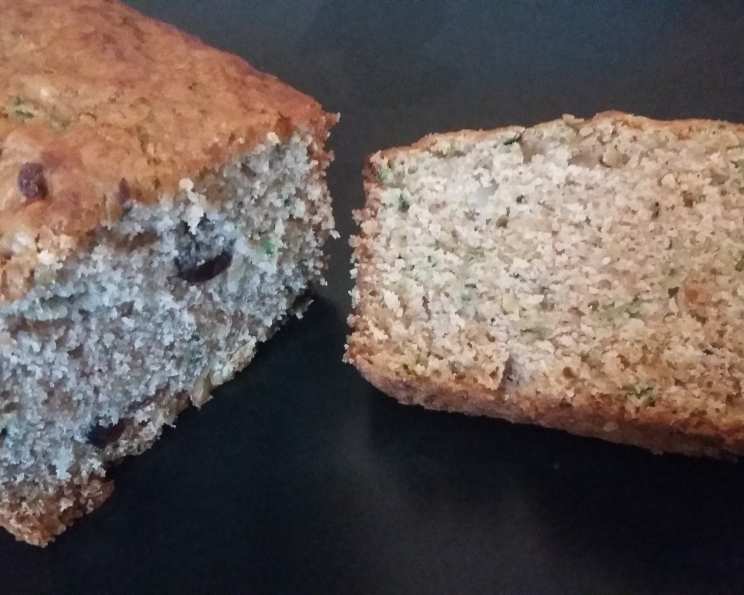
- Yield: 2 loaves
- Dietary Type: Vegetarian
Ingredients
- 2 cups sugar
- ¾ cup vegetable oil
- 3 cups flour, sifted
- 2 cups zucchini, shredded or very finely chopped
- 2 ¼ teaspoons vanilla extract
- ¾ cup low-fat vanilla yogurt
- 1 ½ teaspoons baking powder
- 1 teaspoon baking soda
- 1 teaspoon salt
- 2 ¼ teaspoons cinnamon
- ¾ teaspoon nutmeg
Ingredient Notes:
- For the zucchini, using a blender to chop it very finely can work in a pinch, but be careful not to turn it into a puree! Shredding is usually preferred for texture.
- Feel free to use plain yogurt if you don’t have vanilla yogurt. You may want to add an extra splash of vanilla extract.
- You can experiment with different types of oil like coconut or avocado oil, but vegetable oil yields a reliably neutral flavor.
Equipment Needed
- Two loaf pans
- Measuring cups and spoons
- Medium-sized mixing bowls (2-3)
- Sifter
- Whisk or mixer
- Grater (if shredding zucchini)
- Oven
Instructions
-
Preheat your oven to 350 degrees Fahrenheit (175 degrees Celsius). Grease only the bottoms of your two loaf pans. This will prevent the bread from sticking while still allowing the sides to rise properly.
-
In a medium-sized mixing bowl, measure out the vanilla yogurt.
-
Add the sugar to the yogurt and blend until the mixture is creamy and slightly thickened. This should take approximately 2-3 minutes. You can use a whisk for this step if you don’t have a mixer available. The goal is to dissolve the sugar as much as possible into the yogurt.
-
Pour in the vegetable oil and blend thoroughly into the yogurt-sugar mixture. Make sure it’s fully incorporated.
-
Add the shredded or finely chopped zucchini and vanilla extract to the wet ingredients. Stir until everything is well combined.
-
In a separate medium bowl, sift the flour. Sifting is crucial for creating a light and airy texture in the bread.
-
To the sifted flour, add the cinnamon, nutmeg, baking powder, baking soda, and salt. Whisk these dry ingredients together to ensure they are evenly distributed throughout the flour.
-
Gradually add the dry ingredients to the wet ingredients, a little at a time. This helps prevent lumps from forming.
-
Using your whisk or mixer, gently fold the ingredients together until they are just nicely combined. Be careful not to overmix, as this can result in a tough bread. A few streaks of flour are okay at this stage.
-
Pour the batter into the prepared loaf pans, dividing it evenly between the two.
-
Place the loaf pans in the preheated oven and bake for 1 hour (60 minutes). After 60 minutes, check the bread for doneness by inserting a knife or toothpick into the center. If it comes out clean, the bread is done.
-
If the knife or toothpick comes out with wet batter on it, continue to bake the bread for an additional time. The baking time can vary depending on your oven, so it could take anywhere between an hour and an hour and a half to bake completely. Keep checking every 5-10 minutes after the initial hour mark.
-
Once the bread is done, remove it from the oven and let it cool in the loaf pans for about 10-15 minutes before transferring it to a wire rack to cool completely. This helps prevent the bread from sticking and allows it to cool evenly.
-
Slice and enjoy!
Expert Tips & Tricks
- Don’t overmix! Overmixing develops the gluten in the flour, leading to a dense, tough bread. Mix only until the ingredients are just combined.
- Grate the zucchini finely. This ensures it distributes evenly throughout the batter and creates a more tender crumb. You can use the small holes on a box grater or a food processor with a grating attachment.
- Adjust sweetness to taste. If you prefer a less sweet bread, reduce the sugar by ¼ cup.
- Toast nuts and seeds. Add ½ cup of chopped walnuts, pecans, or pumpkin seeds to the batter for added texture and flavor. Toasting them beforehand intensifies their nutty taste.
- Use room-temperature ingredients. This helps the ingredients emulsify better, resulting in a smoother batter and a more evenly baked bread.
- For a richer flavor, melt the butter and let it cool slightly before adding it to the batter. Brown butter will enhance the flavor even more.
- If the top of the bread starts to brown too quickly, tent it with aluminum foil for the remainder of the baking time.
Serving & Storage Suggestions
Serve the zucchini bread sliced, either warm or at room temperature. It’s delicious on its own or spread with a bit of butter, cream cheese, or honey.
- Room Temperature: Store in an airtight container at room temperature for up to 2-3 days.
- Refrigerator: For longer storage, keep it in the refrigerator for up to a week.
- Freezer: To freeze, wrap the bread tightly in plastic wrap, then place it in a freezer bag. It can be stored in the freezer for up to 2-3 months. Thaw completely before serving.
- To reheat: If refrigerate, warm slices in toaster or oven to refresh.
Nutritional Information
(Estimated per slice, based on 16 slices per recipe)
| Nutrient | Amount per Serving | % Daily Value |
|---|---|---|
| Calories | 288 kcal | 14% |
| Total Fat | 12 g | 18% |
| Saturated Fat | 1.7 g | 8% |
| Cholesterol | 0 mg | 0% |
| Sodium | 238 mg | 10% |
| Total Carbohydrate | 43 g | 14% |
| Dietary Fiber | 1 g | 4% |
| Sugars | 24 g | N/A |
| Protein | 3 g | 6% |
Please note: Nutritional information is an estimate and may vary based on specific ingredients and portion sizes.
Variations & Substitutions
- Gluten-Free: Substitute the all-purpose flour with a gluten-free blend, ensuring it contains xanthan gum for binding.
- Dairy-Free: Replace the yogurt with a plant-based alternative, such as soy, almond, or coconut yogurt.
- Spiced Up: Add a pinch of ground cloves or cardamom to the batter for a warmer, more complex flavor.
- Chocolate Chip Zucchini Bread: Fold in 1 cup of chocolate chips (dark, milk, or white) for an extra touch of sweetness.
- Nutty Zucchini Bread: Add chopped walnuts, pecans, or macadamia nuts for added texture and flavor.
- Lemon Zest: Add the zest of one lemon for a bright, citrusy flavor.
FAQs (Frequently Asked Questions)
Q: Can I use frozen zucchini?
A: Yes, but be sure to thaw it completely and squeeze out any excess moisture before adding it to the batter. Excess moisture can make the bread soggy.
Q: Why is my zucchini bread so dense?
A: Overmixing the batter is a common cause of dense zucchini bread. Be sure to mix only until the ingredients are just combined. Also, ensure your baking powder and baking soda are fresh.
Q: Can I make this recipe into muffins instead of loaves?
A: Absolutely! Reduce the baking time to about 18-22 minutes, or until a toothpick inserted into the center comes out clean.
Q: How do I prevent the top of the bread from burning?
A: If the top is browning too quickly, tent the loaf pan with aluminum foil during the last 15-20 minutes of baking.
Q: Can I add other vegetables to this bread?
A: Grated carrots or apples can be a delicious addition to zucchini bread. Simply substitute a portion of the zucchini with an equal amount of shredded carrot or apple.
Final Thoughts
This eggless zucchini bread is more than just a recipe; it’s an invitation to create a comforting and delicious treat that everyone can enjoy. It’s adaptable, forgiving, and guaranteed to fill your home with the warm, inviting scent of homemade goodness. So, preheat your oven, gather your ingredients, and embark on this culinary adventure. I can’t wait to hear about your baking success and any creative twists you add to make it your own! Share your thoughts, photos, and experiences – happy baking!