
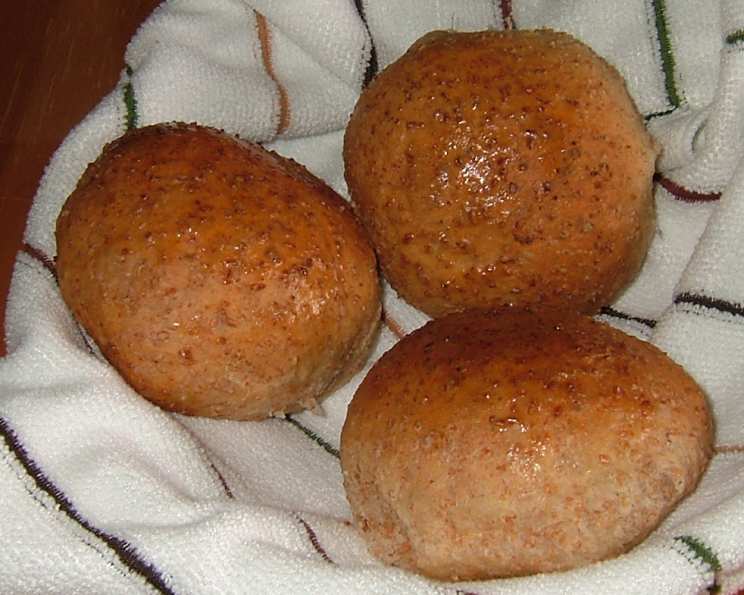
Delicious Homemade Bread by Hand (White or Wheat)
The scent of freshly baked bread has always been my happy place. I remember, as a child, being completely mesmerized watching my grandmother work her magic. Flour dusted her apron as she kneaded and coaxed the dough into submission, the aroma filling her cozy kitchen. That simple, warm, yeasty fragrance promised comfort, love, and, of course, a delicious slice of bread slathered with butter. I’ve tried to recreate that feeling ever since, and this recipe comes pretty darn close.
Recipe Overview
- Prep Time: 30 minutes
- Cook Time: 30-32 minutes
- Rise Time: 1 hour 30 minutes
- Total Time: 2 hours 32 minutes
- Yield: 1 Loaf
- Servings: 12
- Dietary Type: Vegetarian
Ingredients
- 3 1/2 cups white flour (or wheat flour, for wheat bread)
- 1 1/3 cups warm water (not hot, not cool)
- 2 1/4 teaspoons bulk yeast (or 1 packet of yeast)
- 3 tablespoons sugar (or 1/3 cup honey, for wheat bread)
- 1/4 cup vegetable oil
- 1 teaspoon salt
Equipment Needed
- Large bowl
- Hand mixer (optional, but recommended)
- Large spoon
- Measuring cups and spoons
- Oiled bowl
- Damp towel
- Lightly floured surface
- Rolling pin
- Sprayed full-size loaf pan
- Wire rack
Instructions
-
In a large bowl, mix the yeast and warm water. Let it sit for 10 minutes. You should observe bubbles forming, indicating the yeast is active and ready to work its magic.
-
After the 10-minute rest, add the oil, salt, sugar (or honey, if making wheat bread), and 1 cup of flour to the yeast mixture. Mix with a hand mixer for 2 minutes.
-
After mixing with the hand mixer, stir in the remaining flour with a large spoon. Continue mixing until it becomes difficult to stir with a spoon.
-
Now, it’s time for the fun part – kneading by hand. Continue mixing and kneading the dough. Once all the flour is completely incorporated, you should have a dough texture that is neither sticky nor dry. If the dough is too sticky, gradually add more flour, a tablespoon at a time, until the desired consistency is achieved. If the dough is too dry, add a very small amount of water, a teaspoon at a time, until it reaches the right consistency.
-
Once the dough is properly kneaded, roll it into a smooth dough ball.
-
Prepare a separate bowl by oiling it lightly with vegetable oil. It’s important to oil the bowl and not spray it. Place the dough ball into the oiled bowl and flip it once to ensure it’s lightly coated with oil on all sides.
-
Cover the bowl with a damp towel and place it in a warm environment to rise. A simple trick is to preheat your oven to 170 degrees Fahrenheit, then immediately turn it off. This creates the perfect warm environment for rising. Let the dough rise for 1 hour, or until it has doubled in size.
-
After the first rise, remove the towel and the dough from the bowl. Place the dough on a lightly floured surface.
-
Knead the dough briefly to release any trapped air. Then, roll it out into a large rectangle, using a rolling pin. You might need to lightly flour your rolling pin to prevent sticking.
-
You will now roll the rectangle back up along the short side (if you roll along the long side it will not fit in your bread pan). Pinch seams together on bottom and on ends and place seem side down into a sprayed full-size loaf pan. Make sure the loaf pan is thoroughly sprayed to prevent the bread from sticking.
-
Cover the loaf pan with a damp towel and place it back into the oven to rise a second time (again, with no heat on) for 30 minutes.
-
At approximately 24 minutes into the second rise, remove the loaf pan from the oven and let it rise for the remaining 6 minutes on the counter while you preheat your oven to 370 degrees Fahrenheit.
-
Place the uncovered loaf pan into the preheated oven and bake for 30-32 minutes. The bread is done when it is golden brown on top and sounds hollow when tapped.
-
Remove the baked bread from the oven and carefully turn it out onto a wire rack. Allow the bread to cool completely before slicing and serving. Cooling it completely is crucial for achieving the best texture.
Expert Tips & Tricks
- Temperature is Key: Ensure the water is warm, not hot, as hot water can kill the yeast.
- Don’t Over-Knead: Over-kneading can result in a tough loaf. Knead until the dough is smooth and elastic.
- Oven Spring: A burst of rising in the oven during the initial baking phase is known as “oven spring.” A properly proofed dough will exhibit good oven spring.
- Resting Dough: A longer, slower rise often results in a more flavorful loaf. Consider refrigerating the dough overnight for a richer flavor.
- Scoring the Loaf: Before baking, you can score the top of the loaf with a sharp knife to control the expansion during baking and create a decorative effect.
Serving & Storage Suggestions
Serve this homemade bread warm with butter, jam, or alongside your favorite soup or sandwich.
To store, allow the bread to cool completely before wrapping it tightly in plastic wrap or placing it in a bread bag. It will last for 2-3 days at room temperature. For longer storage, you can freeze the bread for up to 3 months. Thaw the bread completely before serving. To refresh the bread, you can warm it in the oven at 350°F for 5-10 minutes.
Nutritional Information
| Nutrient | Amount per Serving | % Daily Value |
|---|---|---|
| Calories | 187.5 kcal | N/A |
| Calories from Fat | 44 kcal | N/A |
| Total Fat | 5 g | 7% |
| Saturated Fat | 0.7 g | 3% |
| Cholesterol | 0 mg | 0% |
| Sodium | 195.7 mg | 8% |
| Total Carbohydrate | 31.3 g | 10% |
| Dietary Fiber | 1.2 g | 4% |
| Sugars | 3.2 g | N/A |
| Protein | 4.1 g | 8% |
Note: Nutritional information is an estimate and may vary based on specific ingredients and portion sizes.
Variations & Substitutions
- Herb Bread: Add 1-2 tablespoons of dried herbs, such as rosemary, thyme, or oregano, to the dough for a savory twist.
- Cheese Bread: Incorporate 1 cup of shredded cheese, such as cheddar or parmesan, into the dough.
- Sweet Bread: Add 1/2 cup of dried fruit, such as raisins or cranberries, and 1 teaspoon of cinnamon to the dough for a sweet and festive bread.
- Whole Grain: Substitute up to half of the white flour with whole wheat flour for a heartier and more nutritious loaf.
- Dairy-Free: Use olive oil or another plant-based oil instead of vegetable oil.
- Gluten-Free: While this recipe is not naturally gluten-free, you can experiment with gluten-free flour blends. Be aware that the texture and rise may be different.
FAQs (Frequently Asked Questions)
Q: Why is my bread dense and not rising properly?
A: Possible reasons include using expired yeast, not letting the dough rise long enough, or using water that is too hot or too cold.
Q: Can I use active dry yeast instead of instant yeast?
A: Yes, but you may need to proof the active dry yeast in warm water for a longer period before adding it to the other ingredients.
Q: How do I know when the bread is fully baked?
A: The bread should be golden brown on top and sound hollow when tapped on the bottom. An internal temperature of 200-210°F is also a good indicator.
Q: Can I freeze the dough instead of baking it immediately?
A: Yes, you can freeze the dough after the first rise. Wrap it tightly in plastic wrap and thaw it in the refrigerator overnight before baking.
Q: What can I do if my bread is browning too quickly?
A: Tent the bread with foil during the last 10-15 minutes of baking to prevent it from browning too much.
Final Thoughts
Baking bread by hand might seem like a daunting task, but it’s an incredibly rewarding experience. The aroma alone is worth the effort. So, gather your ingredients, roll up your sleeves, and get ready to create a loaf of homemade goodness that will warm your heart and soul. Don’t be afraid to experiment with variations and make it your own. And, of course, please share your results and any helpful tips you discover along the way! Happy baking!