
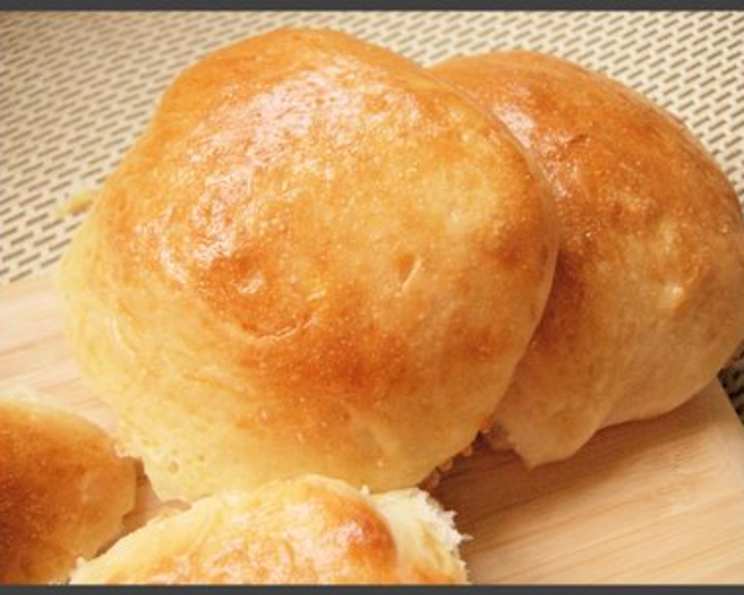
Make-Ahead Dinner Rolls: The Holiday Hero
I remember being a young chef, intimidated by the sheer volume of work during the holidays. The pressure to deliver a perfect feast for family and friends was immense, and fresh bread, with its timing constraints, always felt like the most precarious part. Then, I discovered the magic of make-ahead rolls. It felt like unlocking a culinary secret, suddenly gifting me with precious hours on the big day. The aroma of these golden, fluffy pillows baking in the oven is now forever linked in my mind with the joy and anticipation of the season.
Recipe Overview
- Prep Time: 1 hour 20 minutes (includes yeast softening, kneading, and shaping)
- Rise Time: 45 minutes (first rise) + 20-30 minutes (second rise) + 30-45 minutes (after freezing)
- Cook Time: 15 minutes
- Total Time: 2 hours 20 minutes (plus freezing time)
- Servings: 24
- Dietary Type: Not specified; contains dairy and gluten.
Ingredients
- 1 1⁄4 cups whole milk
- 2 tablespoons granulated sugar
- 1 (1/4 ounce) package fast rise yeast
- 1 large egg, beaten lightly
- 3 1⁄2 cups unbleached all-purpose flour, plus extra for work surface and dusting rolls
- 1 1⁄2 teaspoons table salt
- 8 tablespoons unsalted butter, cut into 8 pieces and softened (1 stick)
Equipment Needed
- Microwave-safe measuring cup or bowl (or small saucepan)
- Whisk
- Standing mixer with paddle and dough hook attachments
- Large bowl
- Plastic wrap
- 2 rimmed baking sheets
- Parchment paper
- Clean kitchen towels
- Large zipper-lock bag
Instructions
-
Warm the oven: Adjust oven rack to low position and heat oven to 200 degrees Fahrenheit. Once oven reaches 200 degrees, maintain oven temperature for 10 minutes, then turn off oven heat. This creates a warm environment for the dough to rise.
-
Warm the milk: Microwave milk and sugar in a microwave-safe measuring cup or bowl at full power until warm (about 95 degrees Fahrenheit). (Alternatively, heat milk and sugar in small saucepan over medium heat until warm; remove from heat.) Whisk to dissolve the sugar.
-
Activate the yeast: Sprinkle yeast over the surface of the liquid, cover with plastic wrap, and set aside for 10 minutes to soften the yeast. This step is crucial to ensure your rolls rise properly. If the yeast doesn’t foam or bubble after 10 minutes, it may be inactive, and you’ll need to start with fresh yeast.
-
Incorporate the egg: Whisk the egg into the milk mixture, dissolving the yeast.
-
Combine dry ingredients: Combine the flour and salt in the bowl of a standing mixer fitted with the paddle attachment; mix on lowest speed to blend, about 15 seconds.
-
Combine wet and dry ingredients: With the mixer running, add the milk mixture in a steady stream; mix on low speed until flour is just moistened, about 1 minute.
-
Add the butter: With the mixer running, add the butter one piece at a time; increase speed to medium and beat until combined and dough is scrappy, about 2 minutes. Don’t worry if it looks a bit messy at this stage.
-
Knead the dough: Replace the paddle with the dough hook and knead the dough until smooth but still sticky, about 4 minutes. The dough should come together but still feel slightly tacky to the touch.
-
Hand Knead: Scrape the dough out onto a work surface. Knead by hand until very smooth and soft but no longer sticky, about 1 minute; do not add more flour. Be careful not to over-knead, as this can result in tough rolls. The dough should be supple and elastic.
-
First Rise: Transfer the dough to a large bowl, cover with plastic wrap, and place in the warm oven until dough doubles in bulk, about 45 minutes. Make sure the oven is OFF before placing the dough inside! The warmth will create a perfect environment for the yeast to work its magic.
-
Prepare Baking Sheets: Line 2 rimmed baking sheets with parchment paper. This prevents the rolls from sticking and makes cleanup a breeze.
-
Punch Down and Rest: Punch down the dough, replace the plastic wrap, and let the dough rest for 5 minutes. This helps to relax the gluten and make the dough easier to shape.
-
Shape and Cut: Turn the dough onto a lightly floured work surface and shape and cut into triangles. Aim for evenly sized rolls for consistent baking. (Instructions for shaping into triangles not provided, so follow your preferred method).
-
Second Rise: Transfer rolls to baking sheets, then cover each with clean kitchen towels and let rise until almost doubled in bulk, 20 to 30 minutes. This is crucial for achieving light and fluffy rolls.
-
Freeze: Remove towels and (without pressing on the rolls) wrap baking sheets tightly with greased plastic wrap. Freeze rolls until solid, about 6 hours; transfer to a large zipper-lock bag and freeze for up to 1 month.
-
Bake: When ready to bake the rolls, adjust oven racks to upper- and lower-middle positions; heat oven to 375 degrees Fahrenheit. Place frozen rolls on 2 parchment-lined rimmed baking sheets; let stand at room temperature for 30 to 45 minutes.
-
Bake to Perfection: Bake until golden brown, about 15 minutes, rotating baking sheets front to back and switching positions from top to bottom halfway through baking time. This ensures even baking.
-
Cool and Serve: Transfer rolls immediately to a wire rack; cool 5 minutes and serve.
Expert Tips & Tricks
- Yeast Temperature: Ensure your milk is warm, not hot, before adding the yeast. Hot liquid can kill the yeast.
- Dough Stickiness: The dough will be slightly sticky, which is normal. Avoid adding excessive flour during kneading, as this can make the rolls tough.
- Freezing Prevention: To prevent freezer burn, make sure the plastic wrap is tightly sealed around the rolls before freezing.
- Baking From Frozen: If the rolls aren’t fully thawed, add a few extra minutes to the baking time.
- Egg Wash: For a richer color and sheen, brush the rolls with a beaten egg or egg wash before baking.
Serving & Storage Suggestions
Serve these rolls warm, straight from the oven. They are perfect alongside any meal, especially holiday dinners. Leftover rolls can be stored at room temperature in an airtight container for up to 2 days. For longer storage, freeze the baked rolls in a freezer-safe bag for up to 2 months. To reheat, wrap the frozen rolls in foil and bake at 350 degrees Fahrenheit for about 10-15 minutes, or until warmed through. You can also microwave them in 30-second intervals until warm, but this may affect the texture.
Nutritional Information
| Nutrient | Amount per Serving | % Daily Value |
|---|---|---|
| Calories | 116 kcal | N/A |
| Calories from Fat | N/A | 36% |
| Total Fat | 4.7 g | 7% |
| Saturated Fat | 2.8 g | 13% |
| Cholesterol | 19.2 mg | 6% |
| Sodium | 154.8 mg | 6% |
| Total Carbohydrate | 15.7 g | 5% |
| Dietary Fiber | 0.6 g | 2% |
| Sugars | 1.8 g | 7% |
| Protein | 2.7 g | 5% |
Variations & Substitutions
- Sweet Rolls: Add a cinnamon-sugar filling before shaping the rolls for a delicious breakfast treat.
- Herb Rolls: Incorporate fresh herbs like rosemary, thyme, or oregano into the dough for a savory twist.
- Garlic Rolls: Brush the baked rolls with garlic butter for an extra burst of flavor.
- Dairy-Free: Substitute the whole milk with plant-based milk (like almond or soy milk) and the butter with a vegan butter alternative. Note that this may affect the texture and flavor.
- Gluten-Free: While a direct substitution of all-purpose flour with a gluten-free blend is possible, it will drastically change the texture. Consider adjusting the liquid content and adding a binder like xanthan gum.
FAQs (Frequently Asked Questions)
Q: Can I make these rolls without a stand mixer?
A: Yes, you can. Knead the dough by hand for about 8-10 minutes until it becomes smooth and elastic.
Q: Why are my rolls not rising?
A: Possible reasons include using inactive yeast, not providing a warm enough environment for rising, or over-kneading the dough.
Q: Can I freeze the dough after the first rise instead of shaping the rolls?
A: Yes, you can. Punch down the dough, wrap it tightly in plastic wrap, and freeze for up to a month. Thaw in the refrigerator overnight, then shape the rolls and let them rise before baking.
Q: How can I make sure the rolls bake evenly?
A: Rotating the baking sheets halfway through baking is key to ensuring even browning. Also, make sure your oven temperature is accurate.
Q: Can I add an egg wash before baking for a shinier crust?
A: Absolutely! Brush the rolls with a beaten egg mixed with a tablespoon of water right before baking for a beautiful golden crust.
Final Thoughts
These make-ahead dinner rolls are more than just a recipe; they’re a gift to yourself during busy times. Embrace the joy of preparing in advance and savor the deliciousness of freshly baked bread without the stress. Don’t be afraid to experiment with flavors and fillings to create your own signature rolls. And please, share your creations with us! Happy baking!