
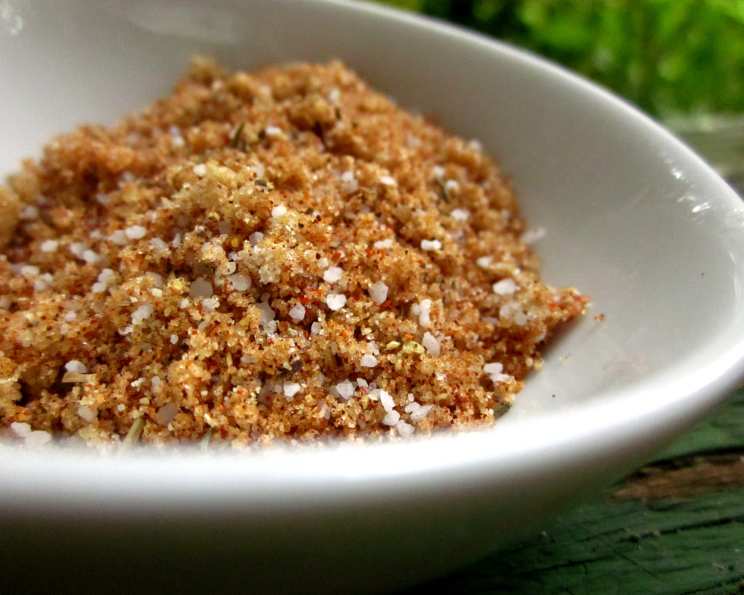
The Ultimate Dry Rub for Barbecued Ribs: A Flavor Fiesta
My first encounter with truly exceptional ribs was at a backyard barbecue, hosted by my friend Barb, the undisputed queen of smoky goodness. The aroma alone was intoxicating – a symphony of sweet, savory, and subtly spicy notes that hinted at culinary magic. These weren’t just ribs; they were tender, fall-off-the-bone masterpieces, infused with a depth of flavor that lingered long after the last bite. When I inquired about her secret, Barb generously shared her dry rub recipe, and it has been my go-to ever since, transforming ordinary ribs into extraordinary feasts.
Recipe Overview
- Prep Time: 5 minutes
- Cook Time: 2.5-3 hours
- Total Time: 2 hours 35 minutes to 3 hours 5 minutes (plus refrigeration time)
- Servings: 5-6
- Yield: About 5-6 lbs of ribs
- Dietary Type: Gluten-Free, Dairy-Free
Ingredients
- 8 tablespoons brown sugar
- 1 tablespoon kosher salt
- 1 tablespoon chili powder
- ½ teaspoon pepper
- ½ teaspoon cayenne pepper
- ½ teaspoon Old Bay Seasoning
- ½ teaspoon thyme
- 1 teaspoon onion powder
- 1 teaspoon garlic powder
- 5-6 lbs baby back ribs
- Barbecue sauce, for finishing (your favorite brand)
Equipment Needed
- Large bowl for mixing
- Measuring spoons and cups
- Covered baking pan (roasting pan with lid or a baking sheet tightly covered with foil)
- Grill (gas or charcoal)
Instructions
-
In a large bowl, combine all the dry rub ingredients. This means thoroughly mixing the brown sugar, kosher salt, chili powder, pepper, cayenne pepper, Old Bay Seasoning, thyme, onion powder, and garlic powder until evenly distributed. Ensure there are no clumps of brown sugar.
-
Prepare the baby back ribs. Remove the membrane from the back of the ribs. To do this, slide a butter knife under the membrane on one end of the rack, then use paper towels to grip and pull the membrane off. This step allows the rub to penetrate the meat more effectively and results in more tender ribs.
-
Generously rub the spice mixture over both sides of the ribs, ensuring every nook and cranny is coated. Don’t be shy; really massage the rub into the meat.
-
Place the rubbed ribs in the refrigerator for at least a couple of hours, or ideally, overnight. This allows the flavors to meld and penetrate deep into the meat, resulting in a much more flavorful final product.
-
Preheat your oven to 325 degrees F (160 degrees C).
-
Place the rubbed ribs in a covered baking pan. Add about 1/4 cup of water or apple juice to the bottom of the pan to create some steam. This will help keep the ribs moist during the baking process.
-
Bake in the preheated oven for 2 1/2 to 3 hours, or until the ribs are very tender and almost falling off the bone. The exact cooking time will depend on the thickness of the ribs. To check for doneness, insert a fork between the bones; it should slide in easily with little resistance.
-
At this point, you have two options. You can either refrigerate the ribs until you’re ready to barbecue them, or you can proceed directly to the grilling stage.
-
If refrigerating, allow the ribs to come to room temperature slightly before grilling.
-
Prepare your grill to a moderately heated temperature.
-
Place the baked ribs on the grill. Brush generously with your favorite barbecue sauce on both sides.
-
Grill the ribs, turning and basting with barbecue sauce frequently, until they are heated through and the sauce is caramelized and sticky. This should take about 10-15 minutes. Be careful not to burn the sauce.
-
Remove the ribs from the grill and let them rest for a few minutes before serving. This allows the juices to redistribute, resulting in even more tender and flavorful ribs.
Expert Tips & Tricks
- Spice Level Adjustment: Adjust the amount of cayenne pepper to control the heat level. For a milder rub, reduce the amount of cayenne pepper or omit it altogether. For extra heat, add a pinch of smoked paprika or a dash of hot sauce to the rub.
- Brown Sugar Matters: Use dark brown sugar for a richer, more molasses-like flavor.
- Membrane Removal: Don’t skip removing the membrane from the back of the ribs! This seemingly small step makes a huge difference in the tenderness of the final product.
- Oven Baking is Key: The slow baking process is crucial for tenderizing the ribs. Don’t rush this step.
- Grilling for Finish: Grilling after baking allows the sauce to caramelize beautifully and adds a smoky char.
- Flavor Boost: For an extra layer of flavor, add a tablespoon of smoked paprika to the dry rub.
- Make Ahead: The dry rub can be made weeks in advance and stored in an airtight container.
Serving & Storage Suggestions
Serve the barbecued ribs hot off the grill with your favorite sides, such as coleslaw, potato salad, corn on the cob, or baked beans. Garnish with chopped fresh herbs, like parsley or cilantro, for a pop of color.
Leftover ribs can be stored in an airtight container in the refrigerator for up to 3-4 days. To reheat, wrap the ribs in foil and bake in a preheated oven at 300 degrees F (150 degrees C) until heated through. You can also reheat them on the grill or in the microwave, but be careful not to dry them out.
Ribs can also be frozen for longer storage. Wrap them tightly in plastic wrap and then in foil, or place them in a freezer-safe bag. Frozen ribs will keep for up to 2-3 months. Thaw them in the refrigerator overnight before reheating.
Nutritional Information
| Nutrient | Amount per Serving | % Daily Value |
|---|---|---|
| Calories | 750 kcal | 38% |
| Total Fat | 55g | 85% |
| Saturated Fat | 20g | 100% |
| Cholesterol | 80mg | 27% |
| Sodium | 750mg | 31% |
| Total Carbohydrate | 20g | 7% |
| Dietary Fiber | 1g | 4% |
| Sugars | 18g | N/A |
| Protein | 45g | 90% |
Note: Nutritional information is an estimate and may vary based on specific ingredients and portion sizes.
Variations & Substitutions
- Spicy Ribs: For extra spicy ribs, add 1/4 to 1/2 teaspoon of chipotle powder or a pinch of crushed red pepper flakes to the rub.
- Sweet and Savory Ribs: Add 1-2 tablespoons of honey powder or maple sugar to the rub for a sweeter flavor profile.
- Herbaceous Ribs: Increase the amount of thyme and add 1/2 teaspoon of dried rosemary or oregano for an herbaceous twist.
- Coffee Rubbed Ribs: Add 1 tablespoon of finely ground coffee to the rub for a unique and bold flavor.
- No-Sugar Rub: Substitute the brown sugar with a sugar alternative like Stevia or Monk Fruit sweetener for a sugar-free version.
FAQs (Frequently Asked Questions):
Q: Can I use this dry rub on other types of meat?
A: Absolutely! This dry rub is versatile and works well on chicken, pork shoulder, and even beef brisket. Just adjust the cooking time accordingly.
Q: How long can I store the dry rub?
A: The dry rub can be stored in an airtight container at room temperature for up to 6 months. Make sure to keep it away from moisture.
Q: Can I use this recipe for ribs in a smoker?
A: Yes, you can! Simply rub the ribs with the dry rub and smoke them at a low temperature (around 225 degrees F) for several hours, until they are tender.
Q: What if I don’t have Old Bay Seasoning?
A: While Old Bay adds a unique flavor, you can substitute it with a blend of celery salt, paprika, and a pinch of black pepper.
Q: Can I use a different type of sugar?
A: While brown sugar is recommended for its molasses flavor, you can use granulated sugar or turbinado sugar as a substitute, although the flavor profile will be slightly different.
Final Thoughts
This dry rub is more than just a recipe; it’s a gateway to barbecue bliss. The combination of sweet, savory, and spicy flavors creates a symphony of taste that will tantalize your taste buds and leave you craving more. So, gather your ingredients, fire up the grill, and prepare to create some truly unforgettable ribs. Don’t hesitate to experiment with the variations and substitutions to create a dry rub that perfectly suits your palate. And most importantly, share your creations with friends and family, spreading the joy of delicious, homemade barbecue. Enjoy!