
Easiest Homemade Chili Powder
The aroma of chili powder always takes me back to my grandmother’s kitchen. She had a knack for making the simplest dishes taste extraordinary, and her secret weapon was always her homemade chili powder. The rich, earthy scent would fill the entire house as she toasted the chilies, a promise of warm, comforting meals to come. It wasn’t just a spice blend; it was a taste of home, a memory etched in my senses. Now, I’m excited to share the magic of creating your very own, incredibly flavorful chili powder.
Recipe Overview
- Prep Time: 15 minutes
- Cook Time: 10 minutes
- Total Time: 25 minutes
- Yield: Approximately 3/4 cup
- Dietary Type: Vegan, Gluten-Free
Ingredients
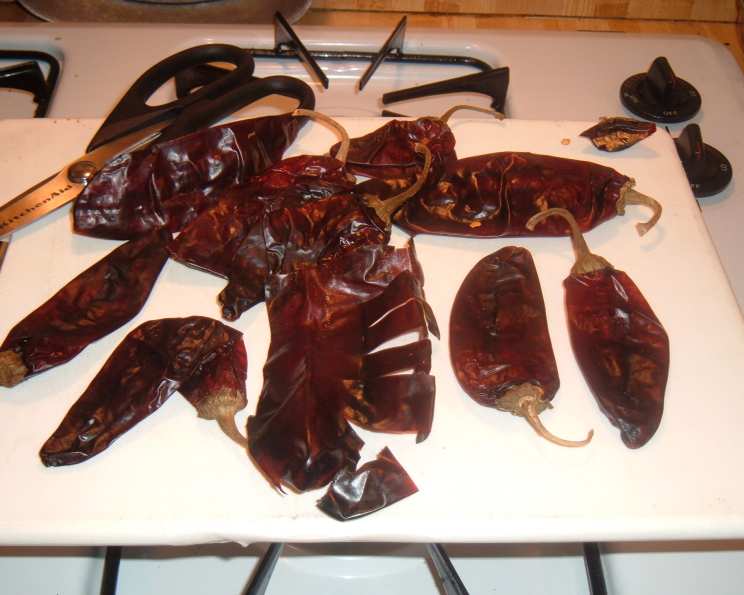
- 1 1/2 ounces dried red chilies, medium heat, preferably ancho and new mexican (approximately 4 ancho to 2 new mexican, or adjust to your preference)
- 2-5 dried red chilies, of greater heat, to taste (such as chile de árbol or cayenne)
- 1 1/2 – 2 tablespoons cumin seeds, toasted and ground
- 1 1/2 – 2 tablespoons garlic powder
- 1 tablespoon ground oregano (preferably Mexican)
Equipment Needed
- Baking sheet
- Oven
- Blender or Spice Grinder
- Jar with lid
Instructions
- Preheat your oven to 300ºF (150°C).
- Prepare the chilies: Remove the stems and seeds from all of the dried chilies. This step is crucial for controlling the heat level and ensuring a smooth final powder. For a milder chili powder, be meticulous in removing all seeds.
- Arrange the chilies in a single layer on a baking sheet. Ensure they’re not overlapping to allow for even toasting.
- Toast the hot chilies: Place the baking sheet in the preheated oven. If using chile de árbol or cayenne, these smaller, hotter pods will toast faster. Remove them after approximately 4-5 minutes. Keep a close eye on them, as they can burn quickly.
- Continue toasting the larger chilies: Return the baking sheet to the oven and bake the remaining ancho and new mexican chilies for an additional 4-5 minutes, or until they are well-dried and slightly fragrant. They should be pliable but not brittle.
- Cool the chilies: Remove the baking sheet from the oven and allow the chilies to cool enough to handle comfortably.
- Break into pieces: Once cooled, break the chilies into smaller pieces (about 2-3 pieces each) to facilitate grinding in the blender or spice grinder.
- Grind the chilies: Transfer the chili pieces to a blender or spice grinder. Pulverize briefly until you achieve a fine powder. Be careful not to over-blend, as this can release too much heat and cause the powder to clump.
- Add remaining ingredients: To the ground chilies, add the toasted and ground cumin seeds, garlic powder, and ground oregano.
- Blend to combine: Pulse the blender or spice grinder just until all the ingredients are thoroughly combined. Avoid over-processing.
- Store: Transfer your homemade chili powder to a clean, dry jar with a tight-fitting lid. Store in a cool, dark place for up to 3 months to maintain optimal flavor and freshness.
Expert Tips & Tricks
- Toasting the cumin seeds: Before grinding the cumin seeds, toast them in a dry skillet over medium heat for a few minutes until fragrant. This intensifies their flavor and adds depth to the chili powder. Be careful not to burn them.
- Controlling the heat: The amount and type of hot chilies (like chile de árbol or cayenne) will determine the overall heat level of your chili powder. Start with a smaller amount and add more to taste. Remember, you can always add more heat, but you can’t take it away!
- Spice Grinder vs. Blender: A dedicated spice grinder will yield the finest powder, but a blender can also work well, especially for larger batches. If using a blender, pulse in short bursts and scrape down the sides as needed to ensure even grinding.
- Preventing clumping: Ensure your chilies are completely dry before grinding to prevent clumping. If your chili powder does clump, try adding a small amount of rice to the blender and pulsing to absorb any excess moisture.
- Testing the flavor: Taste your chili powder after blending and adjust the seasonings as needed. You can add more cumin, garlic powder, or oregano to suit your personal preferences.
Serving & Storage Suggestions
Your homemade chili powder is a versatile addition to countless dishes. Use it to season chili, tacos, enchiladas, stews, rubs for grilled meats, or even sprinkle it on popcorn for a spicy kick.
Store your homemade chili powder in an airtight jar in a cool, dark place away from direct sunlight and heat. Properly stored, it will retain its flavor for up to 3 months. While it won’t necessarily “go bad” after that, the flavor will gradually diminish. There is no need to refrigerate or freeze your chili powder.
Nutritional Information
Please note that the following nutritional information is an estimate and may vary depending on the specific ingredients used.
| Nutrient | Amount per Serving (approx. 1 tsp) | % Daily Value* |
|---|---|---|
| Calories | 5 kcal | 0% |
| Total Fat | 0.2g | 0% |
| Saturated Fat | 0g | 0% |
| Cholesterol | 0mg | 0% |
| Sodium | 1mg | 0% |
| Total Carbohydrate | 1g | 0% |
| Dietary Fiber | 0.4g | 1% |
| Sugars | 0.2g | 0% |
| Protein | 0.2g | 0% |
*Percent Daily Values are based on a 2,000 calorie diet.
Variations & Substitutions
- Smoked Chili Powder: For a smoky flavor, try using smoked paprika or chipotle powder in place of some of the ancho or new mexican chilies.
- Sweet Chili Powder: Add a tablespoon of brown sugar or maple sugar to the blend for a touch of sweetness.
- Hotter Chili Powder: Increase the amount of chile de árbol or cayenne for a spicier blend. You can also add a pinch of cayenne pepper directly to the mixture.
- Regional Variations: Experiment with different types of dried chilies based on your regional preferences. Guajillo, pasilla, and chipotle are all excellent choices.
FAQs (Frequently Asked Questions)
Q: Can I use fresh chilies instead of dried?
A: While you can use fresh chilies, they need to be thoroughly dried before grinding into powder. This process can be time-consuming and requires specialized equipment like a dehydrator. Dried chilies are the easiest and most convenient option for making chili powder.
Q: How do I know if my chilies are properly toasted?
A: The chilies should be slightly pliable and fragrant, but not brittle or burnt. They should also be slightly darker in color. Keep a close eye on them during toasting to prevent burning.
Q: My chili powder is too spicy. What can I do?
A: Unfortunately, there’s no way to remove the heat once it’s in the powder. Next time, use fewer hot chilies. To balance the heat in your dish, add dairy such as sour cream or cheese.
Q: Can I use pre-ground cumin and oregano?
A: Yes, you can, but toasting and grinding the cumin seeds yourself will result in a much more flavorful chili powder. Freshly ground spices always have a more intense aroma and taste.
Q: How can I tell if my chili powder has gone bad?
A: Chili powder doesn’t really “go bad” in the sense of becoming unsafe to eat, but it will lose its potency over time. If your chili powder has lost its aroma and flavor, it’s time to replace it.
Final Thoughts
Creating your own homemade chili powder is a simple yet rewarding experience. The ability to customize the flavor and heat level to your exact preferences is unparalleled. So, gather your ingredients, fire up the oven, and embark on a culinary adventure that will elevate your cooking to new heights. Don’t be afraid to experiment with different chili varieties and spice combinations to create a signature blend that is uniquely yours. And most importantly, share your creations with friends and family, spreading the warmth and flavor of homemade chili powder far and wide.