
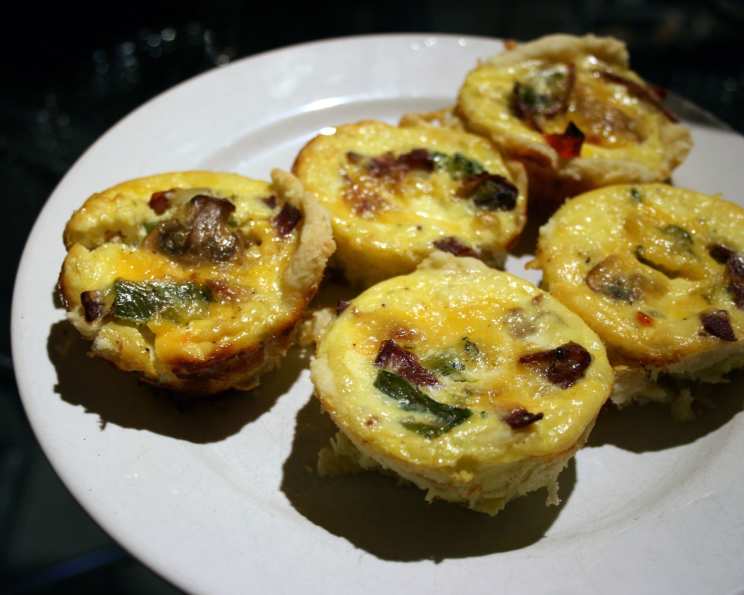
Irresistible Mini Quiches: The Perfect Bite-Sized Delight
I’ll never forget the first time I made mini quiches. It was a chaotic Sunday brunch, and I was determined to impress my family. The aroma of bacon sizzling on the stovetop mingled with the warm, comforting scent of baking bread. As I pulled the golden-brown quiches from the oven, a chorus of “oohs” and “aahs” filled the air. These little savory wonders disappeared in minutes, leaving behind happy smiles and requests for more. From that day on, mini quiches became a brunch staple in our home, a testament to their irresistible charm and ease of preparation.
Recipe Overview
- Prep Time: 20 minutes
- Cook Time: 28 minutes
- Total Time: 48 minutes
- Servings: 12
- Yield: 12 mini quiches
- Dietary Type: Not Vegetarian
Ingredients
- 12 slices whole wheat bread
- Butter or margarine
- 4 eggs
- ¾ cup 2% evaporated milk
- 6 slices bacon, diced
- 4 green onions, finely chopped
- ⅔ cup shredded cheddar cheese or ⅔ cup shredded Swiss cheese
Equipment Needed
- Muffin tin (12-cup)
- Knife
- Liquid measuring cup
- Frying pan
- Spatula
- Whisk
Instructions
- Begin by preparing the crusts. Remove the crusts from all 12 slices of whole wheat bread. This ensures a neater fit within the muffin cups.
- Generously spread one side of each bread slice with butter or margarine. Make sure to spread evenly to ensure a crisp crust.
- Place the buttered side of the bread down into each muffin cup, gently pressing it firmly against the bottom and sides. Be cautious not to tear the bread as you mold it to the shape of the cup.
- Preheat your oven to 325°F (160°C).
- Bake the bread crusts in the preheated oven for 10 minutes. This par-baking step sets the crust and prevents it from becoming soggy later.
- While the crusts are baking, prepare the egg mixture. In a large liquid measuring cup, combine the 4 eggs and ¾ cup of 2% evaporated milk. Whisk thoroughly until the mixture is well combined and slightly frothy. Set aside.
- In a frying pan over medium heat, sauté the 6 slices of diced bacon and 4 finely chopped green onions until the bacon is cooked through and the green onions are softened. Drain off any excess fat.
- Once the bread crusts are par-baked, remove them from the oven.
- Evenly divide the cooked bacon and green onion mixture among the 12 bread cups. Distribute the mixture carefully to ensure each mini quiche has a good balance of flavor.
- Gently pour a small amount of the egg mixture over the bacon and green onions in each cup. Allow it to partially absorb into the bread before adding more. This helps prevent the filling from overflowing and ensures the bread absorbs the delicious flavors. Then, top up with the remaining egg mixture.
- Sprinkle the shredded cheddar cheese or Swiss cheese evenly over the top of each quiche.
- Return the muffin tin to the oven and bake for another 16-18 minutes, or until the quiches are golden brown and puffed up. The filling should be set, and the crust should be nicely browned.
- Remove the mini quiches from the oven and allow them to cool slightly in the muffin tin before attempting to remove them.
- Once cooled enough to handle, carefully remove the mini quiches from the tin. They may stick slightly, so gently loosen them with a knife if needed.
Expert Tips & Tricks
- For a richer flavor, try using full-fat evaporated milk instead of 2%.
- To prevent the crusts from becoming too brown, you can lightly cover the muffin tin with foil during the last few minutes of baking.
- If you’re short on time, pre-made pie crust can be used. Just cut into circles and press into the muffin tins. Adjust baking time accordingly.
- For a vegetarian option, substitute the bacon with sautéed mushrooms or spinach.
- Add a dash of hot sauce or a pinch of red pepper flakes to the egg mixture for a spicy kick.
Serving & Storage Suggestions
Serve these delectable mini quiches warm or at room temperature. They make a perfect addition to brunch spreads, potlucks, or quick snacks. For a complete meal, pair them with a fresh green salad or a bowl of soup.
Leftover mini quiches can be stored in an airtight container in the refrigerator for up to 3 days. To reheat, simply microwave for 30-60 seconds, or bake in a preheated oven at 350°F (175°C) for 5-10 minutes until warmed through. They can also be frozen for up to 2 months. Wrap them individually in plastic wrap before placing them in a freezer bag to prevent freezer burn. Thaw in the refrigerator overnight before reheating.
Nutritional Information
| Nutrient | Amount per Serving | % Daily Value |
|---|---|---|
| Calories | 276.4 kcal | N/A |
| Calories from Fat | N/A | 42% |
| Total Fat | 12.8 g | 19% |
| Saturated Fat | 5.3 g | 26% |
| Cholesterol | 142.6 mg | 47% |
| Sodium | 457.9 mg | 19% |
| Total Carbohydrate | 24.3 g | 8% |
| Dietary Fiber | 4.1 g | 16% |
| Sugars | 3.5 g | N/A |
| Protein | 15.7 g | 31% |
Variations & Substitutions
- Gluten-Free: Use gluten-free bread or a gluten-free pie crust alternative.
- Dairy-Free: Substitute the evaporated milk with unsweetened almond milk or coconut milk. Use a dairy-free cheese alternative.
- Meat Lovers: Add cooked sausage, ham, or pepperoni to the bacon mixture for an extra meaty flavor.
- Vegetable Medley: Incorporate a variety of chopped vegetables, such as bell peppers, mushrooms, zucchini, or spinach, for a colorful and nutritious twist.
- Herbed Delight: Add fresh herbs like thyme, rosemary, or chives to the egg mixture for an aromatic flavor.
FAQs (Frequently Asked Questions)
Q: Can I make these mini quiches ahead of time?
A: Yes, you can prepare them a day in advance and store them in the refrigerator until ready to bake. You might need to add a few extra minutes to the baking time if they are cold.
Q: My quiches are sticking to the muffin tin. What can I do?
A: Make sure your muffin tin is well-greased or use muffin liners to prevent sticking. Gently loosen the edges with a knife before removing the quiches from the tin.
Q: Can I use different types of cheese?
A: Absolutely! Feel free to experiment with different cheeses such as Gruyere, Monterey Jack, or pepper jack for a unique flavor.
Q: Can I freeze these mini quiches?
A: Yes, they freeze well. Allow them to cool completely before wrapping them individually in plastic wrap and placing them in a freezer bag.
Q: Can I use regular milk instead of evaporated milk?
A: Evaporated milk provides a richer and creamier texture, but you can use regular milk as a substitute. The texture may be slightly different.
Final Thoughts
These mini quiches are more than just a recipe; they’re a blank canvas for your culinary creativity. Whether you’re looking for a quick breakfast, an elegant appetizer, or a crowd-pleasing brunch dish, these bite-sized delights are sure to impress. So, gather your ingredients, preheat your oven, and embark on a culinary adventure. Don’t hesitate to experiment with different flavors and fillings to create your own signature mini quiches. I encourage you to try this recipe and share your creations with loved ones. Enjoy the warmth, the flavors, and the joy of homemade goodness!