
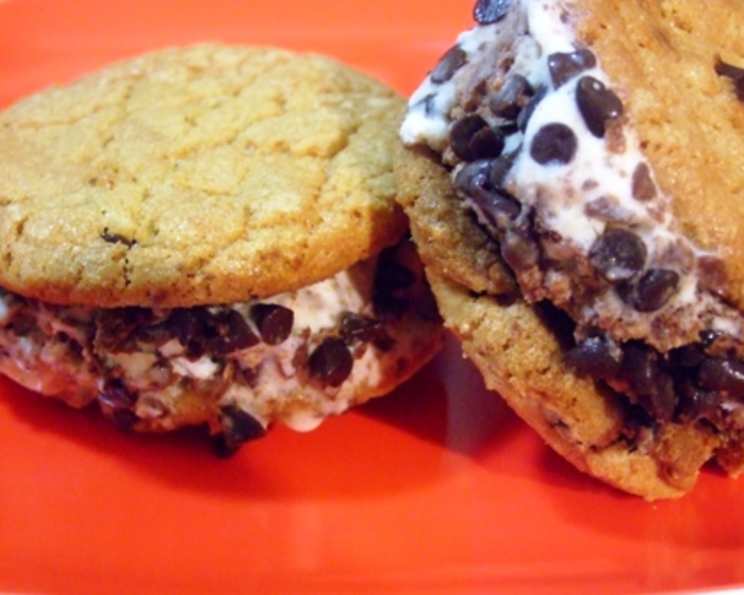
Easy Ice Cream Sandwiches: A Childhood Classic, Elevated
There’s a certain magic to ice cream sandwiches. I remember summer days as a kid, the sheer delight of unwrapping that frosty treat, the way the cold ice cream would squish out the sides as you bit into it, and the satisfying crunch of the cookies. It wasn’t just a dessert; it was an experience – a simple pleasure that defined summer for me. Even now, the first bite of a well-made ice cream sandwich instantly transports me back to those carefree days, reminding me of the joy in life’s simplest pleasures. It’s a dessert that’s both nostalgic and endlessly customizable, making it a timeless favorite.
Recipe Overview
- Prep Time: 20 minutes
- Cook Time: 0 minutes (excluding freezing)
- Total Time: 1 hour 50 minutes
- Servings: 15
- Yield: 15 sandwiches
- Dietary Type: Vegetarian
Ingredients
- 2 cups vanilla ice cream, slightly softened
- 1 cup chopped peanuts, divided
- 30 chocolate chip cookies (such as Chips Ahoy! Real Chocolate Cookies)
Equipment Needed
- Mixing bowl
- Spoon
- Baking sheet or tray
- Plastic wrap
Instructions
- In a mixing bowl, gently combine the slightly softened vanilla ice cream with 1/2 cup of the chopped peanuts. Be careful not to overmix, as you want to maintain some texture.
- Cover the bowl and freeze the ice cream-peanut mixture for 20 to 30 minutes, or until it’s firm enough to hold its shape when scooped. This step is crucial to prevent the ice cream from melting too quickly when assembling the sandwiches.
- Once the ice cream mixture is firm, take half of the chocolate chip cookies (15 cookies) and arrange them bottom-side up on a clean surface or baking sheet.
- Using a spoon or ice cream scoop, place approximately 2 tablespoons of the ice cream-peanut mixture onto the bottom side of each cookie. Try to distribute the ice cream evenly.
- Take the remaining chocolate chip cookies and carefully place them on top of the ice cream, top-side up, creating the sandwiches. Gently press down on the top cookie to ensure a good seal.
- Pour the remaining 1/2 cup of chopped peanuts onto a plate or shallow dish.
- Roll the edges of each ice cream sandwich in the chopped peanuts, coating the exposed ice cream. This adds a delightful crunch and visual appeal.
- Place the assembled ice cream sandwiches on a baking sheet or tray lined with parchment paper. This will prevent them from sticking.
- Freeze the sandwiches for 1 to 2 hours, or until they are firm and solid.
- Once the ice cream sandwiches are thoroughly frozen, remove them from the tray.
- Wrap each ice cream sandwich individually in plastic wrap to prevent freezer burn and maintain their shape.
- Return the wrapped ice cream sandwiches to the freezer for storage.
Expert Tips & Tricks
- Cookie Selection: While the original recipe calls for Chips Ahoy! cookies, feel free to experiment with different types of chocolate chip cookies, or even other flavors like oatmeal raisin or peanut butter cookies, to create unique flavor combinations. Look for cookies that are firm enough to hold their shape but not too hard that they’ll crumble when bitten into.
- Ice Cream Consistency: The key to easy assembly is having the ice cream at the right consistency. It should be soft enough to scoop easily but firm enough to hold its shape. If your ice cream is too hard, let it sit at room temperature for a few minutes to soften slightly. If it’s too soft, freeze it for a bit longer.
- Nut Alternatives: If you’re not a fan of peanuts or have allergies, you can substitute them with other toppings like chopped walnuts, pecans, sprinkles, chocolate shavings, or even crushed pretzels for a sweet and salty twist.
- Make-Ahead Magic: These ice cream sandwiches are perfect for making ahead of time. You can assemble them a day or two in advance and store them in the freezer until you’re ready to serve. This makes them ideal for parties or gatherings.
- Preventing Soggy Cookies: To prevent the cookies from becoming soggy, make sure the ice cream is well-frozen before assembling the sandwiches and wrap them tightly in plastic wrap before freezing.
Serving & Storage Suggestions
Serve the ice cream sandwiches straight from the freezer for the best texture and flavor. To enhance the presentation, you can arrange them on a platter or tray and garnish with extra chopped peanuts or a dusting of cocoa powder.
Store any leftover ice cream sandwiches in the freezer, wrapped individually in plastic wrap, for up to a month. They are best enjoyed within a week or two to prevent freezer burn and maintain their quality. Avoid thawing and refreezing, as this can affect the texture of the ice cream and cookies. These are best served straight from the freezer.
Nutritional Information
Please note that these values are estimates and can vary based on specific ingredients and portion sizes.
| Nutrient | Amount per Serving | % Daily Value |
|---|---|---|
| Calories | 249.9 kcal | N/A |
| Calories from Fat | 143 g | 57% |
| Total Fat | 16 g | 24% |
| Saturated Fat | 4.5 g | 22% |
| Cholesterol | 18.7 mg | 6% |
| Sodium | 132.6 mg | 5% |
| Total Carbohydrate | 24.8 g | 8% |
| Dietary Fiber | 1.9 g | 7% |
| Sugars | 4.5 g | 17% |
| Protein | 5 g | 10% |
Variations & Substitutions
- Gluten-Free: Use gluten-free chocolate chip cookies to make these ice cream sandwiches gluten-free.
- Dairy-Free: Substitute the vanilla ice cream with a dairy-free alternative like coconut milk or soy-based ice cream. Ensure the cookies are also dairy-free to maintain the recipe’s dairy-free status.
- Flavor Combinations: Experiment with different ice cream flavors like chocolate, strawberry, or mint chocolate chip. You can also add a layer of caramel sauce or hot fudge between the ice cream and the cookies for an extra decadent treat.
- Cookie Swaps: Try using other types of cookies like gingerbread cookies during the holidays or snickerdoodles for a cinnamon-spiced twist.
- Sandwich Shape: For a fun presentation, use cookie cutters to create different shapes with the ice cream sandwiches before freezing.
FAQs (Frequently Asked Questions)
Q: Can I use store-bought ice cream sandwiches instead of making them from scratch?
A: While you can, making them from scratch allows for customization and fresher flavors. Plus, it’s a fun and easy project!
Q: How long can I store these ice cream sandwiches in the freezer?
A: They are best stored for up to a month in the freezer when properly wrapped in plastic wrap to prevent freezer burn.
Q: What if my ice cream is too hard to scoop?
A: Let it sit at room temperature for a few minutes to soften slightly before scooping. Don’t let it melt completely, though!
Q: Can I use different types of nuts?
A: Absolutely! Feel free to substitute the peanuts with walnuts, pecans, or any other nut you prefer. You can even omit the nuts altogether.
Q: My cookies are getting soggy. How can I prevent this?
A: Make sure the ice cream is well-frozen before assembling the sandwiches, and wrap them tightly in plastic wrap before freezing.
Final Thoughts
These easy ice cream sandwiches are a delightful treat that’s perfect for any occasion. They are incredibly simple to make, endlessly customizable, and always a crowd-pleaser. Whether you’re reliving childhood memories or creating new ones, this recipe is sure to bring a smile to your face. So, gather your ingredients, get creative with your flavor combinations, and enjoy the deliciousness of homemade ice cream sandwiches! Don’t be afraid to experiment and let your imagination run wild. And, most importantly, share your creations and feedback with others. Happy baking (and freezing)!