
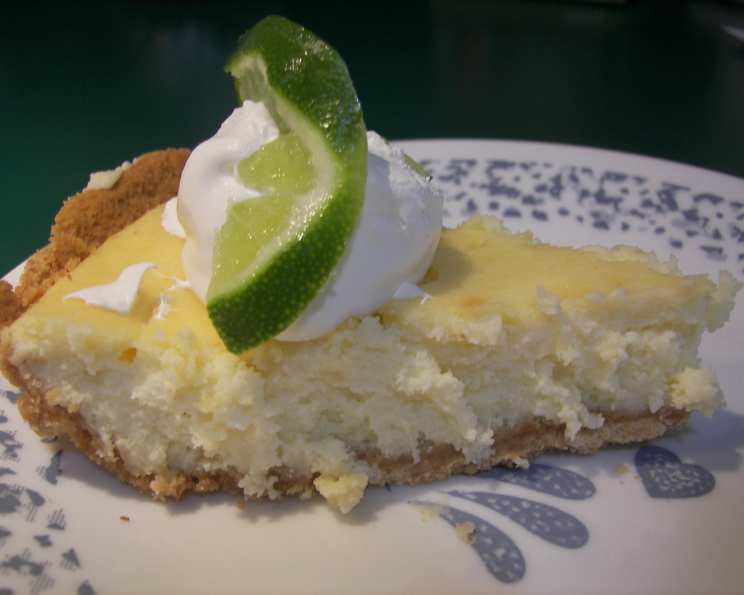
Easy Key Lime Cheesecake: A Slice of Sunshine
I can still remember the first time I tasted Key lime pie. It wasn’t in the Florida Keys, but at a small beachside cafe in California. The bright, tart flavor cut through the warm afternoon like a cool breeze, and the creamy filling just melted in my mouth. Ever since, I’ve been hooked on that signature tangy-sweet combination, and this Easy Key Lime Cheesecake captures that magic in a whole new decadent form. This recipe is ridiculously simple, yet the result is a showstopper – a guaranteed crowd-pleaser that will transport you to a tropical paradise with every bite.
Recipe Overview
- Prep Time: 10 minutes
- Cook Time: 40 minutes
- Total Time: 3 hours 50 minutes (includes chilling)
- Servings: 8
- Yield: 1 cheesecake
- Dietary Type: Vegetarian
Ingredients
- 2 (8 ounce) packages cream cheese, softened
- ½ cup sugar
- 1 teaspoon lime zest
- 2 tablespoons fresh lime juice (Key lime juice is best, but regular lime juice will work in a pinch!)
- ½ teaspoon vanilla extract
- 2 large eggs
- 1 graham cracker pie crust
Equipment Needed
- Electric mixer (handheld or stand mixer)
- Measuring cups and spoons
- Mixing bowl
- Oven
Instructions
- Preheat your oven to 350°F (175°C). Make sure your oven rack is positioned in the center of the oven for even baking.
- In a large mixing bowl, beat the softened cream cheese, sugar, lime zest, lime juice, and vanilla extract with an electric mixer on medium speed until everything is very well blended and smooth. It’s crucial that the cream cheese is properly softened to avoid any lumps in the final product.
- Add the eggs, one at a time, mixing just until blended after each addition. Do not overmix at this stage! Overmixing can incorporate too much air, which can cause the cheesecake to crack during baking.
- Carefully pour the cheesecake batter into the graham cracker pie crust. Ensure it’s evenly distributed for a uniform thickness.
- Bake in the preheated oven for 40 minutes, or until the center is almost set. The center should still have a slight jiggle to it. The edges will be set and lightly golden. This is important: it will continue to set as it cools.
- Remove the cheesecake from the oven and let it cool completely on a wire rack at room temperature.
- Once cooled, refrigerate for at least 3 hours, or preferably overnight, to allow the cheesecake to fully set.
- Before serving, garnish with whipped cream (or Cool Whip) and lime slices, if desired.
Expert Tips & Tricks
- Softening Cream Cheese: The key to a smooth cheesecake is properly softened cream cheese. Leave it out at room temperature for at least an hour, or microwave it in 15-second intervals (checking frequently) until softened, but not melted.
- Preventing Cracks: Avoid overbaking the cheesecake. A slight jiggle in the center is a good indicator that it’s ready. Also, avoid opening the oven door frequently during baking, as sudden temperature changes can cause cracking.
- Water Bath (Optional): For an even creamier texture, consider baking the cheesecake in a water bath. Wrap the bottom of the graham cracker crust with foil, place the pie dish in a larger baking pan, and fill the outer pan with hot water until it reaches about halfway up the sides of the pie dish. This creates a humid environment that helps prevent cracking. If using a water bath, increase the cooking time by approximately 15-20 minutes and check for doneness frequently.
- Blind Baking the Crust (Optional): If you prefer a crispier crust, blind bake it before adding the filling. Prick the bottom of the crust with a fork, line it with parchment paper and fill it with pie weights or dried beans. Bake at 350°F for 10-15 minutes, then remove the weights and bake for another 5 minutes or until golden brown. Let it cool completely before filling.
- Zest is Best: Don’t skip the lime zest! It adds a significant amount of aromatic lime flavor to the cheesecake. Be sure to zest only the green part of the lime, avoiding the bitter white pith underneath.
Serving & Storage Suggestions
Serve the Key Lime Cheesecake chilled. A dollop of whipped cream and a few fresh lime slices make an elegant garnish. You could also sprinkle some extra lime zest on top for a burst of flavor and visual appeal.
Store leftover cheesecake in the refrigerator, covered, for up to 3-4 days. The cheesecake can also be frozen. Wrap it tightly in plastic wrap and then in aluminum foil, and freeze for up to 2 months. Thaw it in the refrigerator overnight before serving. Do not leave the cheesecake at room temperature for more than 2 hours.
Nutritional Information
| Nutrient | Amount per Serving | % Daily Value |
|---|---|---|
| Calories | 396 kcal | – |
| Calories from Fat | 247 kcal | – |
| Total Fat | 27.6 g | 42% |
| Saturated Fat | 14.2 g | 71% |
| Cholesterol | 115.2 mg | 38% |
| Sodium | 335.3 mg | 13% |
| Total Carbohydrate | 31.6 g | 10% |
| Dietary Fiber | 0.4 g | 1% |
| Sugars | 22.9 g | – |
| Protein | 7 g | 13% |
Note: Nutritional information is an estimate and may vary based on specific ingredients and portion sizes.
Variations & Substitutions
- Gluten-Free: Use a gluten-free graham cracker crust or make your own using gluten-free graham crackers.
- Different Citrus: While Key lime is classic, you can experiment with other citrus fruits. Try using Meyer lemons for a sweeter, floral flavor, or a combination of lime and orange for a unique twist.
- Coconut Crust: For a tropical flair, use a coconut graham cracker crust.
- Topping Variations: Instead of whipped cream, try a toasted meringue topping or a simple glaze made with powdered sugar and lime juice. You can also sprinkle toasted coconut flakes on top for added texture and flavor.
- Individual Cheesecakes: Pour the batter into muffin tins lined with cupcake liners for individual cheesecakes. Reduce the baking time to approximately 20-25 minutes.
- Lime Curd Swirl: Gently swirl a spoonful of homemade or store-bought lime curd into the cheesecake batter before baking for a beautiful and flavorful effect.
FAQs (Frequently Asked Questions)
Q: Can I use bottled lime juice instead of fresh?
A: While fresh lime juice is always preferred for its brighter flavor, you can use bottled lime juice in a pinch. However, be sure to use a good-quality bottled juice without any added sugar or preservatives.
Q: Why is my cheesecake cracked?
A: Cracking can occur due to overbaking, sudden temperature changes, or overmixing the batter. Avoid these issues by carefully following the recipe instructions and using a water bath if desired.
Q: Can I make this cheesecake ahead of time?
A: Absolutely! In fact, this cheesecake tastes even better after chilling in the refrigerator overnight. It’s a great dessert to prepare in advance for parties or gatherings.
Q: How do I know when the cheesecake is done?
A: The cheesecake is done when the edges are set and lightly golden, but the center still has a slight jiggle to it. It will continue to set as it cools.
Q: Can I freeze this cheesecake?
A: Yes, you can freeze the cheesecake for up to 2 months. Wrap it tightly in plastic wrap and then in aluminum foil to prevent freezer burn. Thaw it in the refrigerator overnight before serving.
Final Thoughts
This Easy Key Lime Cheesecake is more than just a dessert; it’s an experience. It’s a taste of sunshine, a celebration of simple pleasures, and a testament to the fact that delicious food doesn’t have to be complicated. So, gather your ingredients, preheat your oven, and prepare to embark on a culinary journey that will delight your senses and impress your friends and family. Don’t be afraid to experiment with variations and toppings to make it your own. And most importantly, enjoy every tangy, creamy, blissful bite! Let me know in the comments how your Key Lime Cheesecake turns out, and what your favorite variations are!