
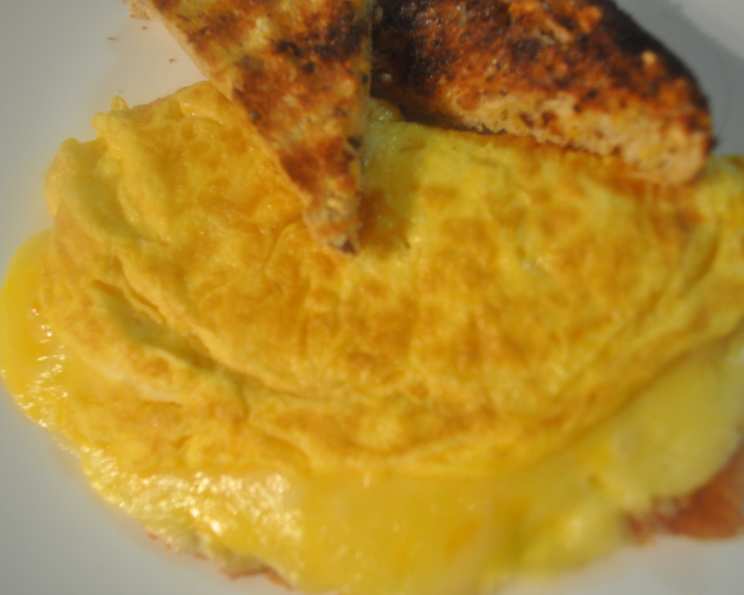
Easy Omelette for 2 or 3, Paula Deen Style
The aroma of a perfectly cooked omelette always takes me back to Sunday mornings at my grandmother’s house. She wasn’t fancy, but her omelettes were legendary. I can still picture her standing at the stove, a whirlwind of motion, effortlessly flipping those golden-brown pockets of eggy goodness filled with whatever savory scraps were lingering in the fridge. There was a love in her cooking that made even the simplest dishes unforgettable. This recipe, reminiscent of that down-home charm, brings me right back to those cozy, delicious mornings.
Recipe Overview
- Prep Time: 5 minutes
- Cook Time: 8-10 minutes
- Total Time: 13-15 minutes
- Servings: 2-3
Ingredients
- 6 large eggs
- Salt and freshly ground black pepper to taste
- Add-ins (choose your favorites):
- Shredded cheddar cheese
- Shredded mozzarella cheese
- Diced onion
- Diced bell pepper (green, red, yellow)
- Diced tomato
- Diced ham
- Cooked crumbled sausage
- Sliced mushrooms
- Sliced black olives
- Chopped spinach
Equipment Needed
- Large pot
- Large bowl
- Whisk
- Resealable plastic freezer baggies (one per omelette)
- Tongs
- Paper towel-lined plate or strainer
Instructions
- Begin by bringing a large pot of water to a rolling boil over high heat. Make sure there’s enough water to fully submerge the filled baggies.
- While the water is heating, prepare your egg mixtures. In a large bowl, whisk together 2 eggs at a time for each individual omelette you plan to make. Season each portion generously with salt and freshly ground black pepper. The seasoning is important, as the water bath can dilute the flavor slightly.
- Now for the fun part: the add-ins! For each individual omelette, add your favorite ingredients to the whisked eggs. Don’t overload the baggie; a balanced amount of fillings will ensure even cooking and prevent the bag from bursting.
- Carefully pour each seasoned egg and filling mixture into separate resealable plastic freezer baggies. It’s crucial to use freezer baggies rather than regular sandwich bags, as they are more durable and less likely to leak under the high temperature of the boiling water.
- Seal each baggie tightly, making sure to squeeze out as much air as possible. The less air in the bag, the better the omelette will cook and the less likely the bag is to float unevenly.
- With the bag securely sealed, gently smash the contents with your hands to thoroughly combine the egg mixture and the add-ins. This ensures that everything is evenly distributed throughout the omelette.
- Once the water is at a full boil, carefully drop each sealed baggie into the boiling water. Be cautious to avoid splashing hot water on yourself.
- Reduce the heat slightly to maintain a gentle simmer. Simmer the bags for 8 to 10 minutes, or until the omelettes are cooked to your desired consistency. The cooking time may vary slightly depending on the amount of fillings you’ve added and the thickness of the omelette.
- Use tongs to carefully remove the baggies from the boiling water.
- Place the baggies on a paper towel-lined plate or in a strainer to drain any excess water that may have accumulated on the outside of the bags.
- Allow the baggies to cool slightly before handling, as the contents will be very hot.
- Once cooled enough to handle, carefully open each baggie and gently pour the cooked omelette onto individual plates.
- Serve immediately and enjoy along or with your favorite morning side dishes, such as hash browns and grits.
Expert Tips & Tricks
- Pre-chop your veggies and pre-cook your meats for ultra-fast omelette assembly in the morning. This makes it easy to customize each omelette to individual preferences.
- Don’t overcrowd the baggie. Too many fillings can prevent the omelette from cooking evenly and can also increase the risk of the baggie bursting.
- Ensure the baggie is tightly sealed. A leaky baggie will result in a watery, diluted omelette. Double-check the seal before submerging the baggie in the boiling water.
- To check for doneness without opening the bag, gently press on the baggie. The omelette should feel firm to the touch. If it still feels liquidy, continue simmering for a few more minutes.
- If you want a slightly browned omelette, you can pan-fry it briefly after removing it from the bag. Simply melt a small amount of butter in a non-stick skillet and gently brown the omelette on both sides for a minute or two.
- For a creamier omelette, add a tablespoon of cream or milk to the egg mixture before whisking.
Serving & Storage Suggestions
Serve these omelettes immediately for the best flavor and texture. They pair perfectly with classic breakfast sides like hash browns, grits, toast, bacon, or sausage. A side of fresh fruit or a dollop of sour cream or salsa also makes a great accompaniment.
While best served fresh, leftover omelette can be stored in the refrigerator for up to 3 days. To reheat, microwave gently or pan-fry in a skillet over low heat until warmed through. Note that the texture may change slightly upon reheating.
Freezing is not recommended, as the texture of the eggs can become rubbery.
Nutritional Information
Note: Nutritional information is an estimate and may vary based on specific ingredients and portion sizes.
| Nutrient | Amount per Serving | % Daily Value |
|---|---|---|
| Calories | 300 kcal | 15% |
| Total Fat | 20g | 31% |
| Saturated Fat | 7g | 35% |
| Cholesterol | 420mg | 140% |
| Sodium | 350mg | 15% |
| Total Carbohydrate | 3g | 1% |
| Dietary Fiber | 1g | 4% |
| Sugars | 2g | 4% |
| Protein | 25g | 50% |
Variations & Substitutions
- Dairy-Free Omelette: Substitute shredded dairy-free cheese alternatives for the cheddar and mozzarella.
- Gluten-Free Omelette: Ensure all your fillings are gluten-free (e.g., use gluten-free sausage).
- Vegetarian Omelette: Omit the ham and sausage, and load up on extra vegetables like mushrooms, spinach, bell peppers, and onions.
- Spicy Omelette: Add a pinch of red pepper flakes or a dash of hot sauce to the egg mixture for a fiery kick.
- Mediterranean Omelette: Use feta cheese, sun-dried tomatoes, olives, and spinach for a flavorful Mediterranean twist.
- Mexican Omelette: Add chorizo, jalapeños, salsa, and pepper jack cheese for a south-of-the-border flair.
- For the health conscious: Use egg whites only instead of the whole egg.
FAQs (Frequently Asked Questions)
Q: Why use freezer bags instead of regular plastic bags?
A: Freezer bags are designed to withstand higher temperatures without melting or leaching chemicals into the food. Regular plastic bags are not suitable for boiling water.
Q: Can I use pre-shredded cheese?
A: Yes, pre-shredded cheese is perfectly fine to use for convenience.
Q: Can I cook more than one omelette bag at a time?
A: Absolutely! As long as the bags are not overcrowded and have enough room to move freely in the boiling water, you can cook several omelettes simultaneously.
Q: What if my baggie leaks during cooking?
A: Unfortunately, there’s not much you can do if the baggie leaks. Discard the contents and start over with a new baggie.
Q: Can I add liquid ingredients like hot sauce or Worcestershire sauce?
A: Yes, you can add small amounts of liquid ingredients, but be careful not to add too much, as it can make the omelette watery. A teaspoon or two should be sufficient.
Final Thoughts
This easy omelette method is a delightful and customizable way to enjoy a quick and delicious breakfast for yourself, family, or friends. Feel free to experiment with different add-ins to create your own signature omelette combinations. Don’t be afraid to get creative and let your taste buds be your guide! We hope you love this recipe as much as we do. And, as Paula would say, “Hey y’all!” Let us know in the comments how you customize it.