
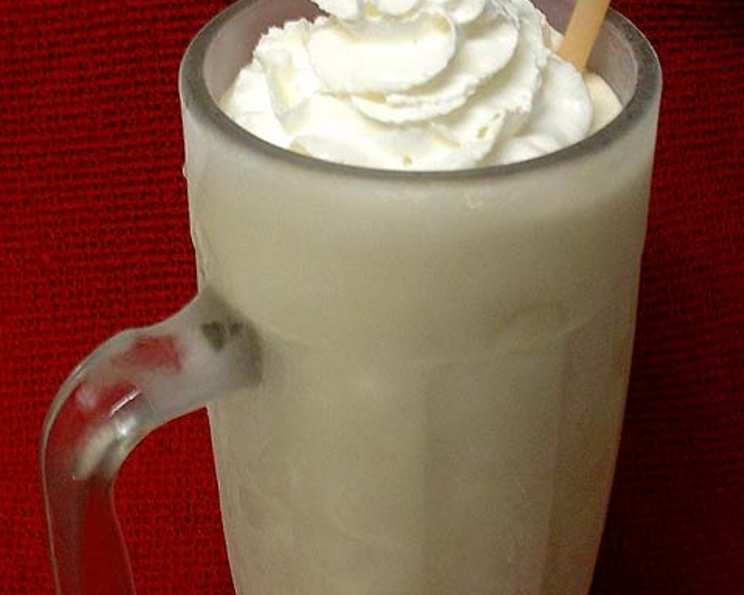
Easy Vanilla Milkshake: A Classic Treat
The first time I ever made a milkshake, I was probably around eight years old. My grandmother, a woman who believed that every day deserved a little bit of sweetness, showed me how to whip one up. I remember standing on a stool next to her, mesmerized by the way the ice cream and milk transformed into a creamy, dreamy concoction. The simple vanilla milkshake, adorned with a cherry on top, tasted like pure happiness. That memory is still as sweet today, as this Easy Vanilla Milkshake promises to be!
Recipe Overview
- Prep Time: 2 minutes
- Cook Time: 0 minutes
- Total Time: 2 minutes
- Servings: 3-4
- Yield: 3-4 cups
- Dietary Type: Vegetarian
Ingredients
- 2 ½ cups milk
- 2 eggs
- 1 teaspoon vanilla extract
- 1 scoop vanilla ice cream (optional)
- 4 teaspoons sugar (or as much as you want)
- 4 ice cubes
Equipment Needed
- Blender
Instructions
- Begin by pouring all of the ingredients – the milk, eggs, vanilla extract, optional vanilla ice cream, sugar, and ice cubes – into a blender.
- Blend the mixture for approximately 30 seconds, or until it reaches your desired consistency. Keep in mind that blending for too long can result in a thinner milkshake.
- Pour the finished milkshake into a cup or glass and enjoy immediately.
Expert Tips & Tricks
- For a richer, creamier milkshake, use whole milk or even add a splash of heavy cream. You can also experiment with different types of ice cream, such as French vanilla or even cookies and cream, for a more complex flavor profile.
- If you prefer a thicker milkshake, add more ice cream or less milk. Conversely, if you want a thinner milkshake, add more milk.
- To elevate the presentation, consider garnishing the milkshake with whipped cream, chocolate shavings, or a cherry on top. A dusting of cocoa powder or a sprinkle of colorful sprinkles can also add a touch of visual appeal.
- If you’re short on time, you can skip the ice cubes and use frozen milk instead. Simply freeze milk in an ice cube tray and add the frozen cubes to the blender along with the other ingredients. This will give you a cold and creamy milkshake without watering it down.
- For a more intense vanilla flavor, use vanilla bean paste instead of vanilla extract. The paste contains tiny flecks of vanilla bean that add a beautiful visual element to the milkshake.
- If you don’t have any fresh eggs on hand, you can use pasteurized liquid eggs or even egg white powder. Just be sure to follow the package directions for proper usage.
- To easily pour the milkshake, especially if it is thick, consider using a blender with a spout or a funnel.
Serving & Storage Suggestions
This Easy Vanilla Milkshake is best enjoyed immediately after preparation, while it is still cold and creamy. However, if you happen to have leftovers, you can store them in an airtight container in the refrigerator for up to 24 hours. Keep in mind that the milkshake may separate slightly during storage, so be sure to stir it well before serving.
Due to the dairy content, it is not recommended to leave the milkshake at room temperature for extended periods of time. It should be refrigerated promptly to prevent spoilage.
Freezing the milkshake is also not recommended, as it can change the texture and make it icy.
Serve this milkshake in a tall glass, garnished with whipped cream and a cherry for a classic presentation. It’s also delicious served alongside cookies, brownies, or a slice of cake.
Nutritional Information
| Nutrient | Amount per Serving | % Daily Value |
|---|---|---|
| Calories | 204.8 kcal | N/A |
| Calories from Fat | 96 g | 47% |
| Total Fat | 10.8 g | 16% |
| Saturated Fat | 5.7 g | 28% |
| Cholesterol | 169.5 mg | 56% |
| Sodium | 147 mg | 6% |
| Total Carbohydrate | 15.5 g | 5% |
| Dietary Fiber | 0 g | 0% |
| Sugars | 6 g | 24% |
| Protein | 10.9 g | 21% |
Variations & Substitutions
- Chocolate Milkshake: Add 2 tablespoons of cocoa powder to the blender along with the other ingredients for a classic chocolate milkshake.
- Strawberry Milkshake: Add ½ cup of fresh or frozen strawberries to the blender for a fruity twist. You may need to adjust the amount of sugar depending on the sweetness of the strawberries.
- Peanut Butter Milkshake: Add 2 tablespoons of peanut butter to the blender for a rich and nutty flavor.
- Vegan Milkshake: Use plant-based milk, such as almond milk or soy milk, and dairy-free ice cream to make a vegan-friendly milkshake. You can also substitute the eggs with a flax egg (1 tablespoon of flaxseed meal mixed with 3 tablespoons of water).
- Malted Milkshake: Add 2 tablespoons of malted milk powder to the blender for a classic malted milkshake flavor.
- Coffee Milkshake: Add 1 shot of espresso or ¼ cup of strong brewed coffee to the blender for a caffeinated treat.
FAQs (Frequently Asked Questions)
Q: Can I make this milkshake without eggs?
A: Yes, you can omit the eggs without significantly impacting the flavor or texture of the milkshake. It will be slightly less rich, but still delicious.
Q: Can I use a different type of sweetener instead of sugar?
A: Absolutely! Feel free to substitute the sugar with honey, maple syrup, agave nectar, or your favorite sugar substitute. Adjust the amount to taste.
Q: Can I make this milkshake ahead of time?
A: While it’s best enjoyed immediately, you can prepare the milkshake up to 24 hours in advance and store it in the refrigerator. Be sure to stir it well before serving, as it may separate slightly.
Q: My milkshake is too thick. How can I thin it out?
A: Simply add a splash of milk to the blender and blend for a few seconds until it reaches your desired consistency.
Q: Can I add other toppings to the milkshake?
A: Of course! Get creative with your toppings and add whipped cream, chocolate shavings, sprinkles, chopped nuts, or anything else that sounds appealing.
Final Thoughts
This Easy Vanilla Milkshake is a simple yet satisfying treat that is perfect for any occasion. Whether you’re looking for a quick and easy dessert, a refreshing afternoon snack, or a nostalgic trip down memory lane, this recipe is sure to please. So, gather your ingredients, grab your blender, and get ready to whip up a delicious milkshake that will bring a smile to your face. Don’t be afraid to experiment with different flavors and toppings to create your own unique version of this classic treat. And most importantly, have fun! I encourage you to share your experiences and variations with others – perhaps you’ll inspire someone else to create their own cherished milkshake memories.