
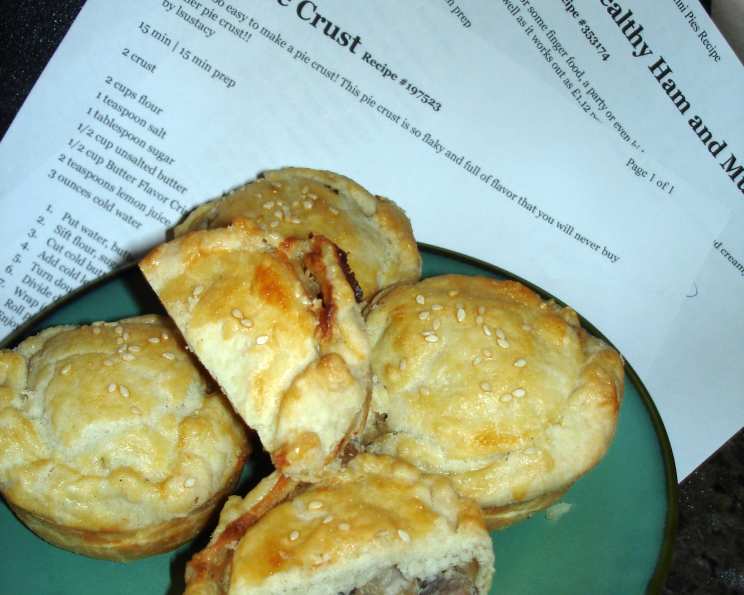
The Only Pie Crust Recipe You’ll Ever Need
I can still picture my grandmother, apron dusted with flour, humming softly as she rolled out her pie crust. The rhythmic thwack of the rolling pin, the delicate scent of butter mingling with sugar—these are sensory memories etched in my mind. Her pies were legendary, each slice a perfect balance of flaky crust and luscious filling. For years, I was intimidated to even attempt recreating her magic, convinced it was some closely guarded family secret. Turns out, it was simply a matter of mastering the basics, and that starts with a truly exceptional pie crust.
Recipe Overview
- Prep Time: 15 minutes
- Cook Time: Varies depending on pie filling
- Total Time: 1 hour 15 minutes (includes chilling time)
- Servings: 8
- Yield: 2 crusts
- Dietary Type: Vegetarian
Ingredients
- 2 cups all-purpose flour
- 1 teaspoon salt
- 1 tablespoon sugar
- ½ cup (1 stick) unsalted butter, very cold, cut into cubes
- ½ cup butter-flavored shortening (such as Crisco), very cold
- 2 teaspoons lemon juice
- 3 ounces ice water (approximately 6 tablespoons)
Equipment Needed
- Measuring cups and spoons
- Large mixing bowl
- Pastry blender or food processor (optional)
- Plastic wrap
- Rolling pin
- Pie dish
Instructions
- Chill the Fats and Water: Begin by placing the butter and shortening (Crisco) in the freezer for at least 30 minutes before starting. Similarly, put the water in the freezer to get it ice-cold. This is crucial for a flaky crust! The colder the fat, the less it will melt during mixing, resulting in those desirable layers of flakiness.
- Combine Dry Ingredients: In a large mixing bowl, sift together the flour, salt, and sugar. Sifting ensures that the ingredients are evenly distributed and prevents lumps in the final crust.
- Cut in the Fats: Using a pastry blender or your fingertips, cut the cold butter and shortening into the flour mixture. The goal is to create pea-sized crumbs. If using your fingertips, work quickly to prevent the fat from melting. You can also use a food processor. Pulse until the mixture resembles coarse crumbs. Be careful not to over-process.
- Add Liquid Ingredients: In a small bowl, combine the cold lemon juice and ice water. Gradually add the liquid to the flour mixture, mixing gently with a fork. Add just enough liquid to bring the dough together. The dough should be moist but not sticky. It should form a shaggy mass. Avoid overmixing!
- Form the Dough: Turn the dough out onto a lightly floured countertop.
- Divide and Wrap: Divide the dough in half. Gently flatten each half into a disc. Wrap each disc tightly in plastic wrap.
- Chill the Dough: Refrigerate the dough for at least 1 hour, or preferably longer. Chilling allows the gluten to relax, making the dough easier to roll out and preventing it from shrinking during baking. You can even chill it overnight.
- Roll Out the Dough: On a lightly floured surface, roll out one disc of dough into a circle about 12 inches in diameter. Rotate the dough frequently as you roll, and add more flour as needed to prevent sticking.
- Transfer to Pie Dish: Gently transfer the rolled-out dough to your pie dish. Trim any excess dough from the edges and crimp the edges as desired.
- Blind Bake (If Necessary): If your recipe calls for a pre-baked crust (blind baking), prick the bottom of the crust with a fork to prevent it from puffing up. Line the crust with parchment paper and fill it with pie weights or dried beans. Bake in a preheated oven at 375°F (190°C) for 15-20 minutes, or until the edges are lightly golden. Remove the pie weights and parchment paper and bake for another 5-10 minutes, or until the bottom is golden brown.
- Fill and Bake (or Bake as Directed): Fill the pie crust with your desired filling and bake according to your pie recipe instructions.
Expert Tips & Tricks
- Keep Everything Cold: I cannot stress this enough. Cold ingredients are the key to a flaky crust.
- Don’t Overmix: Overmixing develops the gluten in the flour, resulting in a tough crust. Mix just until the dough comes together.
- Lemon Juice’s Secret: Lemon juice helps prevent gluten development, contributing to a more tender crust.
- Blind Baking Pro-Tip: For an extra-crisp blind-baked crust, brush the bottom with a lightly beaten egg white before baking.
- Patching Problems: If you have any cracks or tears in your dough, simply dampen the area with a little water and press the dough back together.
Serving & Storage Suggestions
Serve your pie warm or at room temperature, depending on the filling. Fruit pies are often best served warm, while cream pies are better chilled. Leftover pie should be stored in the refrigerator, covered tightly with plastic wrap or foil. It will keep for up to 3 days. You can also freeze baked or unbaked pie crust. Wrap it tightly in plastic wrap and then in foil. Frozen pie crust can be stored for up to 2 months. Thaw it in the refrigerator before using. Reheat slices of pie in a preheated oven at 350°F (175°C) for 10-15 minutes, or until warmed through.
Nutritional Information
| Nutrient | Amount per Serving | % Daily Value |
|---|---|---|
| Calories | 337 kcal | 17% |
| Total Fat | 21g | 32% |
| Saturated Fat | 13g | 65% |
| Cholesterol | 51mg | 17% |
| Sodium | 291mg | 12% |
| Total Carbohydrate | 34g | 11% |
| Dietary Fiber | 1g | 4% |
| Sugars | 2g | 8% |
| Protein | 4g | 8% |
Nutritional information is an estimate and may vary based on specific ingredients and portion sizes.
Variations & Substitutions
- Gluten-Free Pie Crust: Use a gluten-free flour blend designed for baking. You may need to add a binder like xanthan gum.
- Whole Wheat Pie Crust: Substitute up to half of the all-purpose flour with whole wheat flour. This will give the crust a nuttier flavor and heartier texture.
- Vegan Pie Crust: Replace the butter with vegan butter sticks or solid coconut oil. Ensure your shortening is also vegan-friendly.
- Savory Pie Crust: Omit the sugar and add herbs like rosemary, thyme, or sage to the dry ingredients for a savory pie crust.
- Chocolate Pie Crust: Add 2 tablespoons of unsweetened cocoa powder to the dry ingredients for a chocolate-flavored pie crust.
FAQs (Frequently Asked Questions)
Q: Why is my pie crust tough?
A: Overmixing the dough develops the gluten, resulting in a tough crust. Mix just until the dough comes together. Also, make sure your ingredients are cold.
Q: How do I prevent my pie crust from shrinking during baking?
A: Chilling the dough before rolling it out allows the gluten to relax, which prevents shrinkage. Also, avoid stretching the dough when you transfer it to the pie dish.
Q: Can I make the pie dough ahead of time?
A: Yes! The dough can be made up to 2 days in advance and stored in the refrigerator, or frozen for up to 2 months.
Q: My pie crust is browning too quickly. What should I do?
A: Cover the edges of the pie crust with foil or a pie shield to prevent them from burning.
Q: Can I use a food processor to make pie crust?
A: Yes, but be careful not to over-process the dough. Pulse the ingredients until the mixture resembles coarse crumbs, then add the liquid and pulse just until the dough comes together.
Final Thoughts
Don’t let the idea of making pie crust intimidate you. This recipe is truly easy, and the results are far superior to anything you can buy in a store. Imagine the satisfaction of serving a homemade pie with a perfectly flaky crust to your family and friends. So, gather your ingredients, put on some music, and give it a try. I know you’ll be delighted with the results. And don’t forget to share your creations and feedback – happy baking!