
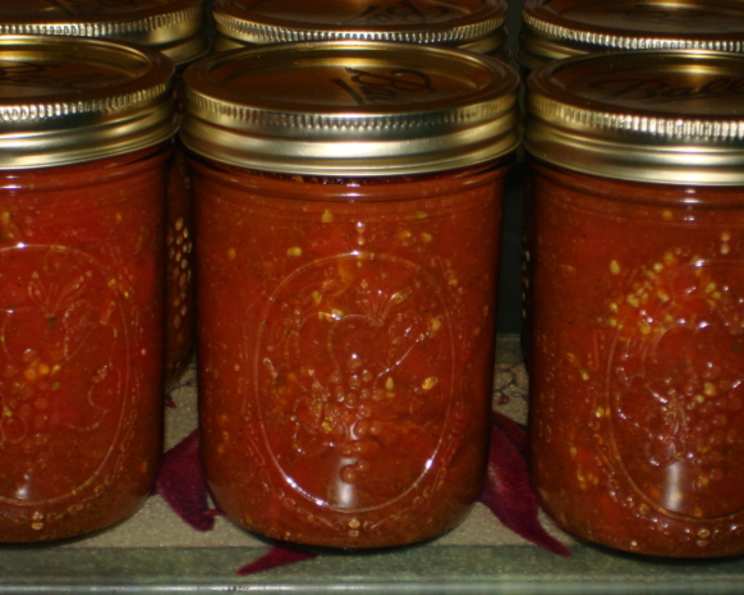
Canning Your Own Authentic Enchilada Sauce
The aroma still takes me back. My abuela, arms dusted with flour, would be humming a soft melody as she stirred a bubbling pot on the stove. That pot held the key to countless family meals: her signature enchilada sauce. Its rich, savory scent would fill her tiny kitchen, promising a feast of enchiladas, huevos rancheros, or even just a simple bowl of rice transformed with its magic. Now, I carry on that tradition, and I’m so excited to share this very special recipe, adapted for canning, so that you can enjoy the incredible flavor of homemade enchilada sauce year-round.
Recipe Overview
- Prep Time: 30 minutes
- Cook Time: 1 hour
- Total Time: 1 hour 30 minutes
- Yields: 6 pints
- Serves: 24
- Dietary Type: Vegan (naturally)
Ingredients
- 12 cups halved, cored, peeled tomatoes (about 24 medium or 8 lb)
- Water (enough to cover tomatoes initially)
Spice Blend:
- 6 teaspoons chili powder
- 2 teaspoons ground cumin
- 2 teaspoons oregano
- 2 teaspoons garlic powder
- 2 teaspoons ground coriander
- 1 1⁄2 teaspoons seasoning salt (optional)
- Bottled lemon juice
- Salt (optional)
Equipment Needed
- Large saucepan or stockpot
- Boiling water canner with rack
- Canning jars (6 pint-sized)
- Canning lids and bands
- Jar lifter
- Ladle
- Bubble remover/headspace tool
- Clean kitchen towels
Instructions
- Prepare your boiling water canner. Fill it with enough water to cover the jars by at least 1 inch, place it on the stove, and bring the water to a simmer.
- Wash canning jars, lids, and bands with hot, soapy water. Rinse well. To sterilize, heat the jars and lids in the simmering water until you are ready to use them. Do not boil. Keep the bands aside. This ensures a proper seal.
- If you are using seasoning salt, use 2 1/2 tsp of the spice blend to each pint jar. If omitting seasoning salt, use only 2 tsp of the spice blend per jar. This slight adjustment ensures the flavor is perfectly balanced.
- In your large saucepan, combine the tomatoes with just enough water to cover them. Bring the mixture to a boil over medium-high heat, then reduce the heat and boil gently for 5 minutes, stirring occasionally to prevent sticking. This brief boiling helps to soften the tomatoes and release their juices.
- To each hot, sterilized jar, add the specified quantity of the spice blend, 1 tablespoon of bottled lemon juice, and 1/4 teaspoon of salt, if you are using it. Adding lemon juice ensures proper acidity for safe canning.
- Pack the hot tomatoes into the hot jars, leaving 1/2 inch of headspace at the top. Use a ladle to transfer the tomatoes carefully into the jars.
- Ladle the hot cooking liquid from the saucepan over the tomatoes in each jar, again leaving 1/2 inch of headspace. Headspace is critical for a successful seal.
- Use a bubble remover or other non-metallic utensil to remove air bubbles from the jars by gently running it down the sides of the jar. Trapped air can compromise the seal.
- Wipe the rim of each jar with a clean, damp cloth to ensure a clean sealing surface.
- Center a hot, sterilized lid on each jar.
- Apply a band to each jar and adjust it until it is fingertip tight. This means the band is snug but not overly tightened, allowing air to escape during processing.
- Carefully process the filled jars in the boiling water canner for 40 minutes for both pint and quart jars. Be sure the water covers the jars by at least an inch. If necessary, add more boiling water to the canner. Adjust processing time for altitude according to your local guidelines. (See FAQ for more info)
- After processing is complete, carefully remove the jars from the canner using a jar lifter and place them on a towel-lined surface to cool. Allow the jars to cool undisturbed for 12-24 hours.
- Check lids for a proper seal after 24 hours. The lid should be concave and not flex up and down when the center is pressed. If a jar did not seal properly, refrigerate it immediately and use the sauce within a few days, or reprocess it with a new lid.
Expert Tips & Tricks
- To get the most flavor from the spices, lightly toast them in a dry pan for a minute or two before adding them to the jars. Be careful not to burn them.
- For a smoother sauce, you can use an immersion blender to puree the tomatoes slightly after boiling them for 5 minutes. However, be sure to leave some texture for an authentic feel.
- If you find that your tomatoes are not very juicy, you can add a little more water to the saucepan to ensure there is enough liquid to cover the tomatoes in the jars.
- Always use bottled lemon juice, as its acidity is consistent and reliable for safe canning. Do not substitute with fresh lemon juice.
- If you want a spicier sauce, consider adding a pinch of cayenne pepper or a dried chile pepper to each jar.
- The spice blend is very customizable. Feel free to adjust the amounts of each spice to suit your personal preference.
Serving & Storage Suggestions
This enchilada sauce is incredibly versatile. Of course, it’s fantastic for making classic enchiladas. Simply dip corn tortillas in the sauce, fill with your favorite ingredients (cheese, chicken, beans), roll them up, and bake until bubbly.
Beyond enchiladas, use it as a flavorful base for huevos rancheros, a topping for tacos or burritos, or as a vibrant addition to soups and stews. It can also be used as a Mexican-inspired tomato sauce for pasta dishes.
Properly canned enchilada sauce can be stored in a cool, dark place for up to a year. Once opened, refrigerate and use within 7-10 days. If the sauce looks or smells off, discard it.
Nutritional Information
(Estimated, per 1/4 cup serving, without added salt):
| Nutrient | Amount per Serving | % Daily Value |
|---|---|---|
| Calories | 20 | 1% |
| Total Fat | 0.3g | 0% |
| Saturated Fat | 0.1g | 0% |
| Cholesterol | 0mg | 0% |
| Sodium | 16mg | 1% |
| Total Carbohydrate | 4.2g | 1% |
| Dietary Fiber | 1.4g | 5% |
| Sugars | 2.4g | N/A |
| Protein | 1g | 2% |
Note: Nutritional information is an estimate and may vary based on specific ingredients and portion sizes.
Variations & Substitutions
- Spicier Sauce: Add a pinch of cayenne pepper or a few dried chili flakes to each jar. For even more heat, consider using a hotter chili powder.
- Smoked Flavor: Use smoked paprika in place of some of the regular chili powder.
- Sweeter Sauce: Add a teaspoon of brown sugar or honey to each jar.
- Vegetarian Option: Ensure all ingredients are vegetarian-friendly, and use vegetable broth instead of water if desired.
- Different Tomatoes: While peeled tomatoes are recommended for texture, you could use crushed tomatoes (drained slightly) for a smoother sauce.
FAQs (Frequently Asked Questions)
Q: Why is lemon juice necessary?
A: Bottled lemon juice adds acidity, which is crucial for safely preserving tomatoes using the boiling water canning method. Tomatoes are considered a borderline high-acid food, so adding lemon juice ensures a safe pH level that inhibits the growth of harmful bacteria.
Q: What happens if I don’t have all the spices listed?
A: While the specific blend contributes to the authentic flavor, you can adjust based on what you have. The most important spices are chili powder, cumin, and oregano. You can substitute garlic powder with fresh garlic, but use caution when canning with fresh ingredients as they can affect the safety and shelf-life of your final product.
Q: How do I adjust the processing time for my altitude?
A: Altitude affects the boiling point of water. At higher altitudes, water boils at a lower temperature, so you need to increase the processing time to ensure proper sterilization. Check your local extension office or the National Center for Home Food Preservation website for specific altitude adjustments for boiling water canning.
Q: Can I use this sauce immediately after canning?
A: Yes, you can use the sauce immediately after canning, but it’s best to let it sit for a few weeks to allow the flavors to meld and develop fully.
Q: What if some of my jars don’t seal?
A: If a jar doesn’t seal within 24 hours, refrigerate it immediately and use the sauce within a week. Alternatively, you can reprocess it with a new lid within 24 hours of the initial processing.
Final Thoughts
I hope this recipe inspires you to create your own delicious and authentic enchilada sauce at home. There’s something incredibly satisfying about preserving the flavors of summer and having them available year-round. Don’t be afraid to experiment with different spice combinations to find your perfect blend. Once you taste the difference between homemade and store-bought, you’ll never go back! Make a batch of enchiladas, invite some friends over, and share the love. I’d love to hear about your experience – let me know how your sauce turns out! Perhaps enjoy your delicious enchiladas with a refreshing margarita.