
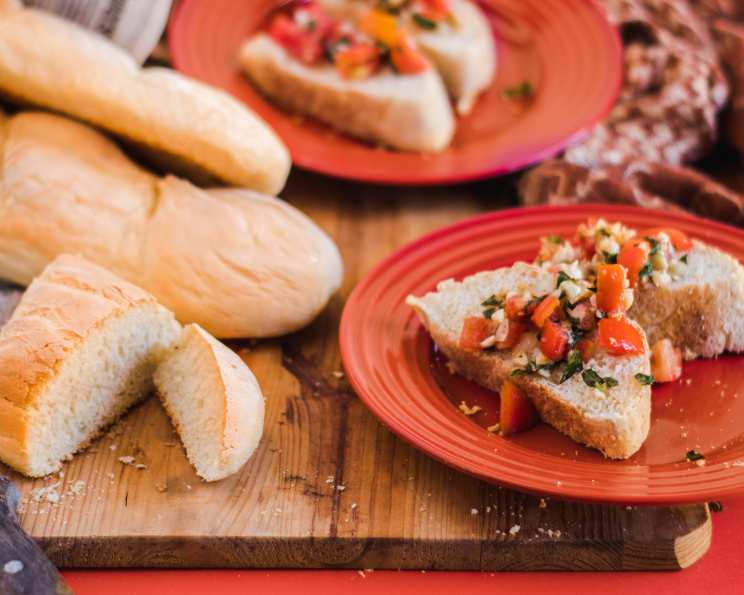
Failproof French Bread (Bread Machine)
The scent of freshly baked bread is a powerful memory trigger for me. It takes me back to my grandmother’s bustling kitchen, filled with the warmth of the oven and the comforting aroma of rising dough. I remember being perched on a stool, mesmerized as she transformed simple ingredients into crusty loaves of French bread. While she baked hers entirely by hand, this recipe uses the magic of a bread machine to bring that same irresistible experience to your own kitchen, effortlessly.
Recipe Overview
- Prep Time: 15 minutes
- Cook Time: 15-20 minutes
- Total Time: 1 hour 30 minutes (including rise time)
- Servings: 8
- Yield: 2 loaves
- Dietary Type: Vegetarian
Ingredients
- 3 1/2 cups bread flour
- 1 teaspoon salt
- 1 (1/4 ounce) package active dry yeast
- 1 1/4 cups warm water (around 110°F)
Equipment Needed
- Bread machine
- Measuring cups and spoons
- Floured surface
- Greased baking sheet
- Clean kitchen towel
- Wire racks
Instructions
-
Prepare the Bread Machine: Add the ingredients to the bread machine pan in the order recommended by your bread machine’s manufacturer. This is crucial for proper mixing and yeast activation. Generally, liquids go in first, followed by dry ingredients, with the yeast added last, often in a small well on top of the flour.
-
Start the Dough Cycle: Select the dough cycle on your bread machine. This setting will mix the ingredients, knead the dough, and allow it to rise properly.
-
Remove the Dough: Once the dough cycle is complete, carefully remove the dough from the bread machine pan. Lightly flour your hands to prevent sticking.
-
Divide the Dough: Place the dough on a lightly floured surface. Using a sharp knife or dough cutter, divide the dough in half.
-
Shape the Loaves: Take each half of the dough and gently roll and stretch it into a loaf shape, approximately 12 inches long, resembling a traditional French baguette. Taper the ends slightly for a more authentic look.
-
Second Rise: Place the shaped loaves on a greased baking sheet, leaving a few inches between them. Cover the loaves loosely with a clean kitchen towel. Allow the dough to rise in a warm place until doubled in size, which should take approximately 1 hour.
-
Preheat the Oven: While the dough is rising for the second time, preheat your oven to 450°F (232°C).
-
Bake the Bread: Once the oven is preheated and the loaves have doubled, carefully place the baking sheet in the oven. Bake for 15 to 20 minutes, or until the loaves are golden brown and sound hollow when tapped on the bottom. For even baking, rotate the baking sheet halfway through the baking time.
-
Cool the Loaves: Remove the baked loaves from the oven and transfer them to wire racks to cool completely. This is important to allow the steam to escape, preventing a soggy crust.
Expert Tips & Tricks
-
Water Temperature: Using water that’s too hot can kill the yeast, while water that’s too cold may not activate it properly. Aim for a temperature between 105°F and 115°F. A kitchen thermometer is your best friend here.
-
Flour Power: Bread flour is preferred over all-purpose flour for its higher protein content, which results in a chewier, more structured loaf.
-
Scoring the Loaves: For a more professional look, and to control where the bread expands during baking, score the tops of the loaves with a sharp knife or lame (a bread scoring tool) just before baking. Make shallow, diagonal slashes about 1/2 inch deep.
-
Steam Injection: To achieve a truly crispy crust, create steam in the oven during the first few minutes of baking. You can do this by placing a pan of hot water on the bottom rack of the oven. Be careful when adding the water to avoid steam burns.
-
Over-Proofing: Be careful not to let the dough rise for too long during the second rise. Over-proofed dough can collapse during baking. A gentle poke should leave a slight indentation that slowly springs back.
-
Under-Proofing: If the dough hasn’t risen enough, it can result in a dense and compact bread. Allow the dough to rise in a warm, draft-free area to ensure proper proofing.
Serving & Storage Suggestions
Serve your freshly baked French bread warm with butter, olive oil, or your favorite dips. It’s also delicious alongside soups, stews, or salads.
To store, wrap the cooled loaves tightly in plastic wrap or place them in a bread bag at room temperature. They will stay fresh for about 2-3 days. For longer storage, freeze the loaves whole or sliced. To reheat, wrap frozen bread in foil and bake at 350°F (175°C) for 10-15 minutes, or until warmed through. You can also toast individual slices directly from frozen.
Nutritional Information
| Nutrient | Amount per Serving | % Daily Value |
|---|---|---|
| Calories | 202 kcal | 10% |
| Total Fat | 0.6g | 1% |
| Saturated Fat | 0.1g | 1% |
| Cholesterol | 0mg | 0% |
| Sodium | 293mg | 12% |
| Total Carbohydrate | 42.1g | 14% |
| Dietary Fiber | 1.7g | 6% |
| Sugars | 0.1g | 0% |
| Protein | 6g | 12% |
Note: Nutritional information is an estimate and may vary based on specific ingredients and portion sizes.
Variations & Substitutions
-
Whole Wheat French Bread: Substitute up to half of the bread flour with whole wheat flour for a nuttier flavor and added fiber. You may need to add a little more water to compensate for the whole wheat flour’s higher absorption.
-
Herb-Infused French Bread: Add 1-2 tablespoons of dried herbs like rosemary, thyme, or oregano to the dough mixture for a flavorful twist.
-
Garlic French Bread: Mix 2-3 cloves of minced garlic into the dough for a savory garlic bread.
-
Cheese-Topped French Bread: Sprinkle shredded Parmesan or Asiago cheese over the loaves before baking for a cheesy crust.
-
Gluten-Free French Bread: While this recipe is designed for traditional bread flour, you can experiment with gluten-free bread flour blends. Keep in mind that gluten-free bread may have a different texture and may require adjustments to the hydration level.
FAQs (Frequently Asked Questions)
Q: Can I use instant yeast instead of active dry yeast?
A: Yes, you can. Use the same amount of instant yeast and add it directly to the dry ingredients without proofing it first.
Q: My bread machine doesn’t have a dough cycle. What should I do?
A: Use the basic bread cycle, but remove the dough after the kneading and first rise cycle is complete.
Q: Why is my bread dense and heavy?
A: This could be due to several factors, including using old yeast, not using enough water, or not allowing the dough to rise sufficiently. Ensure your yeast is fresh, measure ingredients accurately, and give the dough enough time to rise in a warm environment.
Q: Can I make the dough ahead of time?
A: Yes, you can refrigerate the dough after the first rise for up to 24 hours. Punch down the dough before shaping and allow it to come to room temperature before proceeding with the second rise and baking.
Q: How do I get a really crusty crust?
A: Besides the steam trick mentioned above, you can also brush the loaves with an egg wash before baking or spritz them with water a few times during the first few minutes of baking.
Final Thoughts
This failproof French bread recipe is your ticket to homemade goodness, no matter your baking experience. The bread machine takes care of the hard work, leaving you with the delightful task of shaping, baking, and savoring the results. Don’t be afraid to experiment with variations and make it your own. Share your creations with friends and family and enjoy the simple pleasure of freshly baked bread. Bon appétit!