
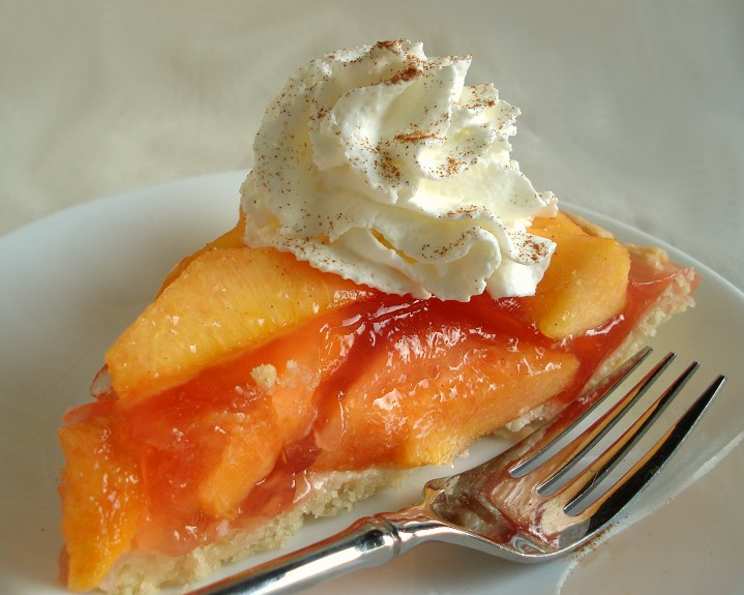
Fresh Peach Pie (No Bake) With Oil Pastry Crust
The memory of that first bite still lingers. It was a sweltering summer afternoon, the kind where the air hangs heavy and sticky. My grandmother, bless her heart, always had a way of making even the most oppressive heat feel bearable. She pulled this pie out of the fridge, its peachy aroma a promise of sweet relief. The cool, silky filling, the juicy peaches, and that surprisingly delicate crust – it was pure summer magic in every mouthful. That first taste cemented my love for no-bake peach pie and inspired me to recreate that nostalgic experience.
Recipe Overview
- Prep Time: 20 minutes
- Cook Time: 12 minutes
- Total Time: 32 minutes + 2 hours chilling
- Servings: 8
- Yield: 1 pie
- Dietary Type: Vegetarian
Ingredients
For the Crust:
- 1 1/2 cups all-purpose flour
- 1/2 teaspoon salt
- 1 1/2 tablespoons sugar
- 2 tablespoons milk
- 1/2 cup oil (vegetable or canola work well)
For the Pie Filling:
- 1 cup sugar
- 2 tablespoons cornstarch
- 1 cup water
- 1 (3 ounce) package peach gelatin (such as Jell-O)
- 3 cups sliced, peeled ripe peaches
Equipment Needed
- 9-inch pie plate
- Fork
- Saucepan
- Whisk
- Measuring cups and spoons
- Knife
- Cutting board
Instructions
- Prepare the Crust: In a medium bowl, thoroughly combine the flour, salt, and sugar with a fork.
- Incorporate the Wet Ingredients: Add the milk and oil to the dry ingredients. Mix with the fork until just combined. The dough will be somewhat crumbly but should hold together when pressed.
- Press into the Pie Plate: Press the dough evenly into the bottom and up the sides of a 9-inch pie plate. Make sure the crust is of uniform thickness.
- Dock the Crust: Prick the bottom of the crust all over with a fork. This prevents it from puffing up during baking.
- Bake the Crust: Bake the crust in a preheated oven at 400 degrees Fahrenheit for 12 minutes, or until lightly golden brown.
- Cool the Crust: Remove the baked crust from the oven and let it cool completely before adding the filling. This is crucial for a firm, sliceable pie.
- Prepare the Filling: In a medium saucepan, whisk together the sugar, cornstarch, and water until smooth, ensuring there are no lumps of cornstarch.
- Cook the Filling: Cook and stir the mixture over medium heat, constantly stirring, until it comes to a simmer and thickens, creating a clear, glossy glaze. This usually takes about 5-7 minutes.
- Dissolve the Gelatin: Remove the saucepan from the heat and stir in the peach gelatin until it is completely dissolved. This will give the pie its structure and signature peachy flavor. Continue stirring until no granules of gelatin remain.
- Cool the Gelatin Mixture: Allow the gelatin mixture to cool slightly before adding the peaches. If it’s too hot, it can soften the peaches and make them mushy. Cooling for about 10-15 minutes is usually sufficient.
- Assemble the Pie: Arrange the sliced, peeled ripe peaches evenly in the cooled pie crust.
- Pour the Filling: Carefully pour the cooled gelatin filling over the peaches, making sure to distribute it evenly.
- Chill the Pie: Cover the pie loosely with plastic wrap (being careful not to let it touch the filling) and chill in the refrigerator until the filling is completely set. This usually takes at least 2 hours, but preferably longer.
- Serve and Enjoy: Once the pie is set, remove it from the refrigerator, slice, and serve. A dollop of whipped cream complements the peachy flavor perfectly.
Expert Tips & Tricks
- Perfect Peach Prep: Choose peaches that are ripe but still firm to the touch. Overripe peaches will become too soft and mushy in the filling. To easily peel peaches, score an “X” on the bottom, blanch them in boiling water for 30 seconds, and then immediately plunge them into ice water. The skin should slip right off.
- Crust Consistency: If the crust dough feels too dry, add a teaspoon of water at a time until it comes together. If it feels too wet, add a tablespoon of flour at a time.
- Prevent a Soggy Crust: Ensure the crust is completely cooled before adding the filling. A warm crust can cause the filling to seep through and make it soggy. You can also brush the cooled crust with a thin layer of melted white chocolate to create a moisture barrier.
- Gelatin Troubleshooting: If your gelatin doesn’t dissolve completely, gently warm the mixture over low heat, stirring constantly, until it dissolves. Be careful not to boil it, as this can weaken its setting power.
- Make Ahead: The crust can be baked a day ahead and stored in an airtight container at room temperature. The filling can also be made a few hours in advance and chilled, but wait to add the peaches until just before assembling the pie to prevent them from becoming discolored.
Serving & Storage Suggestions
Serve this fresh peach pie chilled, straight from the refrigerator. It’s delicious on its own, but a dollop of whipped cream or a scoop of vanilla ice cream elevates it to another level. Store any leftover pie in the refrigerator, covered, for up to 3 days. The crust may soften slightly over time, but the flavor will remain delicious. Freezing is not recommended, as the filling can become watery upon thawing.
Nutritional Information
| Nutrient | Amount per Serving | % Daily Value |
|---|---|---|
| Calories | 385 kcal | 19% |
| Total Fat | 14g | 22% |
| Saturated Fat | 2g | 10% |
| Cholesterol | 1mg | 0% |
| Sodium | 199mg | 9% |
| Total Carbohydrate | 62g | 21% |
| Dietary Fiber | 2g | 7% |
| Sugars | 41g | 82% |
| Protein | 4g | 8% |
Note: Nutritional information is an estimate and may vary based on specific ingredients and serving sizes.
Variations & Substitutions
- Gluten-Free Crust: Use a gluten-free all-purpose flour blend to make a gluten-free crust. You may need to add a bit more liquid to get the dough to come together.
- Different Fruit: Feel free to substitute other fruits for the peaches, such as nectarines, plums, or berries. Adjust the gelatin flavor accordingly (e.g., strawberry gelatin for strawberries).
- Healthier Sweetener: Replace some or all of the sugar with a natural sweetener like honey or maple syrup. Keep in mind that this may slightly alter the flavor and texture of the filling.
- Dairy-Free: To make this pie dairy-free, use a non-dairy milk alternative such as almond milk or soy milk in the crust. Ensure your whipped topping is also dairy-free if serving with whipped cream.
- Spiced Peach Pie: Add a pinch of cinnamon, nutmeg, or ginger to the filling for a warm, spiced flavor.
FAQs (Frequently Asked Questions)
Q: Can I use frozen peaches?
A: Yes, you can use frozen peaches. Thaw them completely and drain off any excess liquid before using. Pat them dry with paper towels to prevent a watery filling.
Q: Can I use a store-bought pie crust?
A: Absolutely! If you’re short on time, a store-bought pie crust is a perfectly acceptable substitute. Just make sure to prick the bottom and bake it according to the package directions.
Q: How do I prevent the crust from browning too quickly?
A: If the crust starts to brown too quickly, you can tent it with aluminum foil during the last few minutes of baking.
Q: Can I add a crumb topping to this pie?
A: While this recipe doesn’t traditionally include a crumb topping, you can certainly add one if you like. Sprinkle it over the peaches before pouring on the filling.
Q: Why is my filling not setting?
A: Ensure you are using the correct amount of gelatin and that it is fully dissolved. Also, make sure the pie chills for the recommended amount of time (at least 2 hours) to allow the filling to set completely.
Final Thoughts
This no-bake fresh peach pie is more than just a dessert; it’s a taste of summer, a reminder of simpler times, and a celebration of fresh, seasonal ingredients. I urge you to try this recipe and experience the joy of creating something delicious and memorable. Don’t be afraid to put your own twist on it with different fruits, spices, or toppings. Share your creations and feedback – I’d love to hear how it turns out! And for a truly delightful experience, pair this pie with a refreshing glass of iced tea or a crisp white wine. Enjoy!