
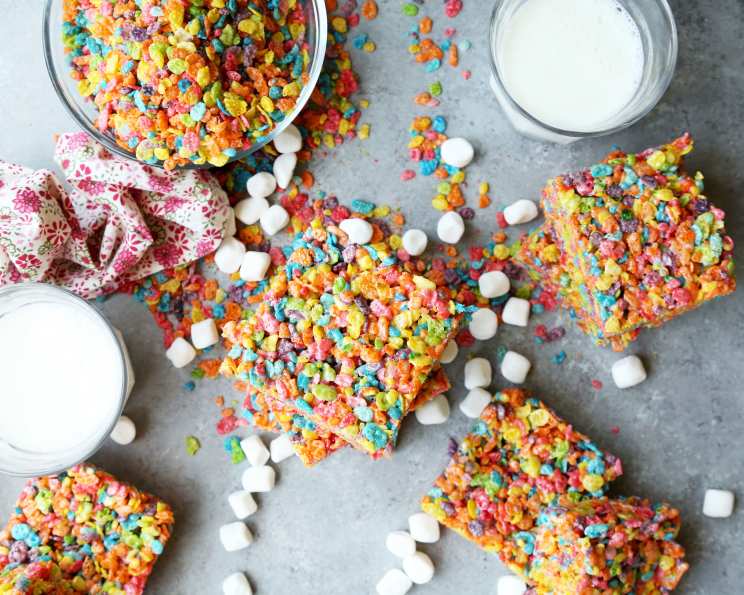
Fruity Pebbles Treats: A Symphony of Nostalgia and Sweetness
The school bake sale. The ultimate proving ground for any young aspiring chef (or, you know, anyone who just really loved sweets). I remember the pressure, the ambition, and the sheer joy of seeing my creations devoured by hungry classmates. And there, amidst the chocolate chip cookies and frosted cupcakes, were always the Fruity Pebbles Treats. Their vibrant colors and unmistakable sugary aroma were irresistible, a guaranteed sell-out every time. They weren’t just a treat; they were a symbol of pure, unadulterated childhood happiness. Even now, just the smell of melting marshmallows instantly transports me back to those days.
Recipe Overview
- Prep Time: 5 minutes
- Cook Time: 5 minutes
- Total Time: 10 minutes
- Servings: 12
- Yield: 1 pan
- Dietary Type: Vegetarian (depending on margarine/butter used)
Ingredients
- 3 tablespoons margarine or butter
- 1 (10 ounce) package regular marshmallows or 4 cups mini marshmallows
- 6 cups Fruity Pebbles cereal
Equipment Needed
- Large saucepan
- 13 x 9 x 2-inch pan
- Cooking spray
- Buttered spatula or waxed paper
Instructions
-
Melt margarine or butter in a large saucepan over low heat. It’s crucial to use low heat to prevent the butter from burning and developing a bitter taste. Patience is key here – a slow melt ensures even incorporation with the marshmallows later.
-
Add the marshmallows and stir constantly until they are completely melted. Continue stirring until the mixture is smooth and creamy. This usually takes about 3-5 minutes. Don’t let the marshmallows burn. Make sure the heat is low and you are stirring constantly to prevent burning.
-
Remove the saucepan from the heat.
-
Add the Fruity Pebbles cereal to the melted marshmallow mixture.
-
Stir until the Fruity Pebbles are thoroughly and evenly coated with the marshmallow mixture. Ensure that every single pebble is glistening with that sweet, sticky goodness. No dry spots allowed!
-
Coat a 13 x 9 x 2-inch pan with cooking spray. This prevents the treats from sticking to the pan and makes them easier to remove later.
-
Using a buttered spatula or a piece of waxed paper, press the mixture evenly into the prepared pan. The buttered spatula or waxed paper will prevent the mixture from sticking to your hands and help you create a smooth, uniform surface. Pack the mixture firmly but gently.
-
Allow the treats to cool completely before cutting them into 2-inch squares. Cooling allows the marshmallow mixture to set properly, making it easier to cut neat squares.
-
For the best taste and texture, serve the Fruity Pebbles Treats on the same day they are made. They tend to get slightly stale if stored for too long.
Microwave Directions:
-
In a large microwave safe bowl, heat margarine or butter and marshmallows at HIGH for 3 minutes, stirring after 2 minutes. Be cautious, as the mixture will be very hot.
-
Stir until smooth.
-
Follow steps 4, 5, 6, and 7 above.
Expert Tips & Tricks
- Freshness is Key: Use fresh marshmallows for the best results. Stale marshmallows tend to be drier and don’t melt as smoothly.
- Low and Slow: Melting the marshmallows over low heat is crucial for a smooth, even consistency. Avoid high heat, which can cause them to burn and become hard.
- Buttered Utensils: Always use a buttered spatula or waxed paper when pressing the mixture into the pan. This prevents sticking and helps you achieve a smooth, even surface.
- Don’t Overmix: Once the Fruity Pebbles are added, stir just until they are coated. Overmixing can make the treats tough.
- Customize the Flavor: Add a pinch of salt to the melted marshmallow mixture to enhance the sweetness and balance the flavors.
Serving & Storage Suggestions
Fruity Pebbles Treats are best served at room temperature, allowing their chewy texture and vibrant colors to shine. They can be served as a snack, a dessert, or even as a fun addition to a party platter.
To store leftover treats, wrap them individually in plastic wrap or place them in an airtight container. They will stay fresh at room temperature for up to 2 days. After that, they may become slightly stale. Freezing is not recommended, as it can alter the texture of the marshmallows.
Nutritional Information
| Nutrient | Amount per Serving | % Daily Value |
|---|---|---|
| Calories | 101.1 kcal | N/A |
| Calories from Fat | 26 kcal | N/A |
| Total Fat | 2.9 g | 4% |
| Saturated Fat | 0.6 g | 3% |
| Cholesterol | 0 mg | 0% |
| Sodium | 52.3 mg | 2% |
| Total Carbohydrate | 19.4 g | 6% |
| Dietary Fiber | 0 g | 0% |
| Sugars | 13.7 g | 54% |
| Protein | 0.5 g | 0% |
Note: Nutritional information is an estimate and may vary based on specific ingredients and preparation methods.
Variations & Substitutions
- Vegan Fruity Pebbles Treats: Use vegan marshmallows and margarine to create a completely plant-based version of this classic treat.
- Gluten-Free Fruity Pebbles Treats: Ensure that the Fruity Pebbles cereal you are using is certified gluten-free.
- Chocolate-Dipped Fruity Pebbles Treats: Dip the cooled and cut squares in melted chocolate for an extra indulgent treat.
- Peanut Butter Fruity Pebbles Treats: Add a spoonful of peanut butter to the melted marshmallow mixture for a nutty twist.
- Sprinkles: Add sprinkles for extra fun!
FAQs (Frequently Asked Questions)
Q: Can I use a different type of cereal?
A: While this recipe is specifically for Fruity Pebbles, you can experiment with other cereals like Rice Krispies or Cocoa Pebbles. The texture and flavor will be different, but still delicious.
Q: How do I prevent the treats from being too hard?
A: Avoid overcooking the marshmallows and don’t pack the mixture too tightly into the pan. Gentle pressure is all you need.
Q: Can I make these ahead of time?
A: Yes, you can make them a day ahead of time. Store them in an airtight container at room temperature to maintain their freshness.
Q: My marshmallows are sticking to the pan. What should I do?
A: Make sure to grease the pan thoroughly with cooking spray before adding the marshmallow mixture. This will prevent sticking.
Q: What if I don’t have a 13 x 9 x 2-inch pan?
A: You can use a different size pan, but the thickness of the treats will vary accordingly. Adjust the baking time if needed.
Final Thoughts
So there you have it: a simple, yet profoundly satisfying recipe for Fruity Pebbles Treats that is sure to bring back a flood of happy memories, and create new ones as well! Whether you’re making them for a bake sale, a party, or simply a quiet afternoon treat, these colorful squares are guaranteed to be a crowd-pleaser. Don’t be afraid to experiment with variations, add your own creative touches, and most importantly, have fun in the kitchen! I encourage you to try this recipe and share your feedback. Happy baking!