
The Dainty Delight of Gem Scones
The memory is etched in my mind: my grandmother’s kitchen, filled with the warm, yeasty aroma of baking bread and the clatter of her well-loved cast iron gem irons. These weren’t just any scones; they were petite, perfectly formed little morsels, each one a miniature work of art. Dipped in clotted cream and homemade jam, they were the highlight of every visit, a sweet and comforting reminder of her love. While those original gem irons are harder to come by these days, the spirit of those delicate, golden scones lives on, just as delicious when baked in modern tins.
Recipe Overview
- Prep Time: 15 minutes
- Cook Time: 12-15 minutes
- Total Time: 27-30 minutes
- Servings: 24
- Yield: 24 scones
- Dietary Type: Vegetarian
Ingredients
- 90g butter, softened
- 4 tablespoons sugar
- 2 eggs
- 2 cups self-raising flour, sifted
- 1/4 teaspoon salt
- 1 cup milk
Equipment Needed
- Electric Mixer
- Baking Tray
- ½ Round Patty Pan Tins OR Gem Irons (if available)
Instructions
-
Preheat your oven to 200 degrees Celsius (390 degrees Fahrenheit). The success of these scones relies on a hot start, so give the oven ample time to reach temperature.
-
Place your ½ round patty pan tins (or gem irons, if you’re lucky enough to have them!) on a baking tray. It’s crucial to heat the tins until they are VERY HOT before you even start making the batter. This helps the scones rise properly and prevents them from sticking.
-
Using an electric mixer, cream together the softened butter and sugar until the mixture is light and fluffy. This process is essential for incorporating air, which will contribute to the scones’ airy texture. Scrape down the sides of the bowl occasionally to ensure everything is evenly combined.
-
Add the eggs one at a time, beating well after each addition. This prevents the mixture from curdling. If the mixture does happen to curdle slightly, don’t panic! Just add a spoonful of the flour and continue beating.
-
Gently fold in half of the sifted self-raising flour and salt. Sifting is important to remove any lumps and to ensure the flour is evenly distributed.
-
Pour in the milk and mix until just combined. Avoid overmixing at this stage, as it can develop the gluten in the flour, resulting in tough scones.
-
Fold in the remaining flour until just incorporated. The batter should be smooth but not overworked.
-
Remove the heated patty pan tins from the oven, keeping them on the baking tray to retain their heat. Carefully fill each patty pan with the batter. Don’t overfill them, as the scones will rise during baking.
-
Bake for 12-15 minutes, or until the scones are golden brown on top. Keep a close eye on them towards the end of the baking time to prevent burning. A toothpick inserted into the center of a scone should come out clean.
-
Once baked, remove the scones from the oven and let them cool slightly in the tins before transferring them to a wire rack to cool completely.
-
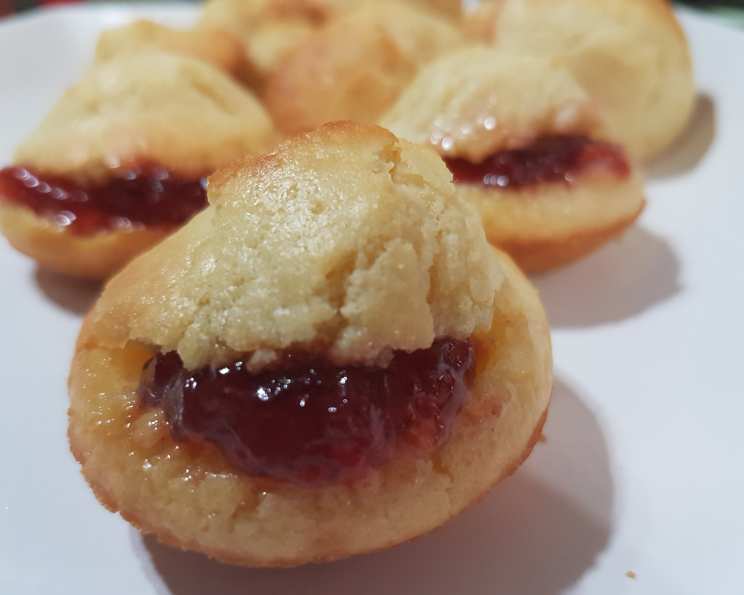
Serve warm with your favorite toppings. I personally love serving some with butter and jam, and others with tangy lemon curd.
Expert Tips & Tricks
- Hot Tins are Key: Seriously, don’t skip the step of heating the tins properly. It’s the secret to those perfectly domed gem scones.
- Gentle Mixing: Overmixing is the enemy of tender scones. Fold the ingredients together just until combined.
- Room Temperature Matters: Make sure your butter is softened, but not melted. This will ensure it creams properly with the sugar. Using room temperature eggs also helps create a smoother batter.
- Sift the Flour: Sifting the flour helps to aerate it and remove any lumps, resulting in a lighter scone.
- Don’t Open the Oven Too Soon: Avoid opening the oven door during the first 10 minutes of baking, as this can cause the scones to deflate.
- Make Ahead Tip: You can prepare the batter ahead of time and store it in the refrigerator for up to 24 hours. However, it’s best to bake the scones fresh for the best texture.
- Rescue Curdled Batter: If your batter curdles after adding the eggs, try adding a spoonful of the flour and continue beating until smooth.
Serving & Storage Suggestions
Gem scones are best served warm, fresh from the oven. They’re delicious on their own, but even better with a dollop of clotted cream, jam, or lemon curd. They also pair well with a cup of tea or coffee.
Leftover scones can be stored in an airtight container at room temperature for up to 2 days. To reheat, wrap them in foil and warm them in a preheated oven at 180 degrees Celsius (350 degrees Fahrenheit) for 5-10 minutes. You can also reheat them briefly in the microwave, but be careful not to overdo it, as they can become tough.
For longer storage, you can freeze the baked scones. Wrap them individually in plastic wrap and then place them in a freezer bag. They can be stored in the freezer for up to 2 months. To thaw, remove them from the freezer and let them thaw at room temperature for a few hours before reheating.
Nutritional Information
Note: Nutritional information is an estimate and may vary depending on specific ingredients and serving sizes.
| Nutrient | Amount per Serving | % Daily Value |
|---|---|---|
| Calories | 85 kcal | 4% |
| Total Fat | 3.9g | 5% |
| Saturated Fat | 2.3g | 12% |
| Cholesterol | 25mg | 8% |
| Sodium | 62mg | 3% |
| Total Carbohydrate | 10.6g | 4% |
| Dietary Fiber | 0.3g | 1% |
| Sugars | 2.1g | – |
| Protein | 2g | 4% |
Variations & Substitutions
- Lemon & Poppy Seed: Add the zest of one lemon and 1 tablespoon of poppy seeds to the batter for a zesty twist.
- Cheddar & Chive: Omit the sugar and add ½ cup of grated cheddar cheese and 2 tablespoons of chopped chives to the batter for a savory scone.
- Gluten-Free: Substitute the self-raising flour with a gluten-free self-raising flour blend. You may need to add a little extra milk to achieve the correct consistency.
- Dairy-Free: Use a dairy-free butter alternative and a plant-based milk alternative such as almond milk or soy milk.
- Spiced Scones: Add ½ teaspoon of mixed spice or cinnamon to the batter for a warm, comforting flavor.
- Dried Fruit Scones: Add ¼ cup of dried cranberries, raisins, or currants to the batter for a chewy texture and burst of sweetness.
FAQs (Frequently Asked Questions)
Q: Why are my scones not rising properly?
A: The most common reason for scones not rising is that the tins were not hot enough. Make sure to preheat them thoroughly before adding the batter.
Q: Can I use all-purpose flour instead of self-raising flour?
A: Yes, but you’ll need to add a leavening agent. For every cup of all-purpose flour, add 2 teaspoons of baking powder.
Q: How do I prevent my scones from becoming tough?
A: Avoid overmixing the batter. Mix the ingredients together just until combined.
Q: Can I freeze the scone batter?
A: While you can freeze the batter, the texture may be slightly different after thawing. It’s best to bake the scones fresh for the best results.
Q: What’s the best way to reheat scones?
A: Wrap them in foil and warm them in a preheated oven at 180 degrees Celsius (350 degrees Fahrenheit) for 5-10 minutes.
Final Thoughts
These gem scones are more than just a recipe; they’re a connection to the past, a reminder of simpler times, and a delicious way to share love with family and friends. So, gather your ingredients, preheat your oven, and prepare to be transported to a world of dainty delights. I hope this recipe brings you as much joy as it has brought me. And don’t hesitate to experiment with different flavors and toppings to create your own unique version of this classic treat. Be sure to share your creations and experiences – I’d love to hear how they turn out! Perhaps with a pot of Earl Grey?