
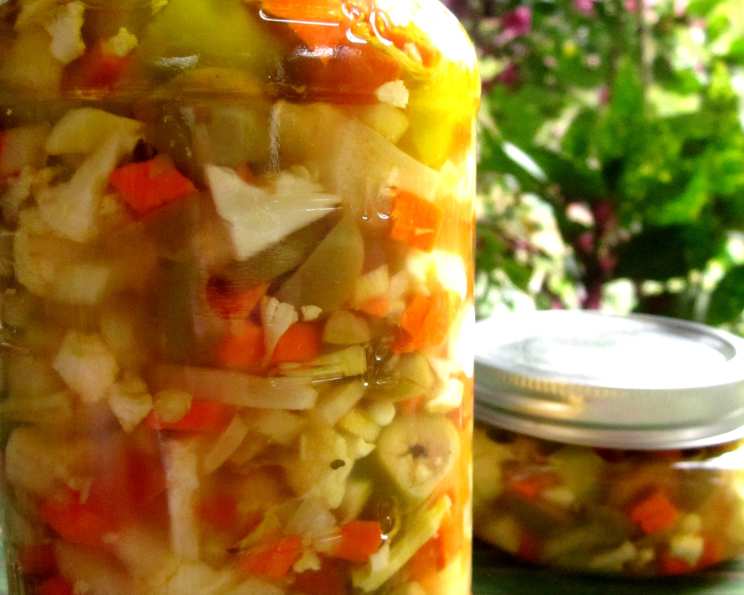
Giardiniera: A Crunchy, Tangy Italian Delight
The first time I tasted giardiniera, I was standing in a bustling Chicago deli, the air thick with the aroma of cured meats and freshly baked bread. I was there for a classic Italian beef sandwich, dripping with gravy, but it was the vibrant, crunchy giardiniera that truly stole the show. The bright acidity cut through the richness of the beef, while the medley of vegetables offered a satisfying burst of texture and flavor. It was a revelation – a simple condiment elevated to culinary stardom. That experience sparked a lifelong love affair with giardiniera, and I’ve been experimenting with different variations ever since.
Recipe Overview
- Prep Time: 20 minutes
- Cook Time: 10 minutes
- Total Time: 48 hours 30 minutes (includes resting time)
- Yields: Approximately 1 quart
- Dietary Type: Vegan, Gluten-Free
Ingredients
- 1 1/2 cups cauliflower florets
- 1 small carrot, chopped into 1/8-inch pieces
- 1/2 small onion, chopped into 1/8-inch pieces
- 2 garlic cloves, smashed
- 2 celery ribs, chopped into 1/2-inch pieces
- 1/2 cup pimento-stuffed green olives, roughly chopped
- 1/4 cup pepperoncini peppers
- 1 cup white vinegar
- 1/4 cup olive oil
- 2 tablespoons salt
- 2 tablespoons sugar (can reduce to 1 tablespoon for less sweetness)
- 1/8 teaspoon red pepper flakes (can substitute 1 fresh chopped hot pepper)
- 1/8 teaspoon oregano
- 1 bay leaf
- 5 teaspoons black peppercorns
Equipment Needed
- Medium saucepan
- 1-quart container or jar
- Strainer
Instructions
-
Begin by toasting the bay leaf and peppercorns. This step intensifies their aroma and flavor. You can do this in a dry pan over medium heat for a minute or two, until fragrant. Watch carefully so they don’t burn.
-
In a medium saucepan, combine the white vinegar, olive oil, salt, sugar, red pepper flakes, and oregano. Bring the mixture to a simmer over medium heat. Stir until the salt and sugar are dissolved.
-
Add the toasted bay leaf and peppercorns to the simmering liquid.
-
Steep the spices in the vinegar mixture for 5 minutes. This allows the flavors to meld and infuse the liquid.
-
Strain the mixture using a fine-mesh strainer to remove the bay leaves and peppercorns. Reserve the strained liquid. This is your pickling brine.
-
Place the cauliflower florets, chopped carrot, chopped onion, smashed garlic cloves, chopped celery ribs, chopped pimento-stuffed green olives, and pepperoncini peppers in a clean 1-quart container or jar.
-
Pour the reserved strained liquid over the vegetables, ensuring they are completely submerged. If necessary, you can add a little more white vinegar to cover them.
-
Let the giardiniera sit in the refrigerator for at least two days before using. This allows the vegetables to pickle properly and develop their signature tangy flavor. The longer it sits, the more the flavors will meld together.
Expert Tips & Tricks
- Vegetable Prep: Consistent chopping is key for even pickling. Aim for roughly the same size pieces for each vegetable.
- Brine Adjustment: Taste the brine before pouring it over the vegetables. Adjust the sugar and salt to your preference. Some like a sweeter giardiniera, while others prefer a more acidic bite.
- Sterilize Your Jar: To ensure a longer shelf life, sterilize your jar and lid before filling. You can do this by boiling them in water for 10 minutes.
- Packing the Jar: Pack the vegetables tightly into the jar to minimize air pockets. This helps to prevent spoilage.
- Spice It Up: For extra heat, add a pinch more red pepper flakes or a finely chopped jalapeño pepper to the mix.
Serving & Storage Suggestions
Giardiniera is incredibly versatile. Serve it as an antipasto with cured meats and cheeses, as a topping for sandwiches (especially Italian beef or muffuletta), or as a side dish with grilled meats or vegetables. It’s also a fantastic addition to salads or pasta dishes.
Store giardiniera in an airtight container in the refrigerator. It will keep for several weeks, and the flavor will continue to develop over time. It’s best not to freeze it, as the texture of the vegetables may become mushy.
Nutritional Information
Here’s an estimated nutritional breakdown per serving. Keep in mind this can vary based on specific ingredient quantities and brands.
| Nutrient | Amount per Serving | % Daily Value |
|---|---|---|
| Calories | 150 kcal | 8% |
| Total Fat | 12g | 15% |
| Saturated Fat | 2g | 10% |
| Cholesterol | 0mg | 0% |
| Sodium | 1200mg | 50% |
| Total Carbohydrate | 8g | 3% |
| Dietary Fiber | 2g | 8% |
| Sugars | 4g | – |
| Protein | 1g | 2% |
Variations & Substitutions
- Spicy Giardiniera: Add more red pepper flakes or a chopped serrano pepper for extra heat.
- Sweet Giardiniera: Increase the sugar to 3 or even 4 tablespoons for a sweeter profile.
- Low-Sodium Giardiniera: Use a low-sodium salt or reduce the amount of salt in the brine.
- Vegetable Variations: Experiment with other vegetables, such as green beans, bell peppers, or mushrooms.
- Vinegar Variations: Try using apple cider vinegar for a slightly different flavor profile.
FAQs (Frequently Asked Questions)
Q: How long does giardiniera last in the refrigerator?
A: When stored properly in an airtight container, giardiniera can last for several weeks in the refrigerator. The flavor will actually improve over time as the vegetables continue to pickle.
Q: Can I use different types of vinegar?
A: Yes, you can experiment with different vinegars such as apple cider vinegar or red wine vinegar, but white vinegar provides the most neutral flavor base.
Q: Can I add other vegetables to the giardiniera?
A: Absolutely! Feel free to add other vegetables like green beans, bell peppers, or pearl onions to customize your giardiniera.
Q: Do I have to use sugar?
A: No, you can omit the sugar entirely if you prefer a less sweet giardiniera. However, a little sugar helps to balance the acidity of the vinegar.
Q: My giardiniera is too sour. What can I do?
A: Add a little more sugar to the brine to balance the acidity. You can also add a small amount of water to dilute the vinegar.
Final Thoughts
Making your own giardiniera is a rewarding experience that allows you to customize the flavors to your liking. Don’t be afraid to experiment with different vegetables, spices, and levels of sweetness and heat. Once you’ve mastered the basics, the possibilities are endless. So, gather your ingredients, get pickling, and prepare to enjoy a vibrant, tangy condiment that will elevate your meals to a whole new level. Share your creations and flavor combinations – I’d love to hear about them! This giardiniera pairs perfectly with a hearty Italian sandwich or alongside a charcuterie board. Enjoy!