
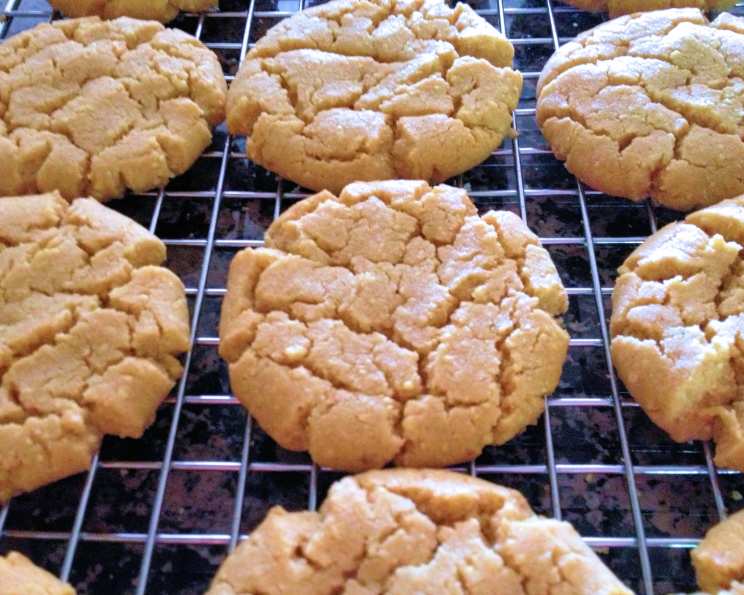
Grandma’s Melt-in-Your-Mouth Peanut Butter Cookies
The scent of peanut butter cookies baking is more than just a fragrance; it’s a time machine. One whiff, and I’m instantly transported back to Grandma’s kitchen, a warm and inviting space filled with the rhythmic clatter of her KitchenAid and the comforting aroma of childhood. Grandma’s peanut butter cookies weren’t just cookies; they were edible hugs, each bite a sweet reminder of her love and unwavering presence. I’ve tried countless other recipes over the years, but none quite capture the magic of hers – a testament to the simple perfection she achieved.
Recipe Overview
- Prep Time: 15 minutes
- Cook Time: 10-12 minutes
- Total Time: Approximately 27 minutes (including 15-minute dough rest)
- Yields: 3-4 dozen cookies
- Serves: Approximately 20
- Dietary Type: Not suitable for Gluten-Free, Dairy-Free, or Vegan diets
Ingredients
- 1 cup softened butter
- 1 cup creamy peanut butter
- 1 cup sugar
- 1 cup brown sugar
- 2 large eggs
- 1 cup Carnation powdered milk
- 2 1/2 cups flour
- 1 teaspoon baking powder
- 1 1/2 teaspoons baking soda
- 1/2 teaspoon salt
Equipment Needed
- Large mixing bowl
- Electric mixer (optional, but recommended)
- Measuring cups and spoons
- Sifter (optional, but recommended)
- Baking sheets
- Fork
- Cooling rack
Instructions
- Begin by creaming together the softened butter and creamy peanut butter in a large mixing bowl. It’s crucial that the butter is properly softened, but not melted. This ensures a smooth and even texture in your final cookie.
- Gradually add the sugar and brown sugar to the butter-peanut butter mixture. Mix well until the mixture is light and fluffy. This step is important for incorporating air into the dough, which contributes to the cookies’ light texture.
- Add the eggs one at a time, mixing thoroughly after each addition. Make sure the eggs are fully incorporated into the batter for a consistent emulsion.
- In a separate bowl, sift together the powdered milk, flour, baking powder, baking soda, and salt. Sifting is recommended to remove any lumps and ensure even distribution of the dry ingredients. If you don’t have a sifter, whisk the dry ingredients together vigorously.
- Gradually stir the dry ingredients into the wet ingredients until just combined. Be careful not to overmix the dough, as this can develop the gluten in the flour and result in tough cookies.
- Let the dough stand for 15 minutes. This allows the flour to fully absorb the moisture and helps to prevent the cookies from spreading too much during baking.
- While the dough is resting, preheat your oven to 375 degrees Fahrenheit (190 degrees Celsius). Lightly grease your baking sheets.
- Roll the dough into balls about the size of a walnut. Place the dough balls on the prepared baking sheets, leaving some space between each cookie.
- Flatten each cookie with a fork, dipped in flour, in a criss-cross fashion. The flour prevents the fork from sticking to the dough. The criss-cross pattern not only looks appealing but also helps the cookies bake evenly.
- Bake at 375 degrees Fahrenheit (190 degrees Celsius) for 10-12 minutes.
- Watch closely and remove the cookies from the oven when the tops just start to brown. Overbaking will result in dry, hard cookies.
- Allow the cookies to cool on the baking sheet for about 5 minutes before transferring them to a cooling rack to cool completely. This prevents them from breaking apart while still warm.
Expert Tips & Tricks
- Soften the butter properly: Don’t microwave the butter to soften it, as this can melt it and change the texture of the cookies. Instead, leave the butter at room temperature for about an hour, or until it is soft enough to easily press with your finger.
- Use a cookie scoop: For perfectly uniform cookies, use a cookie scoop to portion the dough. This will also ensure even baking.
- Don’t overbake: The cookies are done when the edges are lightly golden and the tops are just beginning to brown. They will continue to firm up as they cool.
- For chewier cookies: Slightly underbake the cookies.
- For crisper cookies: Bake the cookies for a minute or two longer.
- Freeze the dough: You can freeze the cookie dough for up to 2 months. Simply roll the dough into balls, place them on a baking sheet, and freeze until solid. Then, transfer the frozen dough balls to a freezer bag. When ready to bake, simply bake the cookies as directed, adding a few minutes to the baking time.
- Add-ins: Feel free to add chocolate chips, chopped nuts, or sprinkles to the dough for extra flavor and texture.
Serving & Storage Suggestions
Grandma’s peanut butter cookies are best served slightly warm with a glass of cold milk, a cup of coffee, or even a scoop of vanilla ice cream. They make a wonderful afternoon snack, a delightful dessert, or a thoughtful homemade gift.
To store, keep the cookies in an airtight container at room temperature. They will stay fresh for about 3-4 days. For longer storage, you can freeze the cookies for up to 2 months. Thaw them at room temperature before serving. You can also briefly warm the cookies in the microwave before serving to restore their soft, melt-in-your-mouth texture.
Nutritional Information
(Estimated per cookie, based on a yield of 4 dozen)
| Nutrient | Amount per Serving | % Daily Value |
|---|---|---|
| Calories | 111 kcal | 6% |
| Total Fat | 6.4g | 8% |
| Saturated Fat | 2.8g | 14% |
| Cholesterol | 16.4mg | 5% |
| Sodium | 115.1mg | 5% |
| Total Carbohydrate | 12.6g | 4% |
| Dietary Fiber | 0.4g | 1% |
| Sugars | 8.1g | N/A |
| Protein | 2.4g | 5% |
Variations & Substitutions
- Peanut Butter Variety: Experiment with different types of peanut butter, such as crunchy or natural peanut butter, for variations in texture and flavor.
- Sweeteners: Try substituting honey or maple syrup for some of the sugar for a slightly different flavor profile.
- Spice it Up: Add a pinch of cinnamon, nutmeg, or cloves to the dough for a warm, spiced flavor.
- Chocolate Peanut Butter: Add 1/2 cup of cocoa powder to the dry ingredients for a chocolate peanut butter version.
- Gluten-Free Option: While not a direct substitution, almond flour can be used as a gluten-free base. You may need to adjust other ingredients to achieve the right consistency. Note that this will alter the original flavor significantly.
FAQs (Frequently Asked Questions)
Q: Why is my peanut butter cookie dough crumbly?
A: This is likely due to insufficient moisture. Ensure your butter is properly softened and not melted. You can also add a tablespoon of milk or water to the dough to help bind it together.
Q: My cookies spread too thin while baking. What went wrong?
A: This can happen if your butter is too soft or melted, or if the oven temperature is not accurate. Ensure your butter is softened but not melted, and verify your oven temperature with an oven thermometer. Letting the dough rest is critical as well.
Q: Can I use natural peanut butter in this recipe?
A: Yes, but be aware that natural peanut butter tends to be oilier. You may need to reduce the amount of butter in the recipe or add a bit more flour to compensate.
Q: How do I keep my cookies soft?
A: Store the cookies in an airtight container with a slice of bread. The bread will help absorb moisture and keep the cookies soft. Don’t overbake them!
Q: Can I make these cookies without powdered milk?
A: Yes, you can omit the powdered milk. However, it contributes to the cookies’ tender texture. If omitting, consider adding an extra tablespoon of flour.
Final Thoughts
Grandma’s peanut butter cookies are more than just a recipe; they’re a legacy of love and warmth. This recipe is designed to bring that same sense of comfort and joy into your own kitchen. So, gather your ingredients, preheat your oven, and let the aroma of freshly baked peanut butter cookies fill your home. Don’t be afraid to make them your own by experimenting with variations and add-ins. And most importantly, share them with loved ones and create memories that will last a lifetime. I encourage you to try this recipe and would love to hear your feedback and variations! Happy baking!